Recent rainfall has left ground conditions sticky across most parts of the country, resulting in more clay travelling up the harvester web to cushion crops.
However, tuber dry matter remains high as a result of the prolonged dry summer growing season, meaning tubers are more susceptible to bruising and dry rots due to harvesting. As always, growers can’t afford to lose any marketable crop because of a poorly set up harvester.
Correct harvester setup and adjustment for the relevant conditions is critical in order to avoid bruising or physical damage. Steven Rogers of Grimme Ireland highlights the key areas where damage is most likely to occur on a typical machine and how such damage can be avoided by taking the time to correctly adjust the machine for the crop and conditions being dealt with.
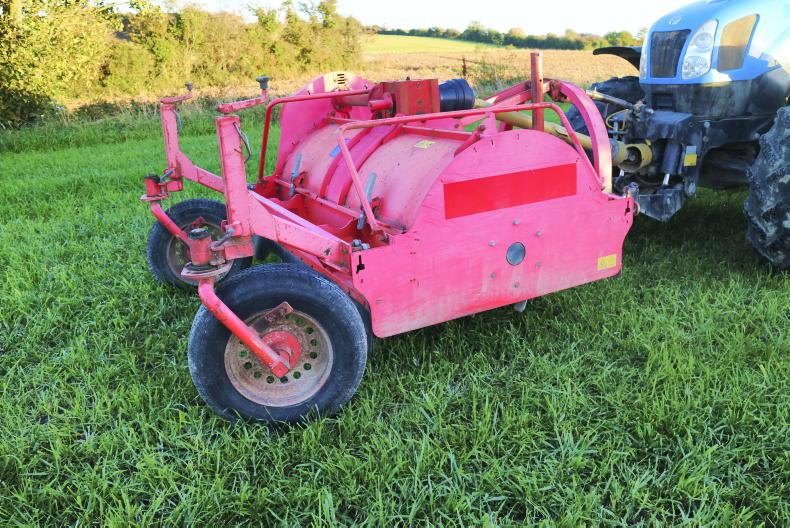
The machine photographed is a Grimme GT170, a common harvester among Irish growers. However, the basic working principles tend to remain similar regardless of make or model.
1 Check samples
Bruising, scuffing or splitting can all happen as a result of rough handling, dropping from a height or unintended rubbing or hitting off the harvester components. As mechanical damage is instant, it will be more obvious, but bruising will naturally take more time to show. Frequently sampling of the crop is important so that adjustments can be made if necessary.
Where possible, place a sample in a warm environment overnight such as a hot press or beside a kitchen stove. This will speed up any signs of bruising.
If bruising is occurring and the source of the problem is proving hard to pinpoint, then it may be worthwhile stopping the harvester mid-drill and collect samples from each of the locations throughout the machine where damage is most likely to occur. These areas include – after haulm topper, the share, the web, haulm separator, as well as the unloading elevator and box/ trailer. Inspect each for mechanical damage and or follow the above process, placing samples in the heat to speed up any possible signs of bruising.
2 Haulm topper and track widths
Being the start of the harvesting process, the haulm topper is the obvious place to begin. From here, follow the various stages of the machine right through from front to back.
Check that the configuration of the topper blades match the shape and depth of the potato drills. If the blades do not match the drills, they could cut into the ridge, damaging the crop. Lifting the topper may prevent this but a poorly flailed haulm may lead to damage at another stage in the harvester. Ensure the blades adequately flail the crop.
Check tractor wheel and tyre widths to ensure ridges are not being squeezed, which may cause damage to the potatoes in the drill.
Check that the configuration of the topper blades match the shape and depth of the potato drills.
3 Share width and height
The share width needs to match the width of the bed to avoid damage and to ensure the crop flows evenly and smoothly on to the web.
Adjust the pitch of the share so that the top of the web is in line with the top of the share blade up to a maximum of 10mm below the top of the web. If set too low, potatoes can hit the web and be damaged. If set too high, damage can also occur as potatoes are dropped while passing from the share on to the web.
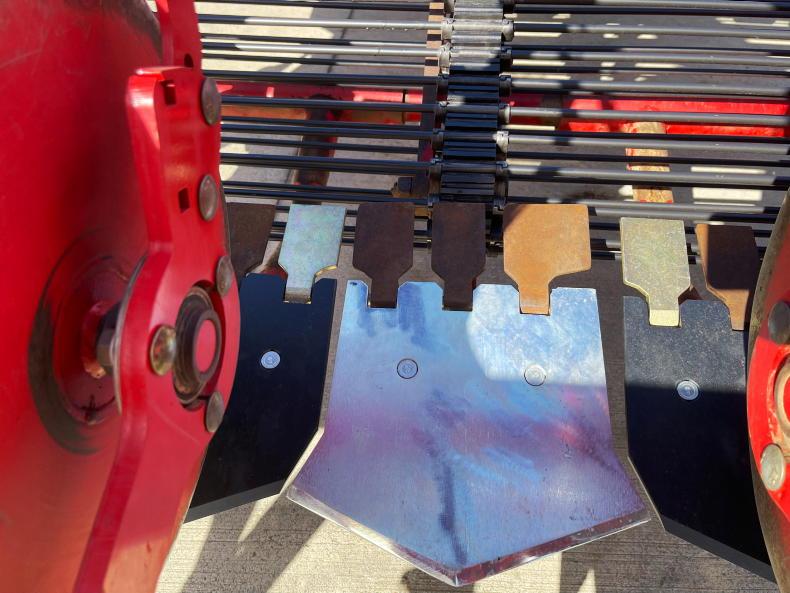
If the share is set too low or too high damage can occur to the crop.
4 Diablo rollers
The position and pressure of the diablo roller or rubber roller affects the flow of soil over the share. This hydraulic adjustment can be made on the fly to suit drill conditions.
Too much pressure can compact the drill and cause the share to run shallow, causing cut or missed potatoes. Too little pressure can lead to soil being pushed, lifting the diablo which in turn changes the height of the share, resulting in an uneven feed on to the web.
Harvester flow can often be improved by moving the diablo forward to give more clearance.
Too much pressure on the Diablo roller can compact the drill and cause the share to run shallow and cut or miss potatoes.
5 Disc settings
Ensure the discs are not set too narrow as they could cut through potatoes in the drill. If these discs are set too wide, this could cause stones or clods to carry on to the web. Disc depth is also important, if set too deep this could make the share run shallow, and also cut into potatoes. Ensure the width between the disc and the outer share is no more than 20mm.
Haulm feed-in rollers prevent wrapping of the haulm around the nose roller of the web.
The gap between the roller and the side panel should be set wider at the rear towards the top to avoid blockages and damage.

It is important that discs are set at the right drill width and to the right depth.
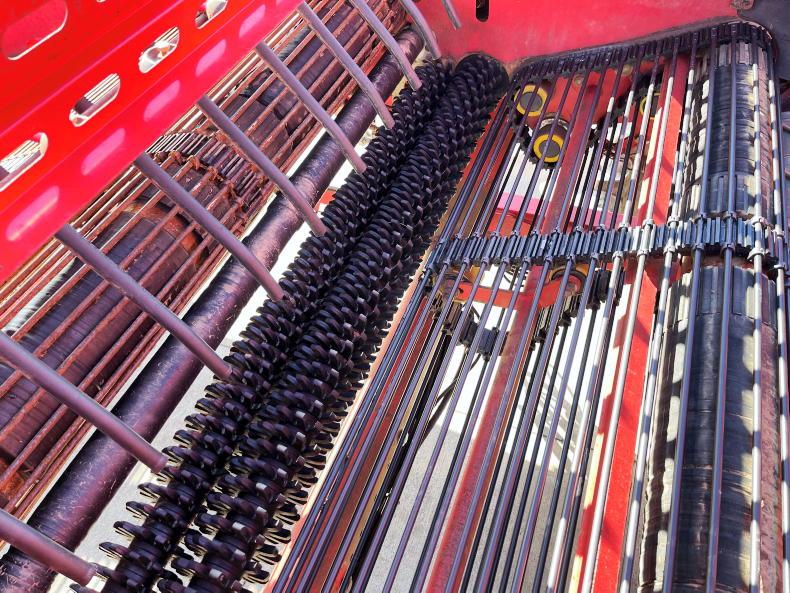
6 Sieve webs and agitation
Decreasing the web speed is one method to help carry more soil on the web in order to prevent potatoes rolling back and being damaged.
Check for worn or bent bars which may also cause potato damage. Ensure the outer belting isn’t worn as potatoes may get trapped between the web and the side panel. Depending on the crop, a web with narrower bar spacings may be needed.
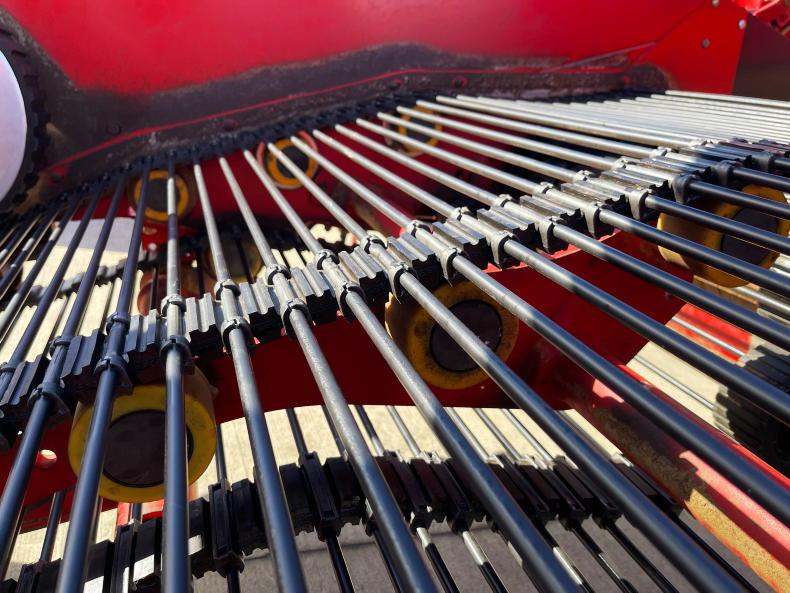
Worn or bent sieve web bars can cause potato damage.
Web agitators, if set too aggressively, can cause potato damage, especially if the crop is easily bruised. The use of agitators is not recommended where conditions are dry. Too much agitation can also sieve soil too quickly and cause the crop to bounce and thus lead to bruising.

If set too aggressively, web agitators can cause severe damage.
7 Haulm separation
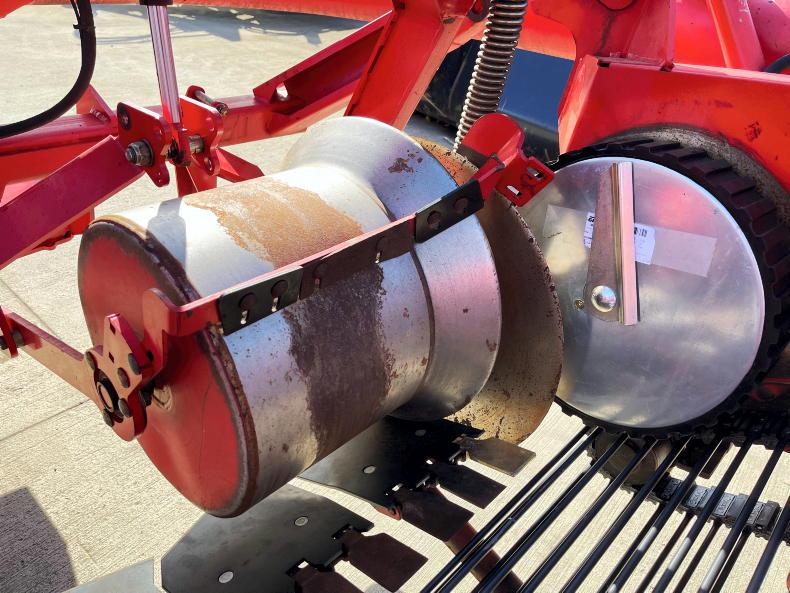
The height and gap of the haulm roller is adjustable and must be set to suit the crop conditions: higher position is more aggressive; larger gap is more aggressive.
The haulm roller should be set in a less aggressive position, with feed fingers (if present) set higher to prevent damage. If haulm separation becomes an issue, raise the haulm roller to increase its aggressiveness and lower the feed fingers. Haulm feed fingers are fitted to both systems and need to be set to the volume of haulm being lifted. When harvesting crop with large volumes of haulm, raise the feed fingers to prevent blockages. Ensure crop is not fed in to the haulm rollers.
Check the condition of the spirals and haulm rollers for sharp edges and wear.
The haulm extraction rollers should be set to a less aggressive position to avoid bruising.
8 Cleaning units
Different cleaning units tend to comprise different types of separators but, as a rule of thumb, crop should be over the separators for the least amount of time possible. Separator speed should be set to keep the crop flowing through the machine and may need to be increased for dry conditions.
If the separators are set too slow, crop may build up in the machine. If they are set too fast, crop may bounce over the separators, causing damage. Check the angle of the separator – too shallow can also cause damage.
Check the condition of all rollers and ensure rollers/spirals are suited to the relevant crop and conditions.
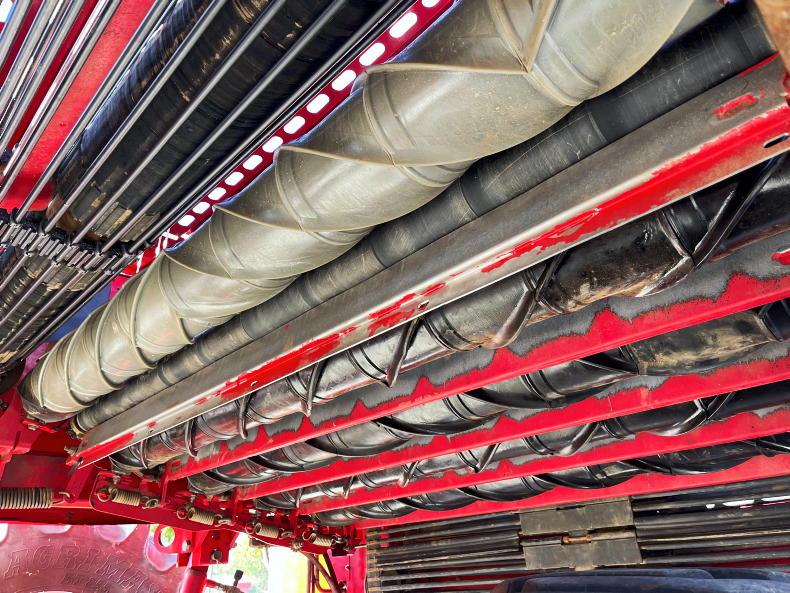
Aside from roller condition, ensure that roller/spirals are suited to the crop and conditions.
9 Picking table and elevator
The crop should move on to the transfer webs at the same speed that it leaves the separator. Minimise the drop into the elevator to reduce any bruising. Many picking tables use plastic-coated bars to minimise crop damage.
Elevator speed can also be a cause of damage or bruising. If the elevator speed is too high, this will throw potatoes into the trailer/box, causing significant damage. The pockets of the cart elevator should ideally be around two-thirds full and the speed should be as slow as possible in order to keep up with crop flow.

Elevator speed should be kept to a minimum to avoid potatoes being thrown into boxes.
10 Off-loading
Finally, now that the crop has made it this far without damage, take care when filling trailers as damage may occur from the elevator. A box filling chute or fall breaker will control the drop of the crop without dropping the elevator too deep into the trailer or box. However, the closer the elevator is to the trailer bed, the shorter the drop. Control the speed to keep the elevator pockets well filled.
If bulk filling a trailer, layer its bed first from front to back to eliminate movement or damage to the crop.
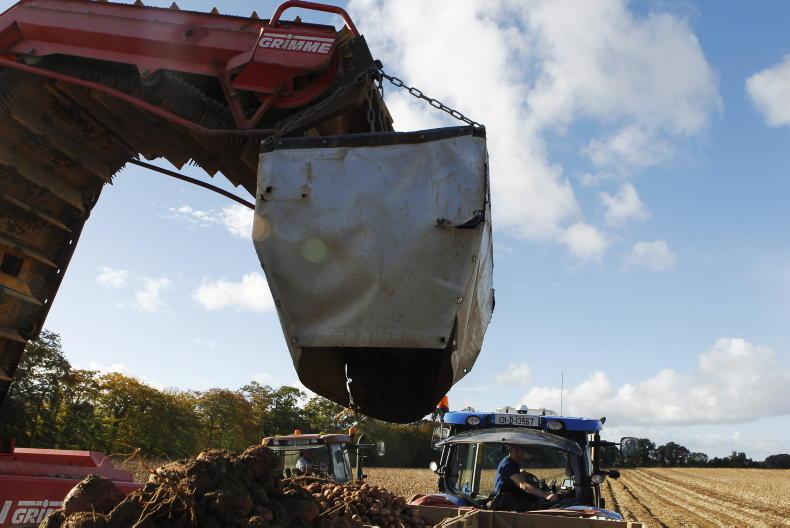
It is good practise to use a fall breaker to reduce crop impact while unloading.
Recent rainfall has left ground conditions sticky across most parts of the country, resulting in more clay travelling up the harvester web to cushion crops.
However, tuber dry matter remains high as a result of the prolonged dry summer growing season, meaning tubers are more susceptible to bruising and dry rots due to harvesting. As always, growers can’t afford to lose any marketable crop because of a poorly set up harvester.
Correct harvester setup and adjustment for the relevant conditions is critical in order to avoid bruising or physical damage. Steven Rogers of Grimme Ireland highlights the key areas where damage is most likely to occur on a typical machine and how such damage can be avoided by taking the time to correctly adjust the machine for the crop and conditions being dealt with.
The machine photographed is a Grimme GT170, a common harvester among Irish growers. However, the basic working principles tend to remain similar regardless of make or model.
1 Check samples
Bruising, scuffing or splitting can all happen as a result of rough handling, dropping from a height or unintended rubbing or hitting off the harvester components. As mechanical damage is instant, it will be more obvious, but bruising will naturally take more time to show. Frequently sampling of the crop is important so that adjustments can be made if necessary.
Where possible, place a sample in a warm environment overnight such as a hot press or beside a kitchen stove. This will speed up any signs of bruising.
If bruising is occurring and the source of the problem is proving hard to pinpoint, then it may be worthwhile stopping the harvester mid-drill and collect samples from each of the locations throughout the machine where damage is most likely to occur. These areas include – after haulm topper, the share, the web, haulm separator, as well as the unloading elevator and box/ trailer. Inspect each for mechanical damage and or follow the above process, placing samples in the heat to speed up any possible signs of bruising.
2 Haulm topper and track widths
Being the start of the harvesting process, the haulm topper is the obvious place to begin. From here, follow the various stages of the machine right through from front to back.
Check that the configuration of the topper blades match the shape and depth of the potato drills. If the blades do not match the drills, they could cut into the ridge, damaging the crop. Lifting the topper may prevent this but a poorly flailed haulm may lead to damage at another stage in the harvester. Ensure the blades adequately flail the crop.
Check tractor wheel and tyre widths to ensure ridges are not being squeezed, which may cause damage to the potatoes in the drill.
Check that the configuration of the topper blades match the shape and depth of the potato drills.
3 Share width and height
The share width needs to match the width of the bed to avoid damage and to ensure the crop flows evenly and smoothly on to the web.
Adjust the pitch of the share so that the top of the web is in line with the top of the share blade up to a maximum of 10mm below the top of the web. If set too low, potatoes can hit the web and be damaged. If set too high, damage can also occur as potatoes are dropped while passing from the share on to the web.
If the share is set too low or too high damage can occur to the crop.
4 Diablo rollers
The position and pressure of the diablo roller or rubber roller affects the flow of soil over the share. This hydraulic adjustment can be made on the fly to suit drill conditions.
Too much pressure can compact the drill and cause the share to run shallow, causing cut or missed potatoes. Too little pressure can lead to soil being pushed, lifting the diablo which in turn changes the height of the share, resulting in an uneven feed on to the web.
Harvester flow can often be improved by moving the diablo forward to give more clearance.
Too much pressure on the Diablo roller can compact the drill and cause the share to run shallow and cut or miss potatoes.
5 Disc settings
Ensure the discs are not set too narrow as they could cut through potatoes in the drill. If these discs are set too wide, this could cause stones or clods to carry on to the web. Disc depth is also important, if set too deep this could make the share run shallow, and also cut into potatoes. Ensure the width between the disc and the outer share is no more than 20mm.
Haulm feed-in rollers prevent wrapping of the haulm around the nose roller of the web.
The gap between the roller and the side panel should be set wider at the rear towards the top to avoid blockages and damage.
It is important that discs are set at the right drill width and to the right depth.
6 Sieve webs and agitation
Decreasing the web speed is one method to help carry more soil on the web in order to prevent potatoes rolling back and being damaged.
Check for worn or bent bars which may also cause potato damage. Ensure the outer belting isn’t worn as potatoes may get trapped between the web and the side panel. Depending on the crop, a web with narrower bar spacings may be needed.
Worn or bent sieve web bars can cause potato damage.
Web agitators, if set too aggressively, can cause potato damage, especially if the crop is easily bruised. The use of agitators is not recommended where conditions are dry. Too much agitation can also sieve soil too quickly and cause the crop to bounce and thus lead to bruising.
If set too aggressively, web agitators can cause severe damage.
7 Haulm separation
The height and gap of the haulm roller is adjustable and must be set to suit the crop conditions: higher position is more aggressive; larger gap is more aggressive.
The haulm roller should be set in a less aggressive position, with feed fingers (if present) set higher to prevent damage. If haulm separation becomes an issue, raise the haulm roller to increase its aggressiveness and lower the feed fingers. Haulm feed fingers are fitted to both systems and need to be set to the volume of haulm being lifted. When harvesting crop with large volumes of haulm, raise the feed fingers to prevent blockages. Ensure crop is not fed in to the haulm rollers.
Check the condition of the spirals and haulm rollers for sharp edges and wear.
The haulm extraction rollers should be set to a less aggressive position to avoid bruising.
8 Cleaning units
Different cleaning units tend to comprise different types of separators but, as a rule of thumb, crop should be over the separators for the least amount of time possible. Separator speed should be set to keep the crop flowing through the machine and may need to be increased for dry conditions.
If the separators are set too slow, crop may build up in the machine. If they are set too fast, crop may bounce over the separators, causing damage. Check the angle of the separator – too shallow can also cause damage.
Check the condition of all rollers and ensure rollers/spirals are suited to the relevant crop and conditions.
Aside from roller condition, ensure that roller/spirals are suited to the crop and conditions.
9 Picking table and elevator
The crop should move on to the transfer webs at the same speed that it leaves the separator. Minimise the drop into the elevator to reduce any bruising. Many picking tables use plastic-coated bars to minimise crop damage.
Elevator speed can also be a cause of damage or bruising. If the elevator speed is too high, this will throw potatoes into the trailer/box, causing significant damage. The pockets of the cart elevator should ideally be around two-thirds full and the speed should be as slow as possible in order to keep up with crop flow.
Elevator speed should be kept to a minimum to avoid potatoes being thrown into boxes.
10 Off-loading
Finally, now that the crop has made it this far without damage, take care when filling trailers as damage may occur from the elevator. A box filling chute or fall breaker will control the drop of the crop without dropping the elevator too deep into the trailer or box. However, the closer the elevator is to the trailer bed, the shorter the drop. Control the speed to keep the elevator pockets well filled.
If bulk filling a trailer, layer its bed first from front to back to eliminate movement or damage to the crop.
It is good practise to use a fall breaker to reduce crop impact while unloading.


 This is a subscriber-only article


SHARING OPTIONS: