Ever fancied making a beautiful homemade quilt, full of your favourite patterns, colours and fabrics, but assumed it would take so long that there was no point starting? Well, in a brand-new book, Quick & Easy Quilts, Lynne Goldsworthy shares a stunning collection of projects that you can run up on your sewing machine in record time: some can even be done in a weekend. And in a four week series, we will be sharing some of Lynne’s most accessible projects.
Kodachrome Quilt
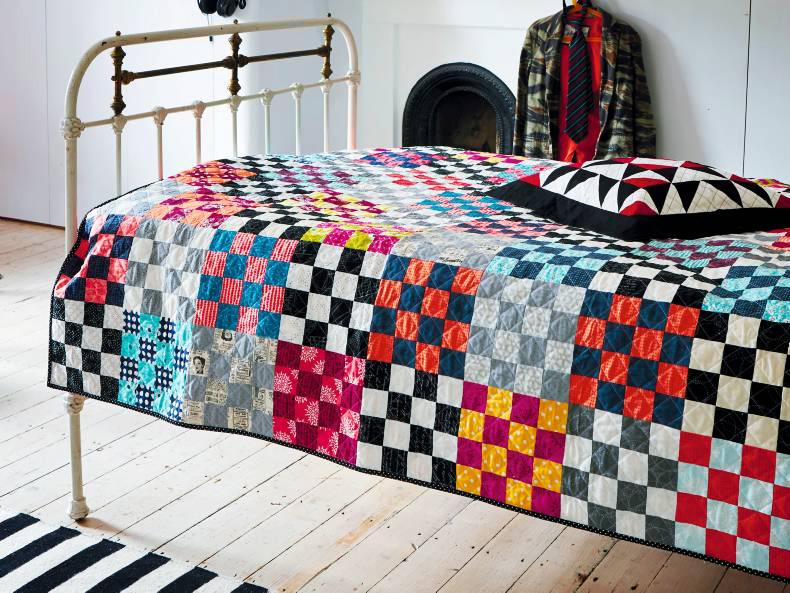
I’ve always loved the contrast between blacks, whites and greys and bright colours. When I started putting this quilt together and creating the coloured and grey-scale blocks, it reminded me of growing up and taking black and white photos, because they were cheaper to develop than colour film – not a problem we have any more. This colourful quilt is great for using up all those leftover “layer cake” slices (10in squares) you may have lying around. Cutting stacks of squares in one go and strip piecing make this quilt quick and easy to make.
32 coloured 10in (25.5cm) squares
16 cream/white 10in (25.5cm) squares
8 black 10in (25.5cm) squares
8 grey 10in (25.5cm) squares
Backing fabric: 4yds (3.75m)
Wadding: 72in (185cm) square
Binding fabric: ½ yd (0.5m)
Suitable piecing and quilting threads
Finished size
64in (163cm) square (approx)Notes
WOF = width of fabricUse ¼ in seams, unless instructed otherwiseFabrics used
Quilt top: Layer Cakes™ from various Moda fabric lines, including Modern Backgrounds by Zen ChicBacking: Check from Pam Kitty Picnic by Pam Vieira-McGinnis for Lakehouse FabricsBinding: White on black dot by Makower UKNotes: For less-experienced quilters, a full explanation of techniques mentioned here, such as “making a quilt sandwich”, “squaring up” and “binding” can be found in Quick & Easy Quilts, or online.Cutting Out
1. If using 10in squares from layer cakes, first trim them to exactly 10in square, as sometimes they are slightly larger.
2. Cut each of the 10in squares into four 2½in x 10in strips. You can speed up the process by cutting up to eight squares in one cut, although make sure your cutter blade is nice and sharp.
3. Cut the binding fabric into seven 2½in x WOF strips.
4. Cut the backing fabric into two equal lengths.
Making the Blocks
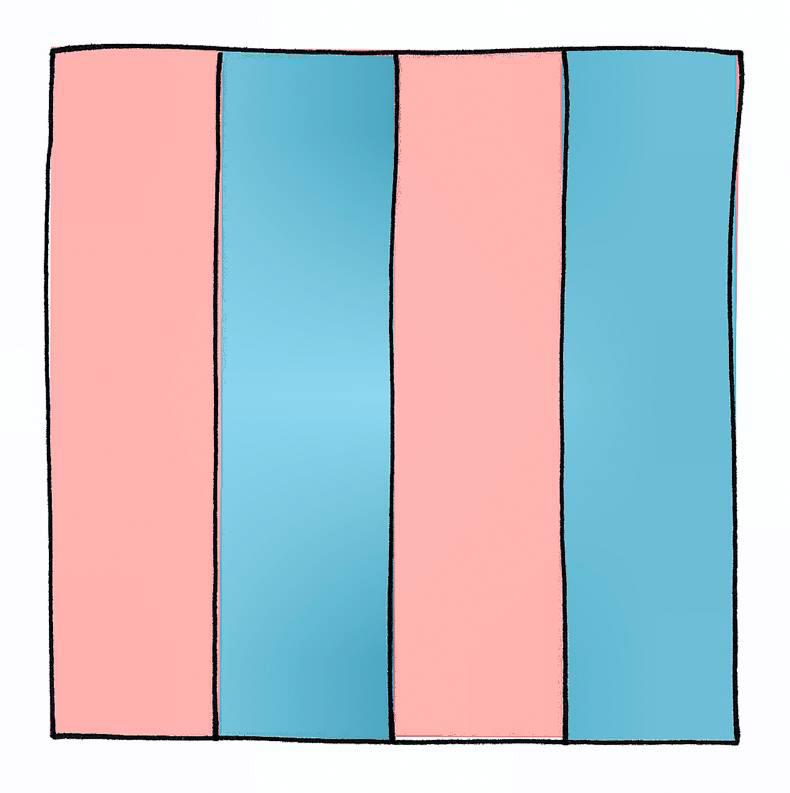
5. There are 64 blocks in the quilt, each one made as a 16-patch block using strip piecing. To make one block start by picking two sets of colour fabric 2½in x 10in strips – one darker and one lighter. Sew them into two groups of four along the long sides, alternating dark/light/dark/light (Fig 1). Press seams towards the darker fabrics.
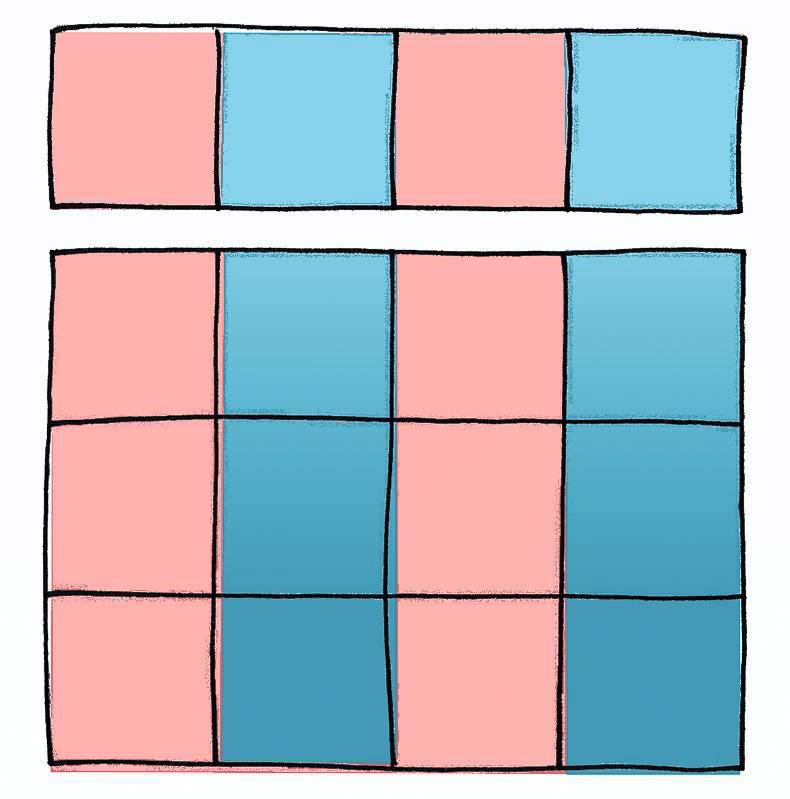
6. Cut across the seams so you have four 2½in x 10in strips (Fig 2).
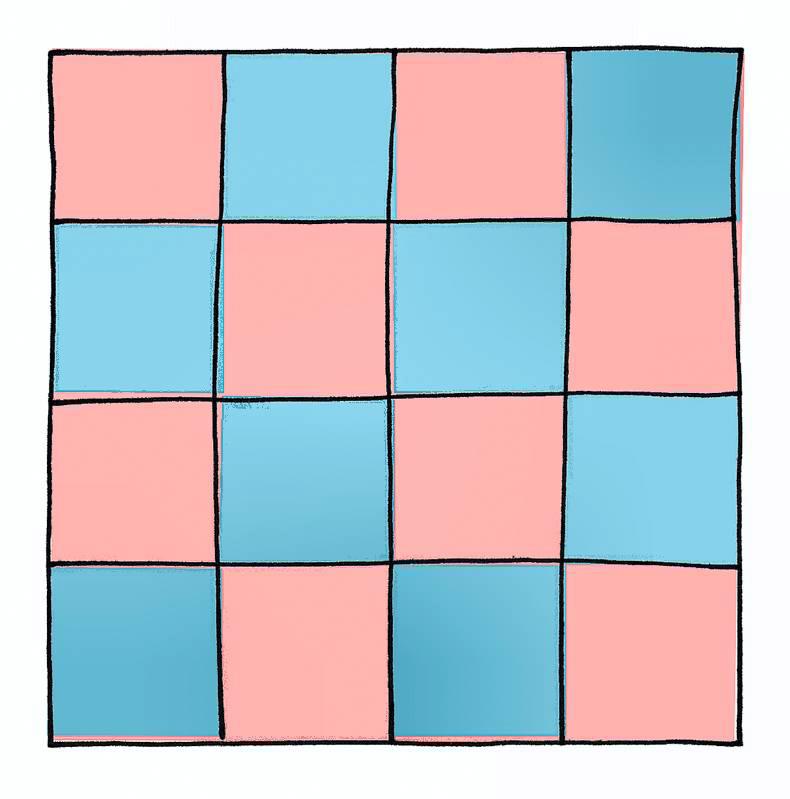
7. Alternating the colours, sew the strips back together into 8½in squares (Fig 3). Press seams open or to one side, as preferred. This makes one block.
8. Repeat this process to make the rest of the blocks, pairing all the coloured squares, and then pairing cream with grey and then pairing cream with black. When all of the blocks are sewn you should have 32 coloured blocks, 16 cream/grey blocks and 16 cream/black blocks.
Assembling the Quilt
9. Lay out the blocks so the coloured blocks alternate with cream/black blocks and cream/grey blocks. Sew the blocks into eight rows each with eight blocks. Press the seams in alternating directions in each row.
10. Sew the eight rows together to finish the quilt top. Press the seams open or to one side, as preferred.
Quilting and Finishing
11. Sew the two pieces of backing fabric together along the long sides using a half-inch seam and press the seam open. Make a quilt sandwich of the quilt back (right side down), the wadding and the quilt (right side up). (Technique: Making A Quilt Sandwich)
12. Quilt as desired. For the quilt shown a hera marker was used to mark a diagonal cross-hatch pattern of lines one inch apart, set a half inch away from each seam line. The quilt shown was quilted using a pale thread.
13. When all quilting is finished, square up the quilt, removing excess wadding and backing as you do so. (Technique: Squaring Up.)
14. Sew the binding strips together end to end using diagonal seams, or straight seams if preferred. Press wrong sides together all along the length to make a double-fold binding. Bind the quilt to finish, taking care to mitre the corners neatly. (Technique: Binding).
Quick & Easy Quilts by Lynne Goldsworthy is published by Kyle Books. Photography by Jan Baldwin
Ever fancied making a beautiful homemade quilt, full of your favourite patterns, colours and fabrics, but assumed it would take so long that there was no point starting? Well, in a brand-new book, Quick & Easy Quilts, Lynne Goldsworthy shares a stunning collection of projects that you can run up on your sewing machine in record time: some can even be done in a weekend. And in a four week series, we will be sharing some of Lynne’s most accessible projects.
Kodachrome Quilt
I’ve always loved the contrast between blacks, whites and greys and bright colours. When I started putting this quilt together and creating the coloured and grey-scale blocks, it reminded me of growing up and taking black and white photos, because they were cheaper to develop than colour film – not a problem we have any more. This colourful quilt is great for using up all those leftover “layer cake” slices (10in squares) you may have lying around. Cutting stacks of squares in one go and strip piecing make this quilt quick and easy to make.
32 coloured 10in (25.5cm) squares
16 cream/white 10in (25.5cm) squares
8 black 10in (25.5cm) squares
8 grey 10in (25.5cm) squares
Backing fabric: 4yds (3.75m)
Wadding: 72in (185cm) square
Binding fabric: ½ yd (0.5m)
Suitable piecing and quilting threads
Finished size
64in (163cm) square (approx)Notes
WOF = width of fabricUse ¼ in seams, unless instructed otherwiseFabrics used
Quilt top: Layer Cakes™ from various Moda fabric lines, including Modern Backgrounds by Zen ChicBacking: Check from Pam Kitty Picnic by Pam Vieira-McGinnis for Lakehouse FabricsBinding: White on black dot by Makower UKNotes: For less-experienced quilters, a full explanation of techniques mentioned here, such as “making a quilt sandwich”, “squaring up” and “binding” can be found in Quick & Easy Quilts, or online.Cutting Out
1. If using 10in squares from layer cakes, first trim them to exactly 10in square, as sometimes they are slightly larger.
2. Cut each of the 10in squares into four 2½in x 10in strips. You can speed up the process by cutting up to eight squares in one cut, although make sure your cutter blade is nice and sharp.
3. Cut the binding fabric into seven 2½in x WOF strips.
4. Cut the backing fabric into two equal lengths.
Making the Blocks
5. There are 64 blocks in the quilt, each one made as a 16-patch block using strip piecing. To make one block start by picking two sets of colour fabric 2½in x 10in strips – one darker and one lighter. Sew them into two groups of four along the long sides, alternating dark/light/dark/light (Fig 1). Press seams towards the darker fabrics.
6. Cut across the seams so you have four 2½in x 10in strips (Fig 2).
7. Alternating the colours, sew the strips back together into 8½in squares (Fig 3). Press seams open or to one side, as preferred. This makes one block.
8. Repeat this process to make the rest of the blocks, pairing all the coloured squares, and then pairing cream with grey and then pairing cream with black. When all of the blocks are sewn you should have 32 coloured blocks, 16 cream/grey blocks and 16 cream/black blocks.
Assembling the Quilt
9. Lay out the blocks so the coloured blocks alternate with cream/black blocks and cream/grey blocks. Sew the blocks into eight rows each with eight blocks. Press the seams in alternating directions in each row.
10. Sew the eight rows together to finish the quilt top. Press the seams open or to one side, as preferred.
Quilting and Finishing
11. Sew the two pieces of backing fabric together along the long sides using a half-inch seam and press the seam open. Make a quilt sandwich of the quilt back (right side down), the wadding and the quilt (right side up). (Technique: Making A Quilt Sandwich)
12. Quilt as desired. For the quilt shown a hera marker was used to mark a diagonal cross-hatch pattern of lines one inch apart, set a half inch away from each seam line. The quilt shown was quilted using a pale thread.
13. When all quilting is finished, square up the quilt, removing excess wadding and backing as you do so. (Technique: Squaring Up.)
14. Sew the binding strips together end to end using diagonal seams, or straight seams if preferred. Press wrong sides together all along the length to make a double-fold binding. Bind the quilt to finish, taking care to mitre the corners neatly. (Technique: Binding).
Quick & Easy Quilts by Lynne Goldsworthy is published by Kyle Books. Photography by Jan Baldwin


 This is a subscriber-only article


SHARING OPTIONS: