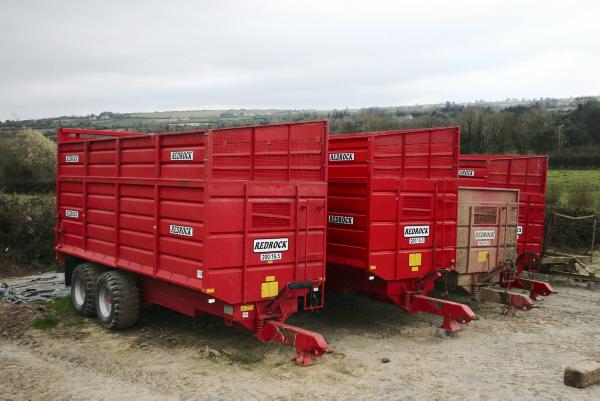
With the silage season just around the corner and no shortage of wet spells, now would be the perfect opportunity for contractors and farmers to ready silage trailers and other equipment for the season ahead.
In the case of silage trailers, many may need to be built back up to silage trailer format with silage rims added or completely built up from a flat floor depending on design construction.
Either way, much care needs to be taken when lifting heavy and awkward weights, including handling what can be very ungainly sides at height.
In many instances, trailers may not have moved for many months since the last of silage or grain harvest.
Trailers are often thought of as a machine, with a view that, once the lights are working, all is fine.
This is far from the case, especially after they have been lying idle for any length of time. From a safety perspective, before you even consider trailer function, it would be a good idea to thoroughly check every aspect of a trailer before use.
Once the sun comes out and the grass grows, it will not be long before the green juices start to flow.
When it does, many tractors, trailers and their drivers will compete in what is like an Olympic relay event from field to pit and back again.
Take a little time, though, to ensure that these mechanical athletes can stop as quickly as they can sprint. An 18ft or 20ft-long fully loaded silage trailer takes quite a bit of stopping!
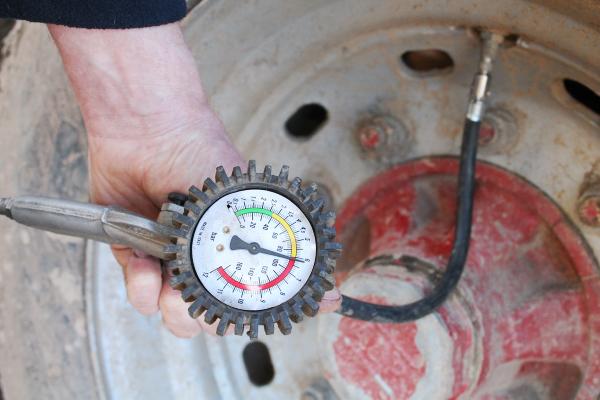
Picture 1 – Pressure
Start with the basics. Tyre pressure is critically important on a trailer carrying any size or type of load. After wintering it out in the shed, you may find that pressures on one or more wheels are below par.
Low tyre pressure on a high-sided silage trailer with a high centre of gravity is a very dangerous situation.
There are many different tyre options, from regular commercial super-singles which may operate on pressures as high as 100psi to special low ground pressure tyres operating as low as 15psi.
If in any doubt, consult with your local agri tyre firm or check the pressures on the various online guides provided by the brands.
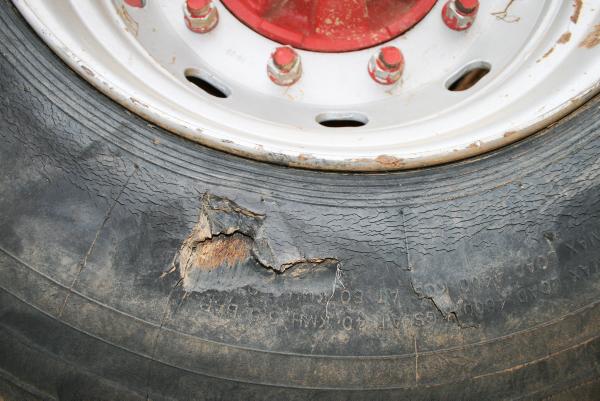
Picture 2 – Tyre
But before attempting to inflate any tyre, check it thoroughly for any signs of damage, cracking or perishing. These may cause the tyre to blow out while inflating it.
Equipped with 10 stud super-singles, this trailer was fitted with remoulds by the manufacturer at new. All had good thread depth but one was showing signs of perishing and had a serious lump taken out of it. This will have to be replaced before it goes to work.
It is good practice to check all the wheel nuts regularly as a combination of the loads being carried and the heat being generated by the brakes can cause the wheel nuts to loosen.
Picture 3 – Lights
Lights and lighting systems in agricultural situations perhaps suffer more than in any other industry. Exposed to acidic and alkali chemicals (fertilizer and lime) plus lots of water, muck, vibration and banging along rough lanes and roads, they are susceptible to damage and failure.
The point of contact in any lighting system is the seven-pin plug connecting the trailer to the tractor.
These are relatively inexpensive, usually under €5, so if in any doubt about its functionality, replace it. Similarly, if there is any doubt about the tractor’s socket replace it. See seven-pin wiring instructions on page 13.
The tail immediately from the plug heading towards the trailer is perhaps the most vulnerable of all cables on a trailer. It is at risk of damage from lift arms or rear wheels on sharp turns.
If there are lighting problems, replace this section of wiring where there are signs of crushing or damage to external insulation. Crushing often breaks the wires within the insulation without any significant external damage, making it very hard to detect a breakage. If in doubt, cut it out.
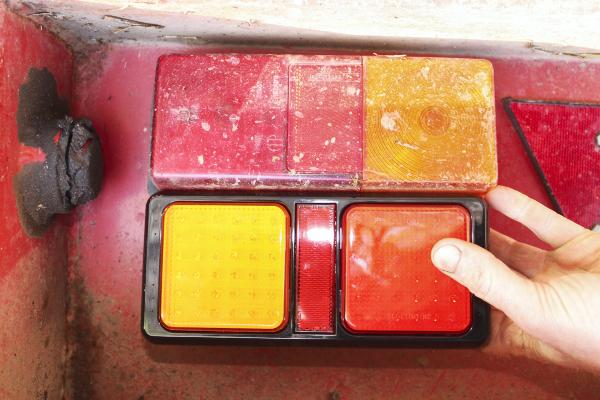
Picture 4 – LED
Many agricultural trailers in the past used commercial specification lights, generally rubber-based units which were very reliable.
Where problems arose with these units, the individual elements could be replaced as required, for example indicator bulb holder, brake bulb holder or parking light holder.
More recently, LED lighting systems, such as those available from RockFit Technologies Ltd and QTP (Matt Buckley Tractor Spares), have proven to be both popular and reliable.
Prices have now come down considerably over the last few years to make them affordable when compared with better quality traditional lights.
Today, there are now many different suppliers of lighting components, all offering LED replacement options for traditional vehicles and trailer lighting systems, such as this one pictured from 247Lighting.
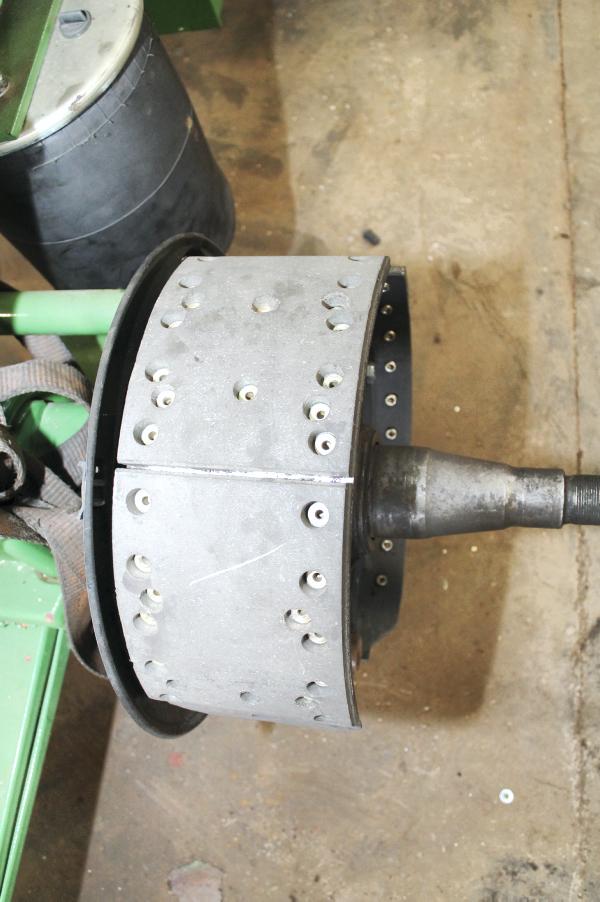
Picture 5 – Brake spec
There has been much talk about brakes and braking efficiency, particularly at higher road speeds of 50km/h. From our recent Irish Farmers Journal survey, many Irish trailer manufacturers fit commercial-specification brakes as standard.
There are many older trailers out there with agricultural specification brakes really only suited to lower speeds.
Pictured is an 80mm bonded brake shoe fitted to a 10-year-old trailer on the home farm. Beside it is an old commercial shoe, which is just 140mm wide but is riveted.
Picture 6 – High speed
A true “high-speed” spec axle will usually have 406x120mm or 420x180mm in diameter foundation brakes operated by S-type cams to give progressive control.
Brake shoes are also riveted rather than bonded to make them more secure and less prone to becoming detached if overheated.
Picture 7 – Brake problems
Hauling a trailer out of the shed for the first time in months, it is critically important to check brake function to make sure that both come on AND go off properly. You will not get very far with brakes that do not release properly. When the brake drum heats up, the entire wheel may lock up rendering the trailer immovable.
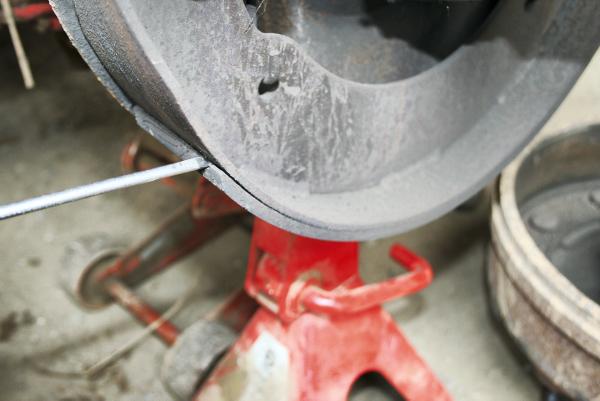
Another problem often caused by overheating brakes is the separation of the friction lining from the brake shoe, as pictured here. These are agricultural-specification bonded brakes that are just 80mm wide. This trailer was hauled with its handbrake on, causing them to overheat and unstick the brake lining from the shoe. Every time the brake is operated after overheating, the wheel will lock up, regardless of load, making it very unsafe to use.
Picture 8
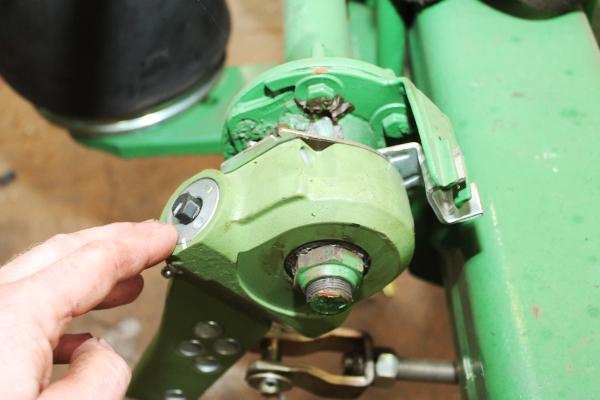
This is a slack adjuster on commercial-specification brakes. Adjustment is via the 13mm nut indicated. With the wheel jacked off the ground, tighten the adjuster and then back it off one and a half turns. Ensure that the wheel can still rotate freely with the brakes off. Automatic slack adjusters are also available and automatically maintain brake adjustment.
Picture 9
Pictured is the hydraulic ram mechanism on agricultural specification brakes. The adjuster is the bolt to the rear of this mechanism, which takes up the slack as the brake shoes wear.
Carefully adjust the bolt to take up the slack or to reposition the exposed chromed rod of the brake ram back into its cylinder. Again, ensure that the brakes are not dragging when adjusted.
Note that this brake cylinder mechanism is leaking badly, which has the potential to render the brakes completely ineffective. Urgent action is required to repair or replace the brake cylinder.
Picture 10
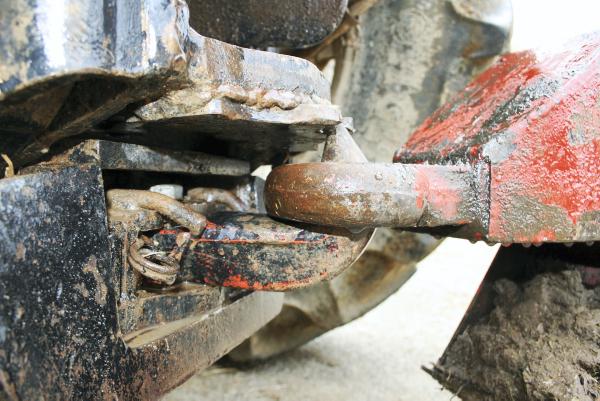
Pick-up eyes will wear, especially on trailers doing a lot of work, and need to be checked before the season kicks off. Replacing a pick-up eye is generally not a job for the farm or contractor’s workshop unless very well equipped.
Picture 11
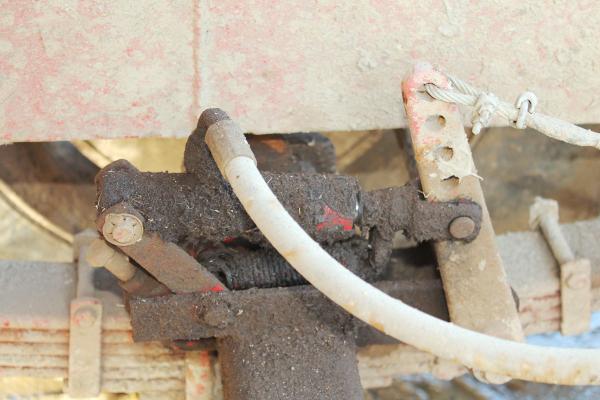
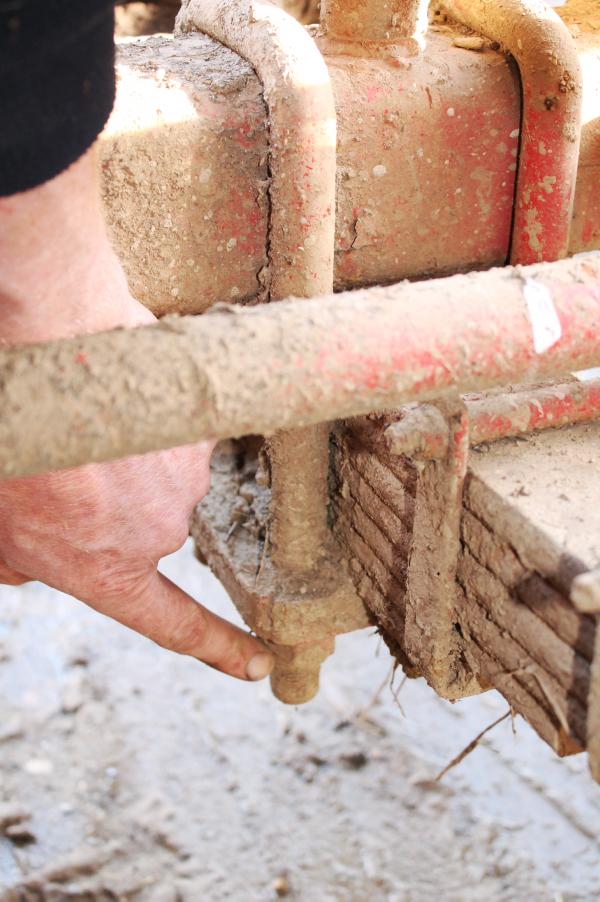
Before the season kicks off, check the trailer’s suspension for loose spring clamps or broken springs. Either can cause the trailer to handle dangerously when loaded and/or braking. Rust streaks around shackles or springs often giveaway the fact that something is loose or broken.
Picture 12
Check spring bushes and pins for wear, as badly worn ones could fail and can also cause a degree of axle self-steer when the brakes are applied. This could potentially be very dangerous.
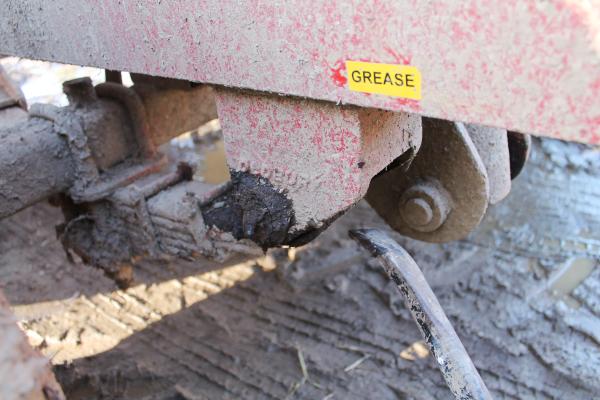
If all is okay, grease all bushings, hinges and rockers as required. Have a good look around the chassis and trailer frame for signs of cracking or damage when checking the axles and running gear. Cracks, particularly in the chassis or tipping structure, should get an urgent repair.
Picture 13
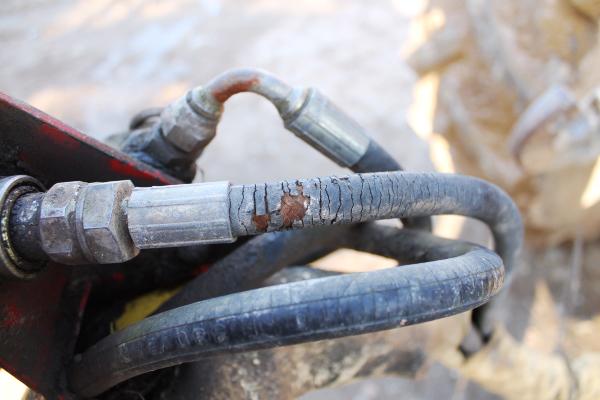
Hydraulic pipes provide oil for both the trailer braking system and tipping the trailer. Defective pipes in either situation are potentially extremely dangerous. Inspect all hydraulic piping and replace as necessary.
Picture 14
Hydraulic couplings for trailer brakes and tipping services need to be in good condition for safe operation. It is not unusual for the trailer tipping pipe to have been dragged along the road and be partly worn by this action. Aside from leaking in use, it can also cause the trailer to become locked in the tipped-up position, a very dangerous scenario.
Picture 15
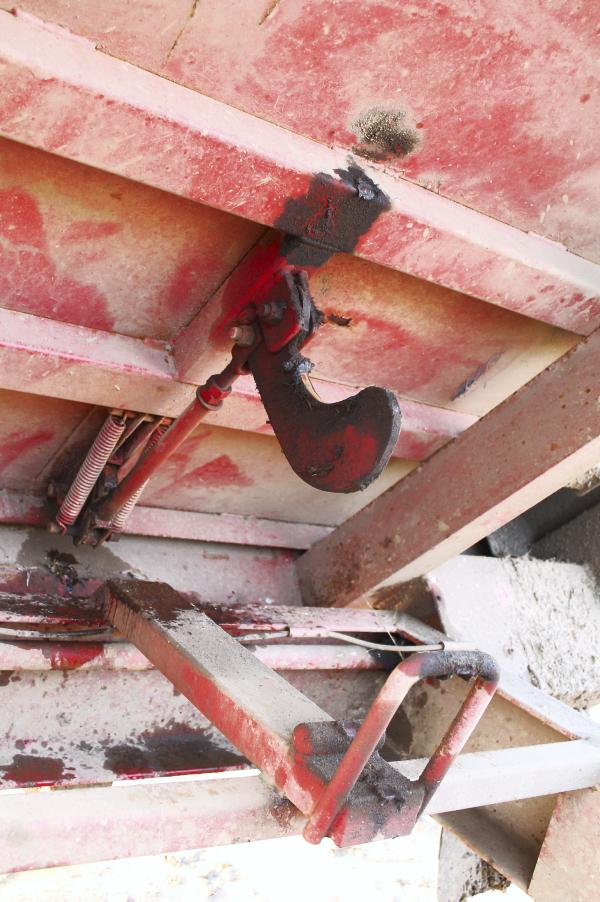
Many manufacturers use some form of automatic tailgate release in silage trailer configurations. Ensure it is functional, adjusted correctly and greased accordingly.
Picture 16
Often overlooked, the handbrake is very important, especially for parking the trailer or trailer and tractor in hilly areas while loaded. Some manufacturers also attach a breakaway cable to the handbrake, so if a trailer becomes attached from the tractor the handbrake is automatically applied.



 This is a subscriber-only article






SHARING OPTIONS: