You will need
12mm of dowelling
200 x 75 x 50mm wood plank
Builder’s wire
4 wooden or turned paper beads (for hands)
Stockinette for hands and face
1m of bonded interlining
Stuffing (small amount)
50cm of polyester wadding
1m of marabou or other fluffy material
50cm of unbleached calico
2m of lace, 3½cm deep
Piece of velvet or hessian (Santa’s bag)
Gold and red material for dress and cloak (I used curtain material)
Wool (for hair)
Trims of your own choice to decorate
Needle and strong thread
Small piece of round elastic
Basic figures
1 For each figure, cut a 30cm piece of dowelling and then a piece of wood to the following measurements: length 100mm, width 75mm, depth 50mm, to act as the base.
2 Drill a hole in the centre of each of the pieces of wood to a size that will hold the piece of dowelling firmly in place. Insert the dowelling. Wrap a strip of interlining around the dowel and stitch in place.
3 Cut a circle of stockinette, approximately 15cm in diameter, for the heads. Run a gathering stitch with strong thread, ½cm from the edge and stuff firmly. When you are satisfied with the shape of your head, attach to the top of the dowel and secure firmly in place.
4 Cut an 80cm piece of wire, double it and twist it together. Stitch the centre of the wire to the dowel for the arms, approximately 2cm down from the head, and glue a bead on either end for the hands.
5 With strips of interlining, shape the body, starting at the intersection of the dowel (body) and the wire (arms). Criss-cross firmly and stitch to secure with strong thread. Move out onto the arms and down the body, wrapping and stitching, taking care to build up the arms and body securely.
6 Wrap a piece of wadding around the body to build it up further and then make a tube of interlining to cover it, securing it with elastic. Stitch a nice piece of lace around the bottom end to cover the joining of the base to the dowel. You can cover the base with felt if you wish.
Mrs Santa
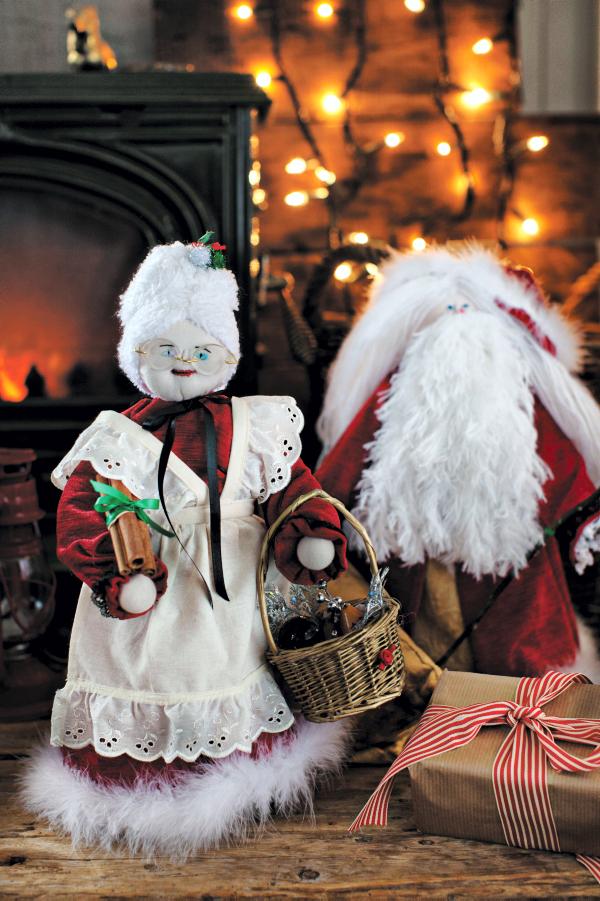
Now that you have your basic shape, make another one using the same method and then have fun dressing them.
1 Lay the figure down and draw around it to get the pattern for the dress. Measure her shoulder and sleeve, and construct the pattern in this way, leaving an opening in the back to put it on.
2 Leave sleeves a little wide and attach lace trim above the seam turning. Gather around her hands when the dress is on her. Attach marabou to the hem of the dress.
3 Cut a piece of calico (15cm x 30cm) for the apron and measure for the band and the straps. Cut these according to the measurements of your figures. Stitch lace in the seams of the straps.
4 Embroider her eyes, nose and mouth, taking care to achieve the expression you want.
5 To make the hair, wrap wool around a piece of cardboard 40cm long about 40 times. Remove, cut and stitch down the centre to secure and sew to head. Plait the wool and wrap it around the top of her head.
Mr Santa
1 Make Santa’s undergarment from gold fabric in the same way as Mrs Claus’s dress, but without sleeves.
2 Santa’s cloak is measured in the same way, but leave 25mm on either side of the front opening for turnings and secure the neck edge with a fastener. Leave sleeves wide and secure with a stitch at his hands. Trim with marabou.
3 Cut hair for Santa – wrap wool around a piece of cardboard 36cm long about 40 times. Remove, cut and stitch down the centre to secure and sew to the head. For the beard wrap wool around a piece of cardboard (23cm long, 20 times) and sew to the face.
4 For his moustache, wrap wool around card about 20 times, tie in the middle and stitch under the nose.
5 Now all you have to do is embroider the face and decorate with his bag of toys and goodies of all sorts.
Next week: Make a festive mini wreath to decorate your home.


 This is a subscriber-only article


SHARING OPTIONS: