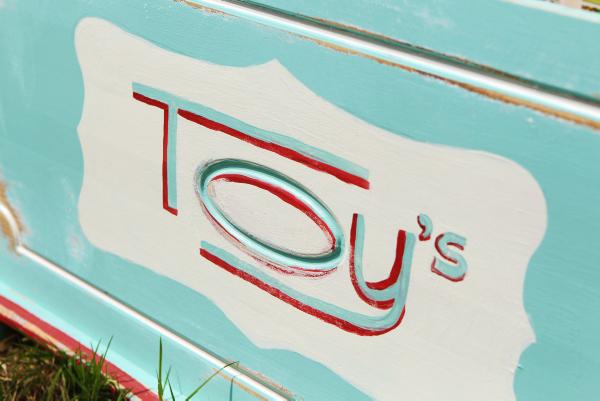
Upcycling a toy box in retro style
Level: Intermediate
Make tidying up tractors and teddies a lot more fun (and stylish) with this retro-style toy box, perfect for a child’s bedroom. This project uses basic painting, stencilling and decoupage techniques.
Materials needed
• Medium or fine-grain sandpaper.• A cloth.• Water-based primer (I used Little Greene’s acrylic primer and undercoat).• Water-based paint ( I used Little Greene’s intelligent eggshell, turquoise blue 93, loft white 222 and baked cherry 14).• Paint brush/paint brush for glue. • Bristly brush for stencilling. • Blade.• Marker.• Masking tape. • PVA glue. • Old Beano magazines/map paper. Method
In a circular motion, sand the toy box with medium/fine-grain sandpaper.
Wipe off any sanding dust with a dry cloth.
Prime with a water-based primer and undercoat.
Paint in a colour of your choice, with two/three coats of paint, allowing them to dry between each coat.
Print out the templates and trace out each section on a piece of heavy card or acetate.
With a sharp blade, cut out each colour on a separate acetate. Starting with Template 1 first, position with masking tape and paint in a light colour (I used Little Greene’s loft white). Allow to fully dry (you might need two coats).
Optional: You could use another colour to paint edges on the toy box, or any moulding to highlight them (I used Little Greene’s baked cherry).
Apply Template 2. With the bristly brush, dab the paint (I used Little Greene’s turquoise blue) in the stencil until it’s covered with an even coat and leave it to fully dry. Fill in the gap on the “O” with a small brush.
Optional: You can also put a drop shadow on the “toys” lettering, to make it stand out even more (Template 3).
For the inside: Paint an even coat of PVA glue onto the paper you have chosen and allow the glue to soak in for a minute.
With a sponge or your hand, start pressing the page along one end, while you have the rest of the page in your hand, and rub the page onto the surface evenly so as not to cause any air bubbles.
Repeat step 10 until the inside of the toy box is covered.
Leave the lid open on the toy box until the inside is fully dry.
When everything is dry, you can distress the outside with some sandpaper around edges.


 This is a subscriber-only article


SHARING OPTIONS: