

I love gardening, but I don't know if I could ever call myself a green thumb.
Over the years, I haven't grown very much worth harvesting.
But this year, I am so proud to say I've successfully grown several things from seed: pumpkins, asparagus (I'll be waiting a few years before I can harvest any, though), onions, leeks, courgette and beetroot are all currently thriving in my raised beds (as long as I remember to water them during this dry weather).
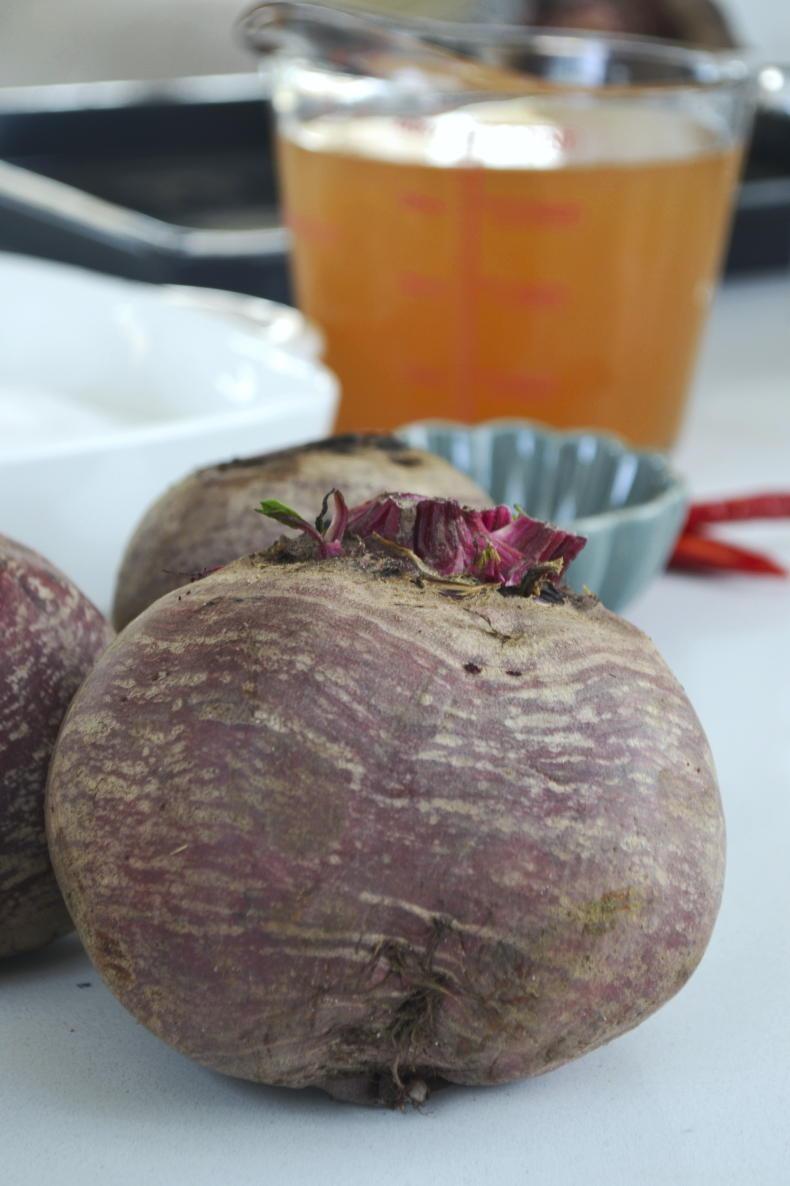
I spent the month of July visiting family in Canada and when I came home to the farm, I knew my beetroot was ready to harvest. Some were so big they were half stuck in the soil and half out in the open.
I planted an heirloom variety of beetroot, which means they came out all different colours. This includes pink, golden (sadly I only harvested one of these, but it is beautiful), white and the traditional red varieties.
While I didn't grow tonnes of beetroot, I was more successful than I had expected. Fresh beetroot is absolutely gorgeous roasted or steamed and diced.
It also makes delicious soups or dips, such as beetroot hummus. To deal with the excess and ensure I have some of our harvest last through the winter months, I pickled the remainder.
I learned how to pickle many years ago. A restaurant where I used to work was very into pickling - we tried pickling everything!
Most vegetables work really well with a basic brine (I especially love pickled mushrooms and cauliflower), while others just don't work out (hello broccoli!).
For other vegetables, a basic brine (which combines water, sugar, salt, vinegar and a variety of flavourings) won't do the job. Beetroot is one of those vegetables (onion is another).
For a beetroot pickle, the brine is actually much simpler than a basic pickle brine. You don't need any water or additional flavourings - just equal parts sugar, apple cider vinegar and a bit of salt.
Pickling vegetables may sound daunting, but once you have the method down it's as easy as one, two three. You might think you need to invest in lots of fancy equipment, but that isn't true, either.

I ordered a set of jars with fitting lids from alpack.ie. This will set you back around €40 (with shipping), but the amount of jars you receive in the order will see you through the preserving season and it's much less expensive than buying a load of kilner jars in a shop.
You can sterilise and reuse jars, too, of course, but when you pickle each year and give some away as gifts, it's nice to have a fresh set (I will reuse the glass jars I keep and purchase new lids as needed).
If you're reusing glass jam jars and the like, these are better suited to quick pickles for keeping in the fridge and less suited to things you plan to preserve for months (the lids will not reseal the same way and there is a risk of bacteria getting in).
While I sterilise my jars in the oven or dishwasher (on the highest temperature setting), I will also submerge my filled and sealed jars in a pot of boiling water for around five minutes, if I plan to keep them in storage over the winter. This ensures a good seal which will keep any bad bacteria out of the jars.
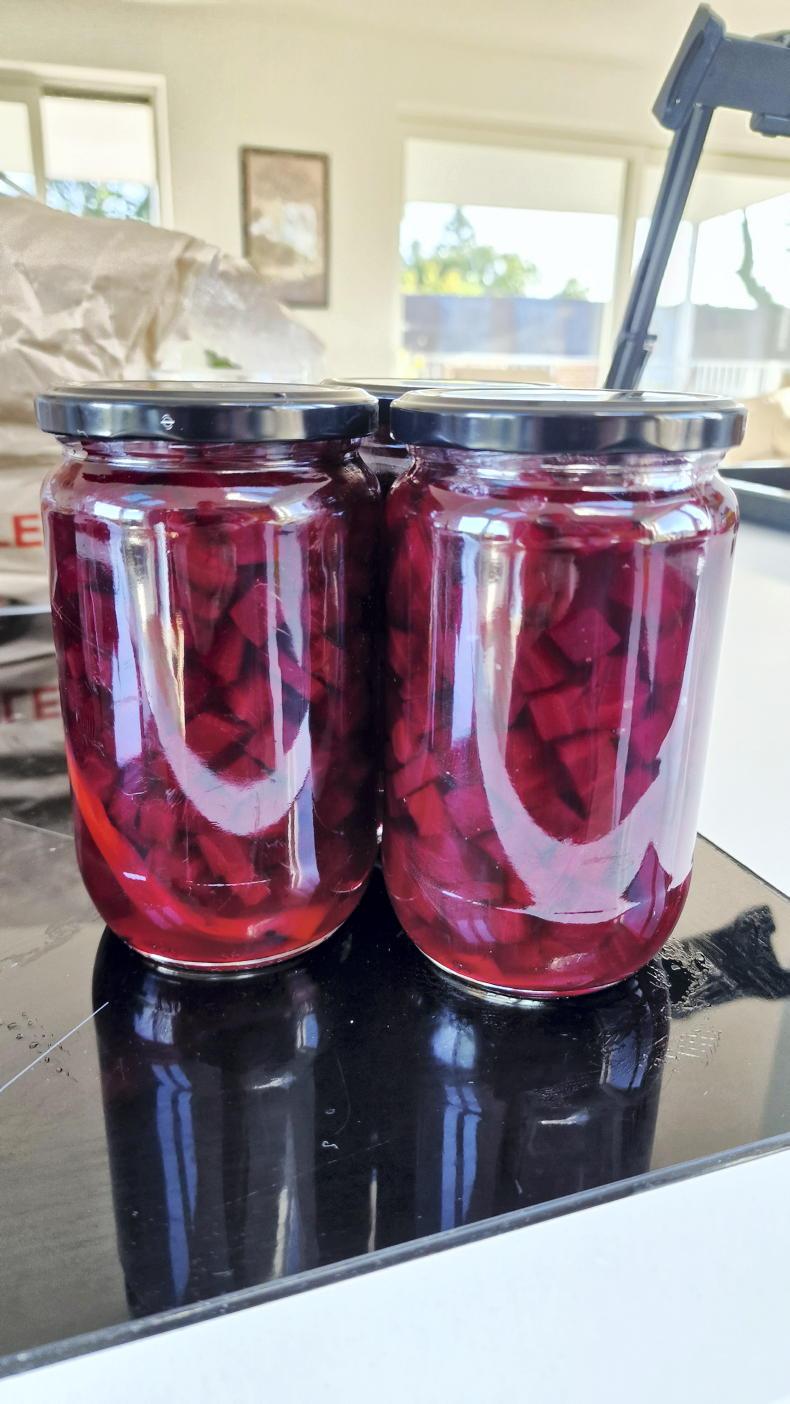
This recipe can be scaled, so it will work for one beetroot or 60. Just make enough brine to cover and, if preserving for several months, fill the jar to nearly the top.
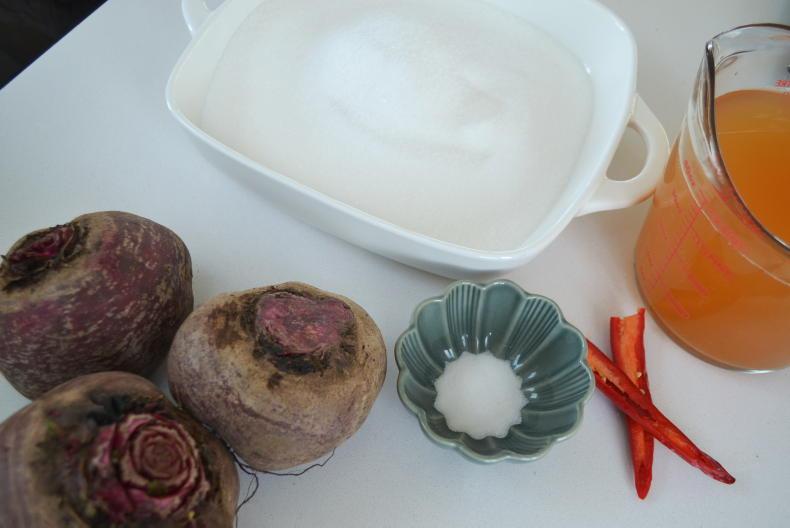
I used 1kg sugar to 1L apple cider vinegar here; just ensure the sugar and vinegar are equal parts.
Ingredients
Fresh beetroot, unpeeled (for this recipe, I used eight medium-sized beetroots and got approximiately 1L of pickled beetroot)
1L apple cider vinegar
1kg white sugar
2 tsp salt
1 chilli, spllit lengthwise (optional)
Directions
1 Choose beetroot which are similar enough in size, as they will be cooked within a similar timeframe. Add them to a pot and cover with cold water.
2 Bring the pot to a boil, cover with a tightly fitted lid and turn down the heat so the water is at a rapid simmer. Cook the beetroot until fork tender; around 30 to 45 minutes (depending on size).
3 Make the brine: combine the apple cider vinegar, sugar, salt and the chilli pepper to another pot. Set aside until ready to use.
4 When the beetroot are cooked, drain and cool slightly, then using a small paring knife, peel off the skin (see video). This can be a bit messy, so use gloves if you like for this bit. Chop or slice the beetroot any way you like; I prefer a large dice. Again, keep them a similar size so they take on the brine equally.
5 Sterilise your glass jars and lids in the dishwasher or in a hot oven (place them in a preheated oven for five minutes). This will kill any bacteria lingering on the jars.
6 Bring the pot of brine to a rapid boil, stirring to help dissolve the sugar. Once the boil is reached, remove it from the heat and immediately pour over the peeled and chopped beetroot.
7 Remove the hot jars from the oven or dishwasher and fill, leaving around 2cm between the jar and the lid. Remember: hot jars, hot lids, hot filling - everything should be hot at this crucial stage.
8 Carefully place the hot lids on the hot jars (I use two dry, clean tea towels for this as everything is hot).
9 At this stage, you can leave the jars to cool slightly or immediately submerge the jars in boiling water for three to five minutes for a final sterilisation/seal (I do this for most of my preserves, but it's not recommended for preserving vegetables such as sweetcorn or green beans; you need to preserve those with a pressure preserver).
10 Before you store your jars away, wipe the outsides of the jar with cleaning vinegar or hot soapy water to ensure they don't have any food or brine sticking to them. Leave for at least 48 hours before digging in.

SHARING OPTIONS