


The new year is often a good time to look at your tractor in relation to its service schedule. A basic service normally consists of engine oil, engine oil filter, fuel filters and air filters whereas a more major service may include back end and hydraulic filters, axle and hub oils as well as transmission fluid in some cases. A typical schedule for a basic service is every normally 500 hours while a major service can be between 1,000 and 1,500 hours. These figures vary between models and manufacturers and should be checked in the operator’s manual or with your main dealer to be sure before commencing.
Servicing your tractor is basic mechanical maintenance and is quite simple but is often neglected due to time or mechanical confidence. I am going to go through a step-by-step guide on how to do it yourself in order to help you save money on servicing bills from the dealerships and ultimately keep your tractor running smoothly.
Draining your oil
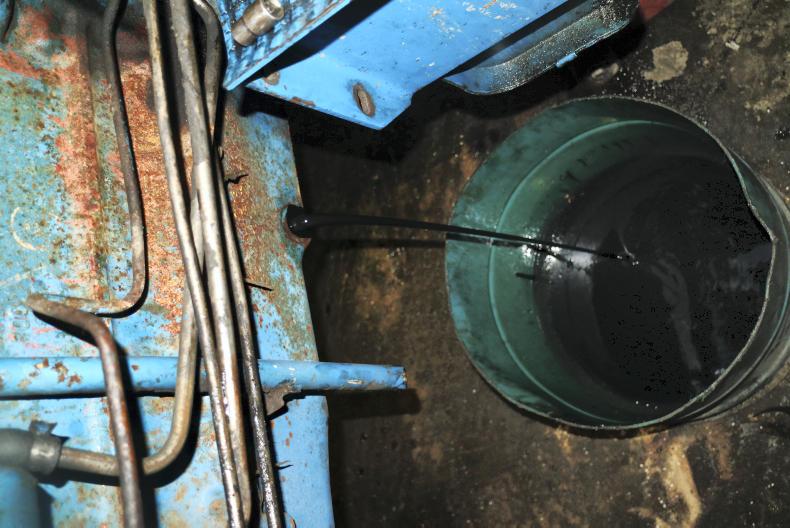
Before you can fill the engine with new oil, you must obviously remove the old oil. Firstly run the tractor up to its optimum operating temperature to heat the oil. This will allow it to flow easier and therefore drain completely faster. The tractor should be parked on level ground, the handbrake applied, switched off and the key removed. For added safety, a wheel chock should be put in front of the wheels to stop the tractor moving when you are working around it. To drain the old oil, loosen the drain bolt or sump plug which is located at the lowest point of the engine known as the sump. Always place an adequate container underneath to catch the oil and always dispose of it correctly. Remove the drain bolt and inspect it for thread damage. Remove the copper washer which should be fitted and replace it with a new one. Some drain bolts have a magnet to collect metal fillings in the oil which occur from normal wear and tear, if there is excessive metal on the magnet it may indicate a more serious internal problem and should be investigated further by a qualified mechanic.
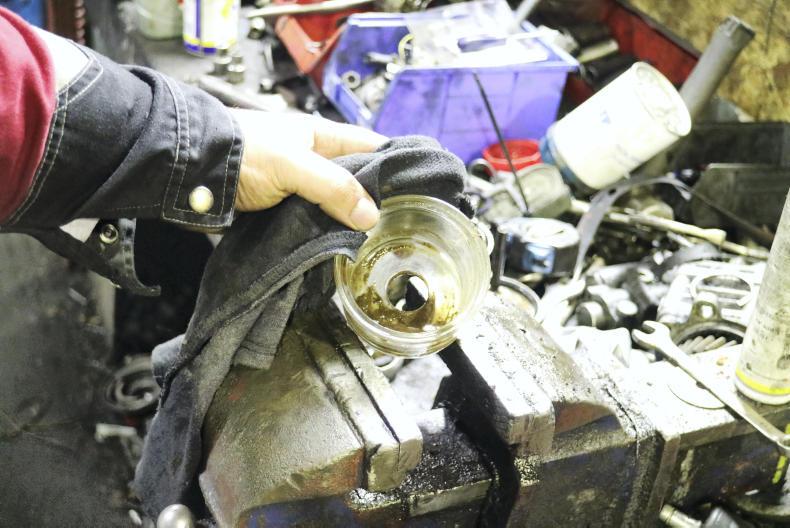
Replace oil filter
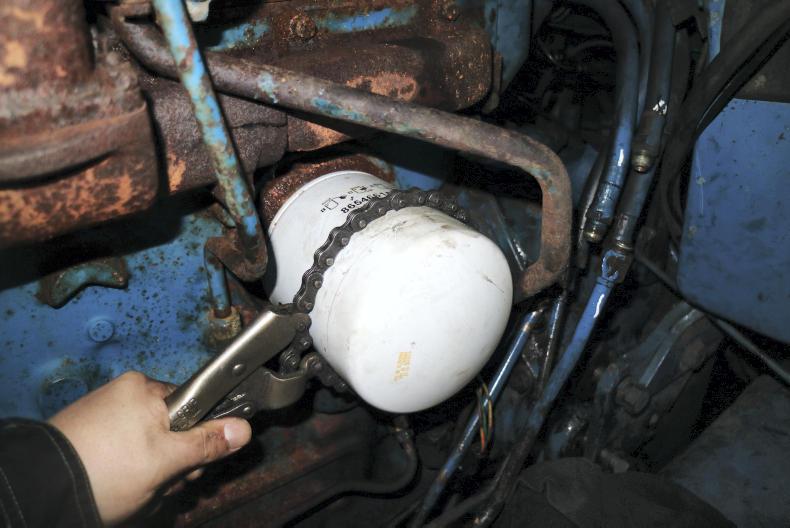
While the oil is draining you can move on to the next job of removing the oil filter. The filter cleans the oil of any contaminates that may find their way into it and potentially block oil ports and lead to component failure. It is vitally important that you replace the oil filter as well as the oil and not just one. Clean around the filter before removing it. Turn it anticlockwise along its thread to screw it off. In some cases due to the heat from the engine, the filter may become too tight to loosen by hand. In this case a filter strap or wrench can be used which allows you to apply more leverage to remove the filter. Once the filter is removed you can then fit the new one. Make sure it is the same as the one you removed, then apply a thin film of oil to the seal on the bottom of the filter before screwing it back in place. This will help it seal properly and reduce the possibility of oil leaks. Only tighten the new filter back by hand – never use the filter strap as it will tighten itself from the heat.
Replacing the air filters
Next up are the air filters. Most engines have two air filters – an outer and inner filter, which gradually remove dust particles before the air eventually goes into the combustion chamber. The air filters are normally located in an air box and may vary in shape or size but their working principle is the same. To change them, open the air box and loosen any locking screws before finally removing the outer and inner filters. It is often a good idea to blow out the air box with an air compressor to remove any residual dust before fitting the new filters. To fit the new filters, simply reverse the process, taking care that the air box seal is in place and undamaged. The service schedule for air filters can vary greatly depending on what conditions the tractor is working in. When operating in very dusty environments, it may be necessary to remove the filters and clean them with a high-pressure air line regularly.
Fuel filters and bleeding the system
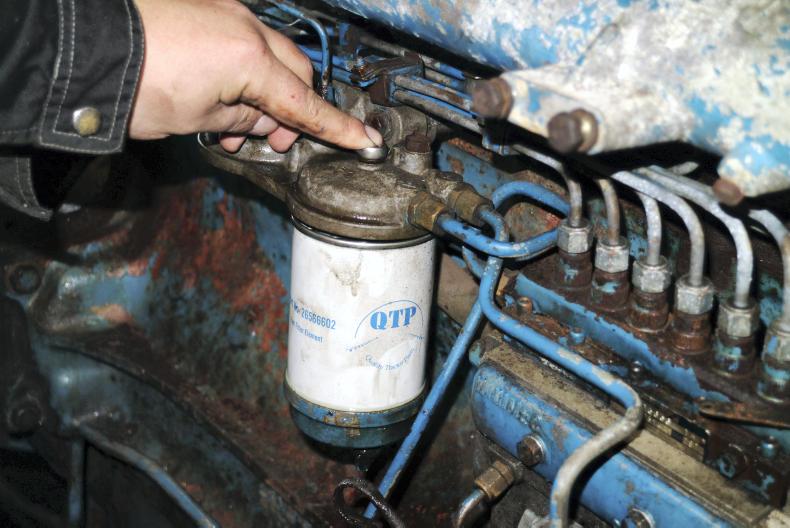
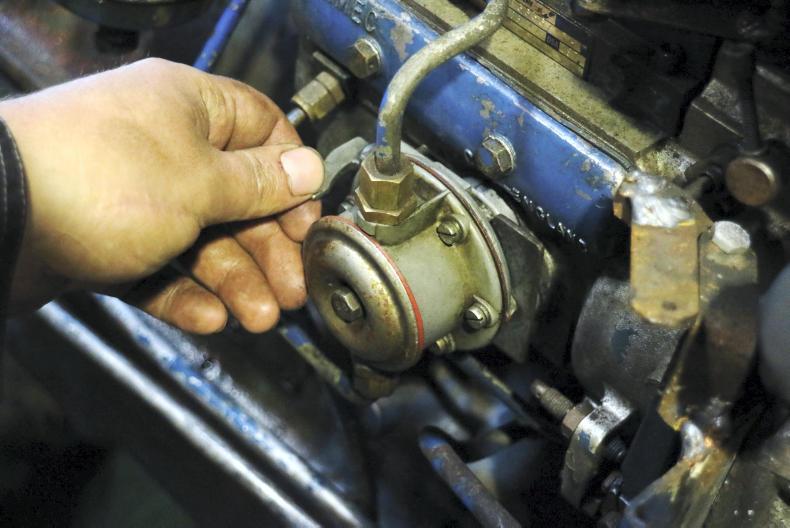
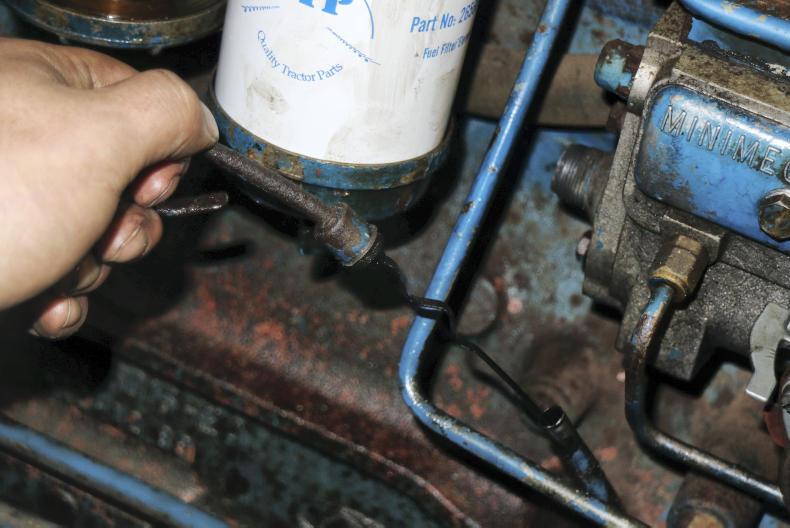
One of the areas most susceptible to contamination is the fuel system due to the fact that it is regularly exposed to possible contamination when refuelling as well as varying diesel qualities. Most modern tractors will be fitted with a water separator and two fuel filters consisting of a pre filter and final filter. The difference between the two is the grade of mesh which filters different micron levels. Before removing the fuel filters place an adequate container to catch the diesel which will leak out and dispose of it correctly. Clean around the filters and loosen the drain plugs at the bottom (if fitted) to drain the diesel. Once they are empty remove by hand or with a filter strap if necessary. Refit the new filters taking care to replace the seals that are supplied with them. Again apply a light film of lubricant to the rubber seal on the filter before fitting. Tighten by hand and do not over-tighten.
Next, move on to the water separator if fitted. This removes water and larger contaminants from the fuel system and should be cleaned regularly. Open the separator and clean all the components with diesel and a clean rag. Once clean, reassemble and refit. If an in-line filter is fitted, replace it at this stage as well.
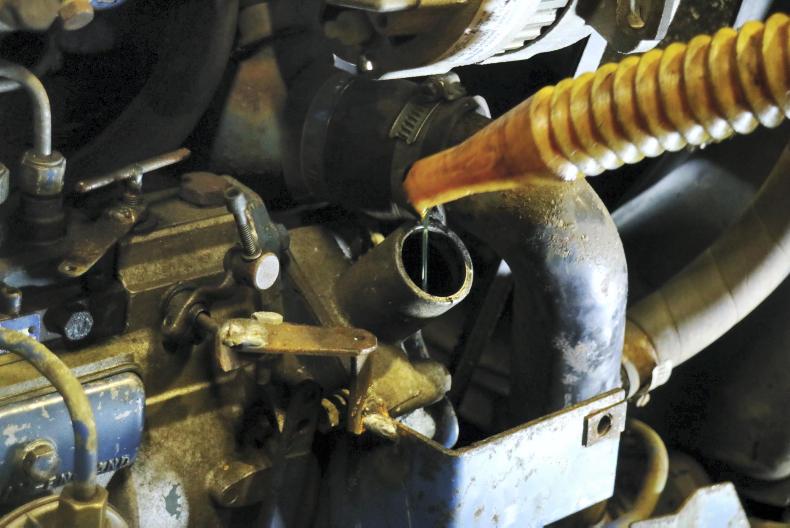
When all filters are replaced then you will need to bleed the air out of the fuel system in order for it to start. To achieve this, firstly make sure all filters are securely fitted, all connections are sealed and that there is diesel in the tank. Next open the bleed screw which is normally located on top of the filter housing. Do not remove it – just loosen it to allow the air to escape. To pump the diesel out of the tank and through the system to expel the air a manual pump is normally fitted. Pump the lever until all the air is expelled and a steady flow of diesel with no air bubbles is coming out of the bleed screw. Close the screw at this stage as all the air is now expelled. Some tractors are fitted with an electric bleed pump which is activated by the ignition instead of having to manually pump it.
Replacing the oil
At this stage, the old oil should be completely drained. Refit the drain bolt, making sure the threads are undamaged and the copper washer is replaced. Tighten the drain bolt adequately so as it doesn't loosen but take care not to over-tighten. Once this is done you can then refill the engine with new oil. Take note of the amount of oil that came out in order to give you an indication of the amount to put back in. Clean around the fill point and dipstick to avoid dirt getting in. Ideally, use a graduated jug with spout to keep tract of the amount of oil you are putting in while also continually cleaning and checking the dipstick to obtain the correct level of oil.
Once you have the correct oil level on the dipstick, close the fill point and start the engine on tick-over only. This will circulate the oil all around the engine to ensure it is getting adequate protection. Run it for 30 to 60 seconds and turn off. Let the oil settle and check the dipstick again. Top up as necessary. At this stage take a good look around the tractor for any signs of leaks.

Choosing the correct oil
Engine oil has three jobs. The main job is to lubricate the metal parts and stop them rubbing against each other so hard that they create excess friction and therefore heat and weld themselves together. Oil is also responsible for helping to cool an engine. As oil moves around the engine, heat from all the moving parts is carried away to cooler parts of the engine where the oil itself cools before being pumped back through the engine again. The third function of oil is to keep the inside of the engine clean. Small bits of metal from worn parts, dust from the air, contaminants from the fuel and bits of rust and scale from inside the fuel tank are all caught and suspended in the oil and then carried to the oil filter where they are trapped and prevented from another journey through the delicate engine internals. It is therefore vital that you use the correct oil when servicing your tractor. Different manufacturers and models will use different oils so it is important that you check the operator’s manual or contact your local dealer to ensure that you are using the correct one for your tractor. Failure to do so may result in engine damage.
The label on the oil container will tell you all you need to know. The brand name doesn't necessarily matter. More important is the oil's classification, such as 10W-30 for example. This represents the oil's viscosity (resistance to flow) on a scale; the first number (10) is the viscosity at -17.8°C, ie at cold start. The W stands for winter, while the last number (30) is the viscosity at 100°C. For example, 5W-30 viscosity engine oil thickens less in the cold than 10W-30, but more than 0W-30. An engine in a colder climate, where engine oil tends to thicken due to lower temperatures, would benefit from 0W or 5W viscosity whereas a tractor in warmer climates would need a higher number to keep the oil from thinning out too much. The label will also tell you what the oil is intended for. In this case, it's diesel engine oil. It will also give you a number of specification codes and numbers which it conforms to. Without going into too much detail, it is important that these match or exceed the manufacturer’s recommendations.
Finally, the actual oil itself can be of three types – conventional, semi-synthetic and fully synthetic. Conventional oils are mineral based and have little or no additives for added protection, semi synthetic oils are a blend of conventional oils and additives to increase engine performance and protection. These are the most common type used in modern machinery. Finally, fully synthetic oils are completely engineered to offer the best possible traits but come at an increased price.
What you will need
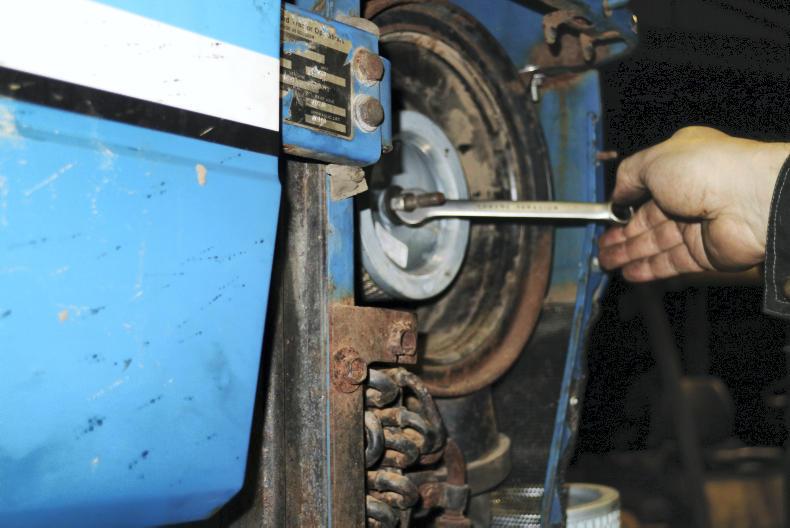
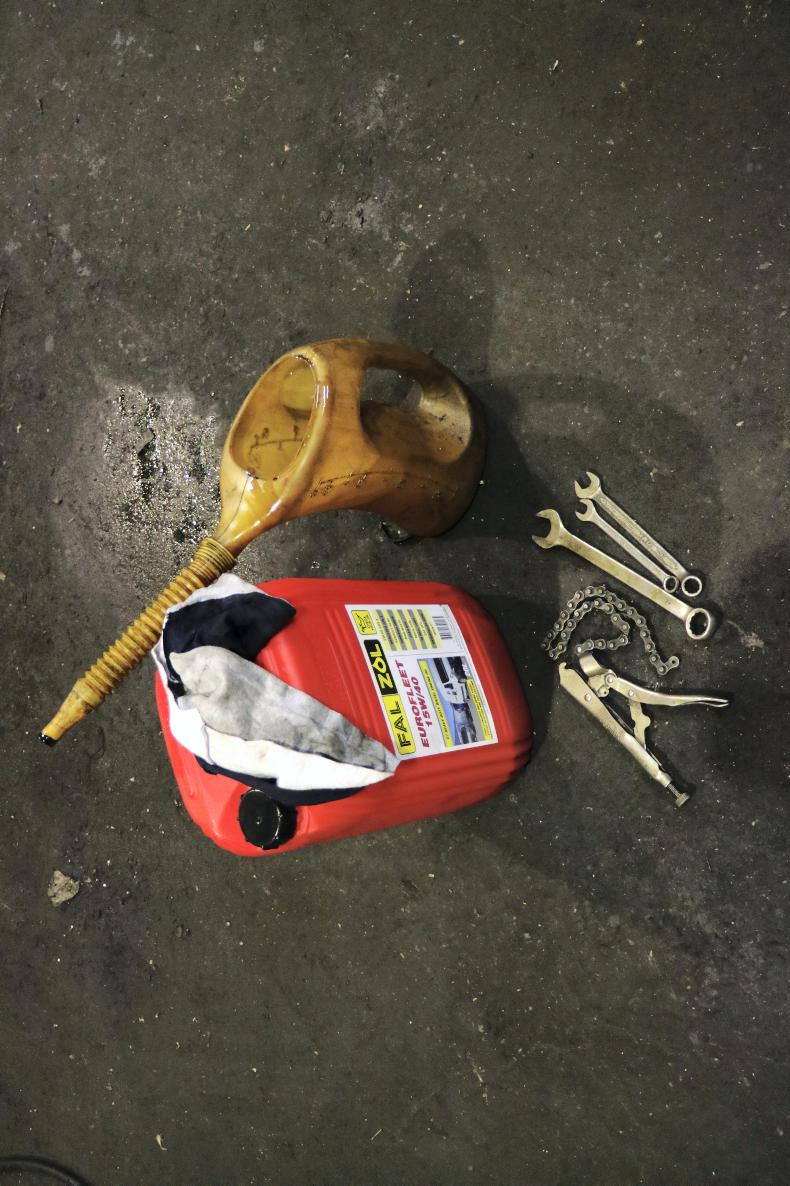
To carry out a basic service you need basic tools and a bit of elbow grease and most importantly know-how. The first thing is to ensure you have the correct filters and oil that you will need as once you start to service the tractor it will essentially be out of action until completed. You will need a filter strap or wrench, basic spanners and sockets with a ratchet. To catch the oil and diesel an adequate container is needed as well as some clean rags to make the job cleaner. To refill the oil a graduated jug with a spout is ideal. If possible, an air compressor with air line to clean out the air box is desirable but not necessary.
Dos
Don'ts
A small amount of mechanical know-how will allow you to carry out the servicing on your tractors saving you money as opposed to sending it into the main dealers. When confident, a basic service should take on average an hour to complete while more major servicing will take longer.
SHARING OPTIONS