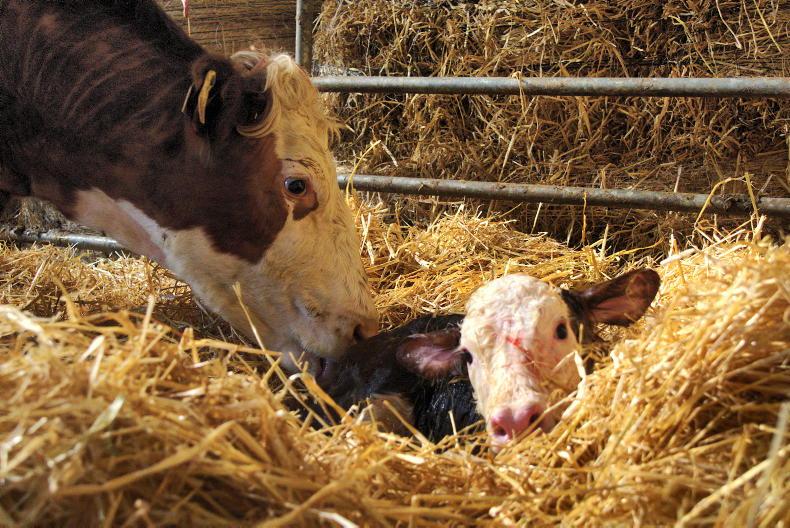
Spring calving is getting under way across the country. While the majority of cows will hopefully calve without any need for assistance, every now and then, you will be required to step in and help deliver the calf.
When you have to assist a cow during calving, patience is essential. Do not rush the process. Knowing when to step in and what action to take will make assisting the cow much easier. These are 10 steps to follow when assisting a cow at calving time:
1. Move the cow to a proper calving pen
Once the cow has entered labour and passed the water bag, it is time to move her to a calving pen with a proper calving gate to securely restrain the animal.
This makes it much safer for you to handle and work with the cow. It is also safer for the animal and facilitates veterinary intervention if required.
Trying to work with a cow during a difficult labour in makeshift pens, or larger loose pens, is not advisable. If anything, it increases the stress levels on both the cow and the farmer.

Always secure a cow in a calving gate when checking on calving progress.
Having access to a proper head-locking gate means the cow is secured and stationary, allowing you to safely examine the position of the calf before deciding on which course of action to take.
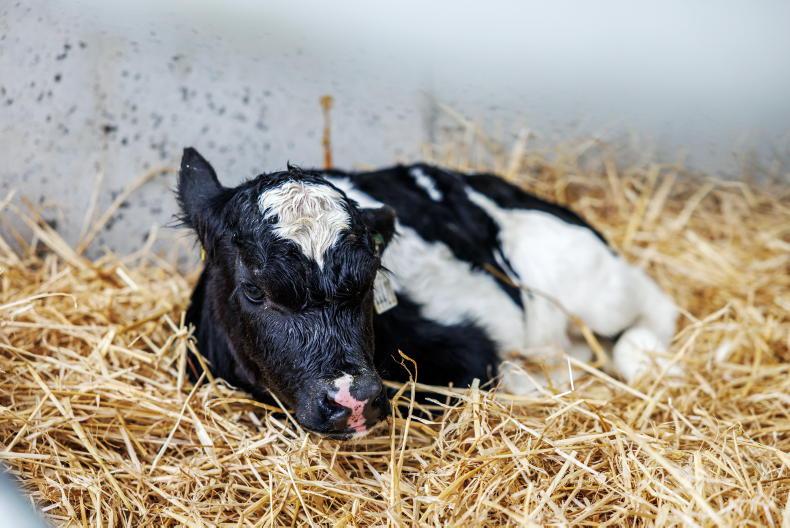
Make sure cows are calving in a clean, well-bedded pen. Fresh straw will reduce the risk of infection for the newborn calf and also provide more traction for the cow during calving.
2. Observe from a distance
Calving is a stressful time for the cow, especially heifers. The less you disturb them, the better. Being over-eager to calve the cow can delay calving. Instead, once the cow enters the early stages of labour, leave her alone and monitor from a distance or via calving cameras.
Once the cow passes the water bag, continue to give her time to make progress on her own. Stepping in too early to deliver the calf can create problems as the cow’s cervix may not be fully open.
More often than not, the cow will deliver the calf on her own if given adequate time.
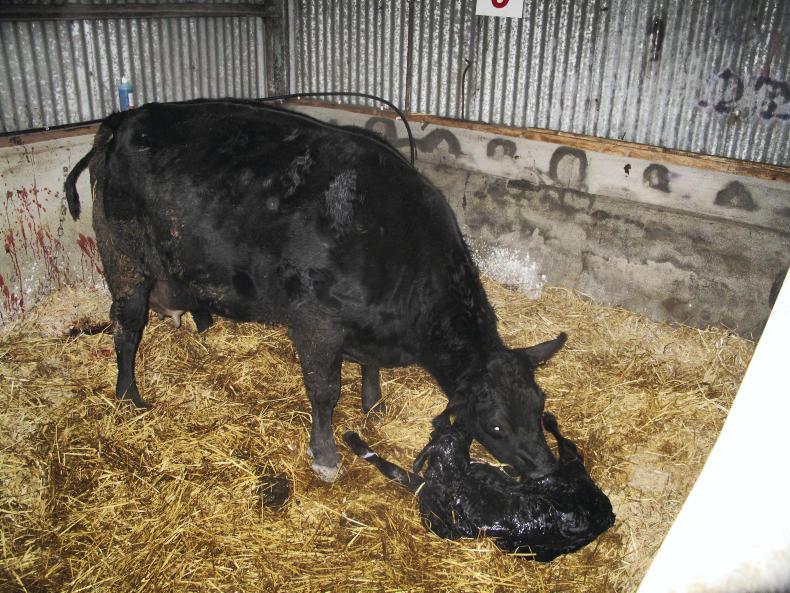
Give cows plenty on time to calve. Be patient and work with the cow.
If the cow is showing all the usual signs of calving, but no water bag has been presented, then there could be an issue with a twisted uterus, which means veterinary assistance will be required.
3. Time to check
Once the cow has passed the water bag, you should give her around two hours before stepping in to check if there is a potential problem. For heifers, you can step in after one hour and check for problems. At this point, you should only be checking to see if the calf is coming in the correct position with the two front feet followed by the head.
If the calf is correctly presented, the cow may just require more time to calve. Leave the cow alone and monitor progress every 30 minutes. Should a calf be mis-presented, use your judgement at this point to examine whether you can deliver the calf successfully.
Correct any trailing limbs slowly and carefully so as not to cause the cow any damage internally.
If you place your hand in the cow and cannot feel the calf, check to see if the cow's uterus is clear and free from obstruction. If your arm has to rotate inside the cow, then the uterus is twisted and you will need veterinary assistance.
4. Hygiene
Before you do step in and check the calf’s position, make sure you are wearing a clean arm-length plastic glove. Do not place your hand into the cow uncovered as you can transfer infection directly to the animal, affecting fertility with a delay in the cow returning to heat post-calving. Use a clean glove every time you check on the calf’s progress during labour.
5. Use a proper lubricant
Always use a proper lubricant when inserting your hand into the cow. Do not use any form of soap or washing-up liquid as an alternative as they are irritants. When assisting the cow, apply lubricant inside of the vagina and around the crown of the calf’s head.
6. Monitor progress
If you have checked the calf is in the correction position, but no progress has been made 30 minutes later, it is then time to step in and assist the cow deliver the calf.
Use a clean glove with lubricant and place your arm inside the cow. Check that the calf is properly positioned and pull the feet forward into a position that will allow you to apply ropes.
When pulling the calf, if is not moving forward, then it is most likely caught at the shoulders. At this point, you should be re-evaluating your options on delivering the calf.
7. Applying ropes
Use coloured ropes as they can be co-ordinated to specific feet. This way you know which leg is being pulled forward. Place the blue rope on the left leg and red rope on the right leg. Makes sure that the knots are far enough from the foot loop to fit the ratchet on the calving jack.
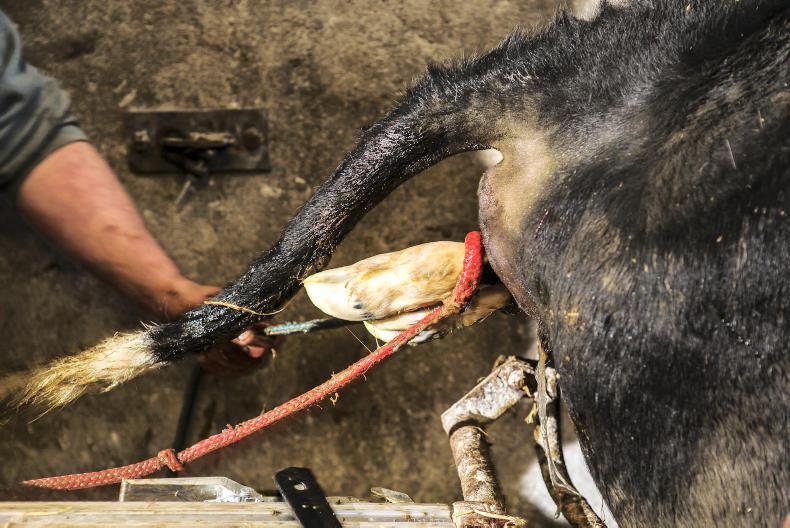
Use a red rope on the right leg and a blue rope on the left leg. \ Philip Doyle
Place the rope so that the first loop is above the calf’s fetlock. Double the rope to place a second loop below the fetlock. Using the double loop spreads the pressure being applied to the calf’s leg. Keep the knots on the loops positioned below the calf’s leg.
8. Calving jack
Wait until the calf’s head has been presented before applying the jack. Position the jack so the head frame is being supported by the cow’s hind-quarter and keep the cow’s tail out of the way.
Make sure that the ratchet bar is straight and attach the ropes. Adjust the ratchet until the ropes are tight. Always stand to the left of the jack in case the cow moves or goes down. Never stand between the jack and the wall.
9. Work with the cow
Using the jack applies huge pressure to the calf, so be sure that you use it properly. Work with the cow by levering the jack downwards every time she pushes.
Once the cow is relaxed, straighten the jack and tighten the ropes again. Repeat as long as the calf continues to make progress.
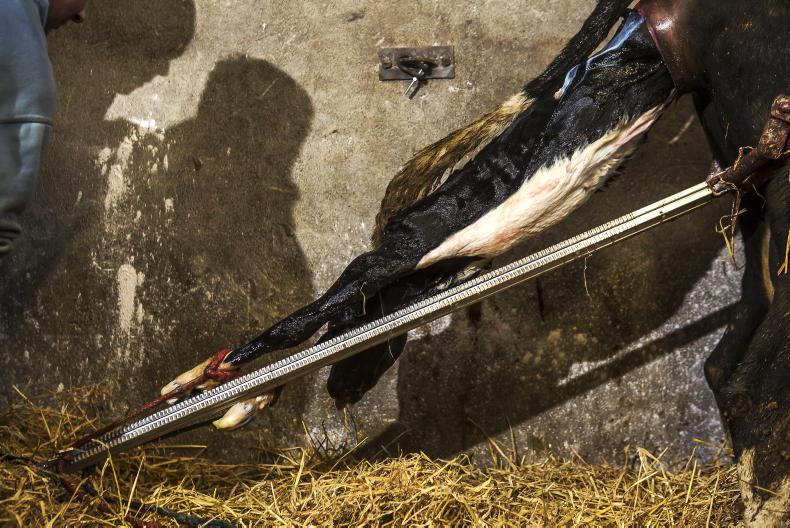
Work with the cow by levering the jack downwards every time she pushes. \ Philip Doyle
If the calf is stuck, ease the pressure by taking the tension off the calf. This way the calf can breathe properly.
Keeping tension on the ropes will stretch the calf, restricting its breathing and increasing the chance of a dead calf.
Try to rotate the calf through 90 degrees as this can help to release the hips and allow the calf to pass.
10. Call the vet
If the calf is not coming freely with the jack, do not try to force it. Ease off and call the vet to help deliver the live calf.
Read more
Newford farm awaiting a calving boom
Improved feedlot demand and farmer demand drives prices of short-keep cattle and stores
Getting around calving issues this spring
Spring calving is getting under way across the country. While the majority of cows will hopefully calve without any need for assistance, every now and then, you will be required to step in and help deliver the calf.
When you have to assist a cow during calving, patience is essential. Do not rush the process. Knowing when to step in and what action to take will make assisting the cow much easier. These are 10 steps to follow when assisting a cow at calving time:
1. Move the cow to a proper calving pen
Once the cow has entered labour and passed the water bag, it is time to move her to a calving pen with a proper calving gate to securely restrain the animal.
This makes it much safer for you to handle and work with the cow. It is also safer for the animal and facilitates veterinary intervention if required.
Trying to work with a cow during a difficult labour in makeshift pens, or larger loose pens, is not advisable. If anything, it increases the stress levels on both the cow and the farmer.
Always secure a cow in a calving gate when checking on calving progress.
Having access to a proper head-locking gate means the cow is secured and stationary, allowing you to safely examine the position of the calf before deciding on which course of action to take.
Make sure cows are calving in a clean, well-bedded pen. Fresh straw will reduce the risk of infection for the newborn calf and also provide more traction for the cow during calving.
2. Observe from a distance
Calving is a stressful time for the cow, especially heifers. The less you disturb them, the better. Being over-eager to calve the cow can delay calving. Instead, once the cow enters the early stages of labour, leave her alone and monitor from a distance or via calving cameras.
Once the cow passes the water bag, continue to give her time to make progress on her own. Stepping in too early to deliver the calf can create problems as the cow’s cervix may not be fully open.
More often than not, the cow will deliver the calf on her own if given adequate time.
Give cows plenty on time to calve. Be patient and work with the cow.
If the cow is showing all the usual signs of calving, but no water bag has been presented, then there could be an issue with a twisted uterus, which means veterinary assistance will be required.
3. Time to check
Once the cow has passed the water bag, you should give her around two hours before stepping in to check if there is a potential problem. For heifers, you can step in after one hour and check for problems. At this point, you should only be checking to see if the calf is coming in the correct position with the two front feet followed by the head.
If the calf is correctly presented, the cow may just require more time to calve. Leave the cow alone and monitor progress every 30 minutes. Should a calf be mis-presented, use your judgement at this point to examine whether you can deliver the calf successfully.
Correct any trailing limbs slowly and carefully so as not to cause the cow any damage internally.
If you place your hand in the cow and cannot feel the calf, check to see if the cow's uterus is clear and free from obstruction. If your arm has to rotate inside the cow, then the uterus is twisted and you will need veterinary assistance.
4. Hygiene
Before you do step in and check the calf’s position, make sure you are wearing a clean arm-length plastic glove. Do not place your hand into the cow uncovered as you can transfer infection directly to the animal, affecting fertility with a delay in the cow returning to heat post-calving. Use a clean glove every time you check on the calf’s progress during labour.
5. Use a proper lubricant
Always use a proper lubricant when inserting your hand into the cow. Do not use any form of soap or washing-up liquid as an alternative as they are irritants. When assisting the cow, apply lubricant inside of the vagina and around the crown of the calf’s head.
6. Monitor progress
If you have checked the calf is in the correction position, but no progress has been made 30 minutes later, it is then time to step in and assist the cow deliver the calf.
Use a clean glove with lubricant and place your arm inside the cow. Check that the calf is properly positioned and pull the feet forward into a position that will allow you to apply ropes.
When pulling the calf, if is not moving forward, then it is most likely caught at the shoulders. At this point, you should be re-evaluating your options on delivering the calf.
7. Applying ropes
Use coloured ropes as they can be co-ordinated to specific feet. This way you know which leg is being pulled forward. Place the blue rope on the left leg and red rope on the right leg. Makes sure that the knots are far enough from the foot loop to fit the ratchet on the calving jack.
Use a red rope on the right leg and a blue rope on the left leg. \ Philip Doyle
Place the rope so that the first loop is above the calf’s fetlock. Double the rope to place a second loop below the fetlock. Using the double loop spreads the pressure being applied to the calf’s leg. Keep the knots on the loops positioned below the calf’s leg.
8. Calving jack
Wait until the calf’s head has been presented before applying the jack. Position the jack so the head frame is being supported by the cow’s hind-quarter and keep the cow’s tail out of the way.
Make sure that the ratchet bar is straight and attach the ropes. Adjust the ratchet until the ropes are tight. Always stand to the left of the jack in case the cow moves or goes down. Never stand between the jack and the wall.
9. Work with the cow
Using the jack applies huge pressure to the calf, so be sure that you use it properly. Work with the cow by levering the jack downwards every time she pushes.
Once the cow is relaxed, straighten the jack and tighten the ropes again. Repeat as long as the calf continues to make progress.
Work with the cow by levering the jack downwards every time she pushes. \ Philip Doyle
If the calf is stuck, ease the pressure by taking the tension off the calf. This way the calf can breathe properly.
Keeping tension on the ropes will stretch the calf, restricting its breathing and increasing the chance of a dead calf.
Try to rotate the calf through 90 degrees as this can help to release the hips and allow the calf to pass.
10. Call the vet
If the calf is not coming freely with the jack, do not try to force it. Ease off and call the vet to help deliver the live calf.
Read more
Newford farm awaiting a calving boom
Improved feedlot demand and farmer demand drives prices of short-keep cattle and stores
Getting around calving issues this spring


SHARING OPTIONS