

Hanging baskets packed with colourful flowers are the essence of summer for many gardeners. The great advantage of hanging baskets is that they can be positioned where it might be otherwise difficult to locate plants.
Now is the time to get them planted up and ready for summer. After planting, keep them in a cool greenhouse, polytunnel or conservatory until all danger of frost has passed. By the end of the month, they should be blooming and the weather warm enough to hang them in their final position.
Big is best for baskets. Large hanging baskets are much easier to look after than small ones. Those with a diameter of less than 30cm dry out rapidly in hot weather, requiring twice-daily watering. Cone-shaped baskets are deeper than the traditional bowl types so small diameters are less of a problem.
Use a good quality, lightweight, peat-free, multi-purpose compost and mix in some slow-release fertiliser and a handful of water-retaining crystals. These little crystals, which turn into gels, absorb and hold an incredible amount of water, releasing it slowly to the roots as the compost becomes dry.
When it comes to planting, there are a huge range of bedding plants to grow in hanging baskets and the temptation to cram in as many as possible can easily lead to it looking like a bag of Dolly Mixtures. By limiting yourself to just two or three colours, your display will be more eye-catching and stylish.
A beautifully balanced hanging basket is all about composition. To get it right, use the classic ‘Thriller, Filler, Spiller’ method. The ‘Thriller’ is your showstopper, the plant that provides height, drama and a central focus. A small, upright fuchsia, pelargonium or tuberous begonia is perfect.
The ‘Fillers’ are your workhorse plants that create the body of the display, filling out the middle of the basket. Petunias, calibrachoa (million bells), nemesias, verbenas and impatiens are ideal fillers, forming a lush mound of colour and foliage around your thriller.
The ‘Spillers’ are the trailers that soften the basket’s edges and tumble gracefully over the side. Trailing lobelia and bacopa are reliable choices, along with colourful foliage plants like golden creeping jenny, silver-leaved helichrysum or variegated trailing catmint.
Edible flowers
For a different take on a hanging basket, you could also opt for edible plants such as herbs, salad leaves, tumbling tomatoes, strawberries and edible flowers like nasturtiums.
To assemble your creation, pop your basket on a bucket or a large pot to keep it steady while you work. Line the basket with moss, plastic or a pre-formed liner. Some basket designs come with an attached liner. To prevent the compost becoming waterlogged, cut a couple of drainage slots if using a plastic liner. Fill it about two-thirds of the way with your compost mix. Gently ease your plants out of their pots and give the roots a little tickle to loosen them up which encourages them to grow out into the fresh compost.
Place your ‘Thriller’ plant right in the middle. Next, arrange your ‘Fillers’ around it, allowing them a bit of room to grow. Finally, pop your ‘Spillers’ in around the edge, angling them slightly outwards to encourage them to trail down the sides.
Looking after your basket
Once everything is in position, top up the basket with more compost, gently firming it around the plants and leaving about 2-3cm of space from the rim. This creates a ‘well’ for watering and stops water from spilling everywhere. Water well to settle the compost around the roots.
Hang the basket in a bright, sheltered position to let the plants establish for a few weeks before moving to a sunny spot outside.
Water as necessary, and with increasing frequency as the basket matures. It may be necessary to water twice a day in hot spells.
Ice cubes placed in the basket in the morning melt slowly, allowing a steady absorption. Begin feeding about four to six weeks after planting and feed once a week with a high-potash feed, such as tomato feed. Deadhead regularly, removing dead foliage and faded flowers, to prolong flowering. Turn the basket each week.
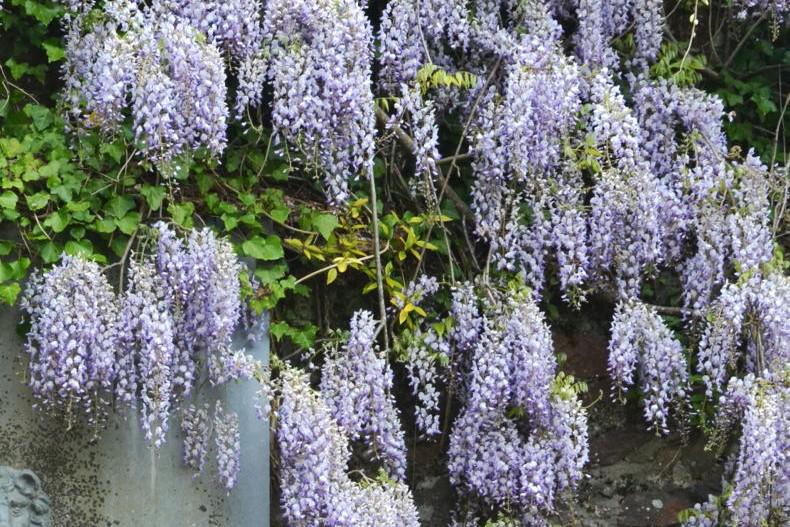
I planted a wisteria years ago on a south-facing wall. It produces masses of leaves but no flowers. Have I put it in the wrong position, or should I have pruned it? – Jane, Co Leitrim.
The south-facing position you have chosen is correct, but a wisteria plant can take around eight years to establish and bloom for the first time. A lack of flowering can also be attributed to too much fertiliser or improper pruning.
Don’t feed wisteria with nitrogen-rich fertilisers as they are naturally vigorous plants and nitrogen stimulates them to produce more leaves. If your wisteria needs a nutrient boost, use a phosphate-rich fertiliser, which encourages blooming.
Establish a pruning routine to promote the production of short, flowering shoots rather than long, whippy, green growth. Wisteria is pruned twice a year. During July or August, cut back all the long shoots of the current year’s growth to five or six leaves from a main stem.
Water: start to water regularly any trees, shrubs or hedging planted bare-rooted during last winter or early spring to help them establish.
Cut: from roses below ground level, cut off suckers to stop the rose wasting energy on them.
Acclimatise: gradually acclimatise and harden off dahlias, sweet peas and tender summer bedding plants started indoors to outdoor conditions to prevent shock before planting them out in their final positions for summer.
Growth: pinch out the shoot tips of bedding plants and young annuals, such as fuchsias, to encourage bushier growth.
Mary Keenan and Ross Doyle run Gash Gardens, Co Laois. See gashgardens.ie


SHARING OPTIONS