Halloween and healthy treats rarely fall under the one umbrella. If your house is like mine, the loot gathered from an evening trick-or-treating is generally enough to cater for a child’s birthday party. As it is only one night of the year, I try not to nag. I loved Halloween as a child and one of the main attractions was the opportunity to gorge on goodies I would only dream about at other times of the year. So, I understand the temptation.
The only trick I can offer to other parents is to provide some nutritious foods early in the evening, leaving less space in little tummies for sweets and chocolates. I was many years into adulthood before I realised that my own mother had this plan sussed at an early stage, as each Halloween evening an offering of colcannon and fried eggs was traditionally served. This plate of buttered spuds and eggs was warmly embraced as it became a tradition. As much as I tried to continue this with my own crew, it only worked on two of the four children, so a few other dishes have had to step up to the mark.
Naturally, these dishes must have some sort of spook appeal, while also resembling what a witch or a demon of the night might offer at their banquet. Steaming hot bowls of soup go hand in hand with autumnal weather and make for a nutritious filler. Pumpkin soup is rather delicious and it’s a marvellous way to put our jack o’ lantern filling to good use. If serving at a Halloween bash, a scooped out pumpkin makes for a perfect serving bowl, and it also looks pretty impressive as a centerpiece.
A few treats are a must, and when there are so many sweets making an appearance, it’s nice to make a few nutritious but equally tasty alternatives. Chocolate-covered fruit, such as the obligatory Halloween chocolate apples, are a good offering. Coating some fruit pieces with yoghurt and setting them in the freezer offers a nutritional snack that also tastes great. However, I always find anything goes as a Halloween treat, once there are raisins or chocolate chips for eyes and some edible drizzle resembling blood. Happy Halloween.
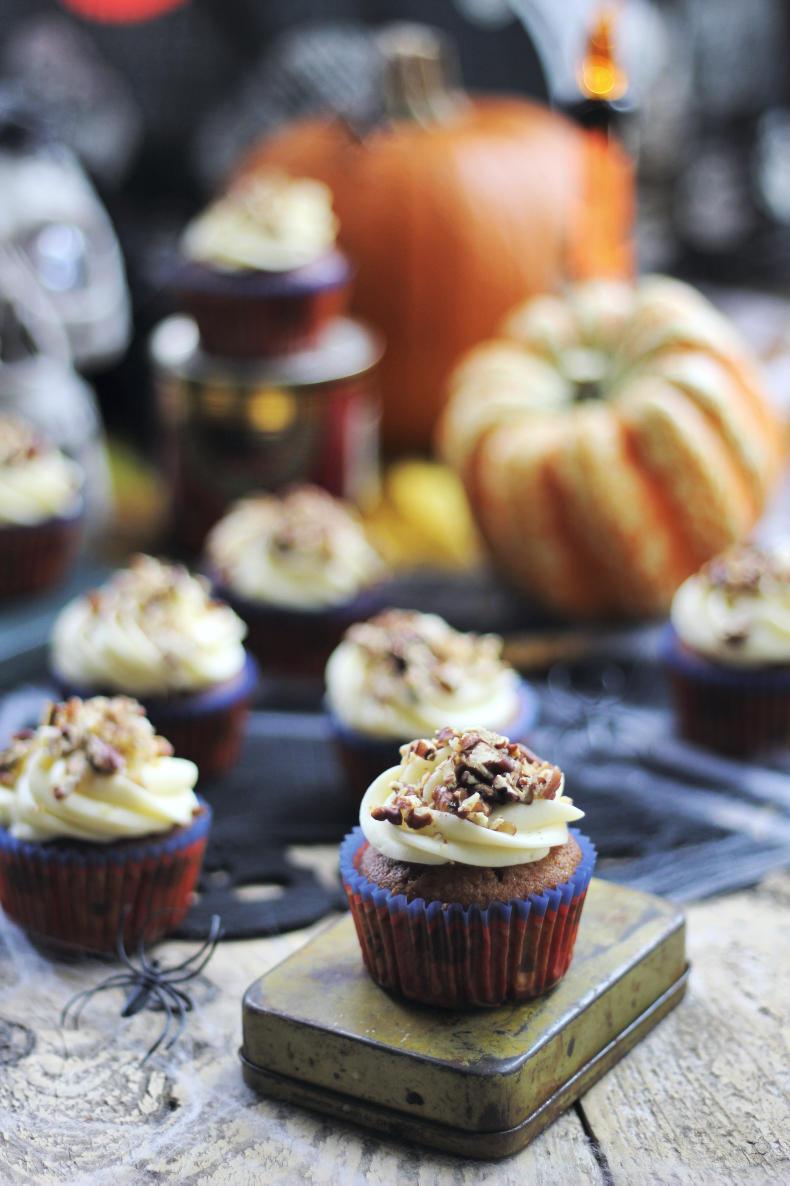
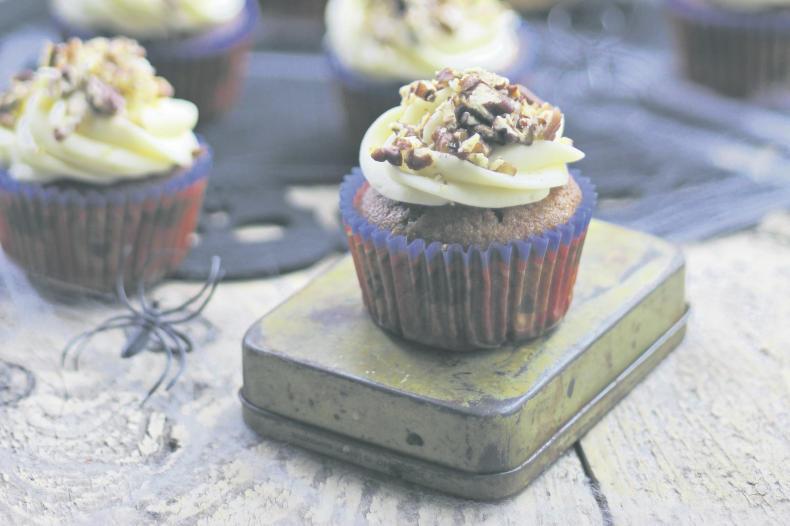
Spiced pumpkin muffins for Halloween. \ Nessa Robins
Spiced pumpkin muffins
These muffins are deliciously moist, due to the addition of the pumpkin puree. They are also incredibly effortless to make, simply adding the wet ingredients to the dry ingredients, making these muffins the perfect Halloween treat to make with young cooks.
125g plain flour
125g wholemeal flour
1 tsp baking powder
1 tsp mixed spice
1 tsp ground cinnamon
½ tsp ground cloves
½ tsp ground nutmeg
250g light muscovado sugar
4 free range eggs
200ml sunflower oil
250g pumpkin puree (see above)
1 tsp vanilla extract
For icing:
100g cream cheese
50g butter, softened
2 teaspoon vanilla extract
300g icing sugar, sieved
To decorate:
50g pecans
1 Preheat the oven to 190°C/fan 170°C/Gas five. 2 Sieve the flours, baking powder, spices and sugar into a large bowl. Tip into the bowl whatever remains in the sieve from the wholemeal flour.3 In another bowl, add the eggs and lightly beat with a hand whisk. Add the sunflower oil, pumpkin puree and vanilla extract, and combine.4 Pour the wet ingredients into the bowl with the dry ingredients. Stir well until all the ingredients are combined together.5 Divide the mixture between 16-18 muffin cases.6 Bake the muffins, in the preheated oven for 25 minutes until they are risen and golden. 7 Remove from the oven and leave to cool on a wire tray.
8 To prepare the pecans, add them to a baking tray and place them in the oven for five minutes. Transfer to a plate and once cooled, finely chop.9 While the muffins and pecans are cooling, make the creamy topping by combining the cream cheese, butter, vanilla extract and icing sugar in a bowl. Beat together until smooth and creamy. Scoop into a piping bag ready for decorating the muffins. 10 When the muffins have completely cooled, pipe some of the cream cheese topping on each and add a generous sprinkling of chopped pecans.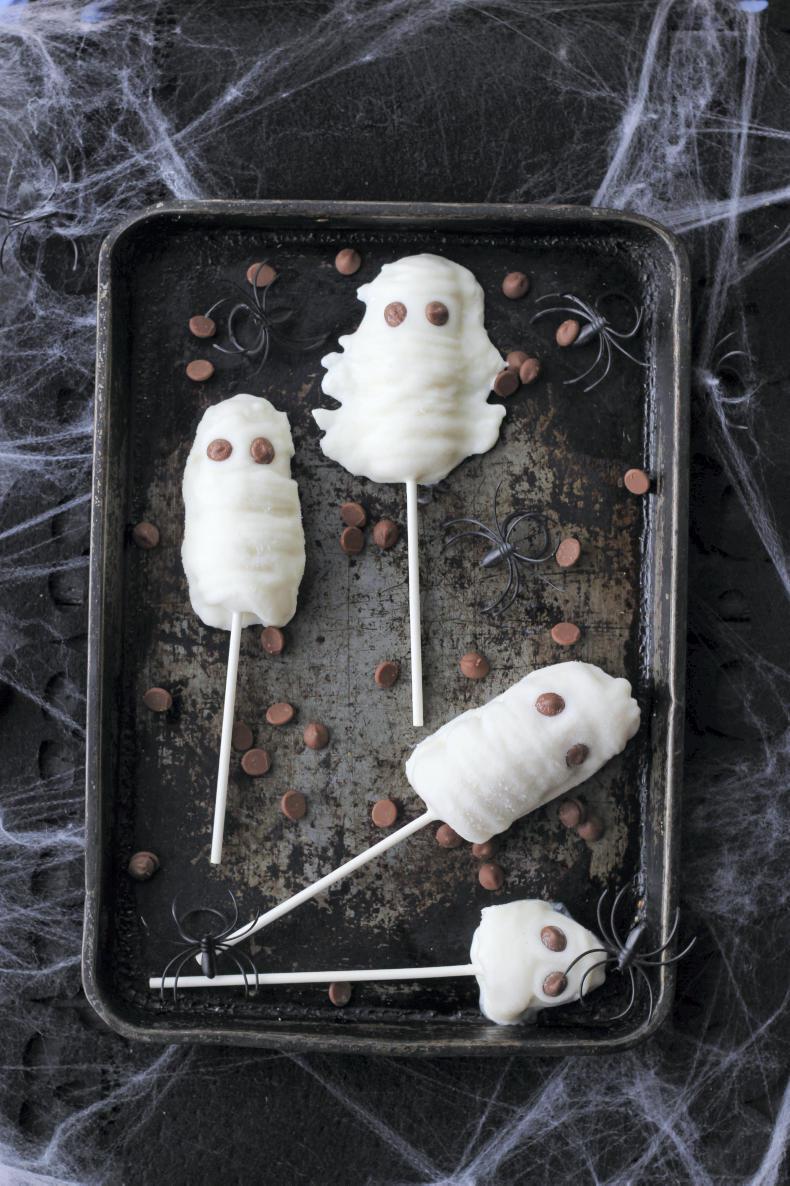
Banana mummies for Halloween. \ Nessa Robins
Banana mummies
These Halloween treats are so easy to make, as they are simply frozen yoghurt-covered banana pieces. They can be stored in the freezer for up to a week, but let them sit at room temperature for about 15 minutes before serving. Ensure the bananas are ripe, but not over-ripe as the ‘ghosties’ will only become mushy as they start to thaw.
2 bananas
150g Greek yoghurt
20g icing sugar, sieved
1 tsp vanilla extract
Handful of chocolate chips
8 lollipop/cake-pop sticks
1 Line a large baking tray, which will fit into your freezer, with a sheet of parchment paper. Peel each banana and cut in half across the middle and then slice in half along the length. Carefully skewer each banana piece with a lollipop stick and place them on the baking tray. Freeze for at least two hours, or overnight.2 In a bowl, combine the Greek yogurt, icing sugar and vanilla extract. Dip each of the frozen bananas into the yogurt mixture and place back on the baking tray. Add two chocolate chips to each one for the ghosties’ eyes. Return to the freezer for another two hours to allow the yoghurt to set. Place the remaining yoghurt mixture in a small sandwich bag and leave in the fridge until needed for decorating the ghosties.3 Once the ghosties are fully set, take from the freezer. Make a small snip at the corner of the yoghurt-filled sandwich bag and drizzle the yogurt over each pop. Place back in the freezer for about an hour to harden. 4 Take the pops from the freezer about 15 minutes before serving. Do not re-freeze once they have thawed. The banana ghosties can be made at least a week in advance and stored in the freezer. Just pop in a ziplock freezer bag once fully set.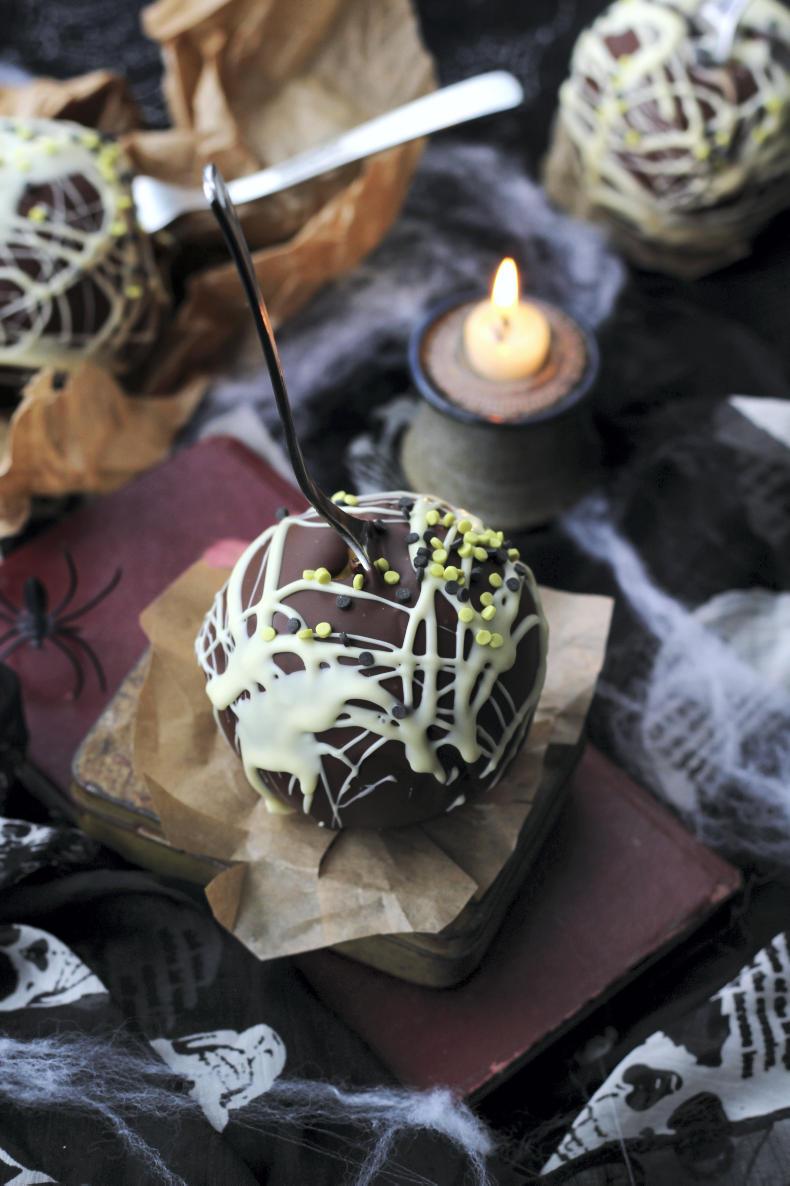
Chocolate apples for Halloween. \ Nessa Robins
Chocolate apples
If you are in search of something easy to make with the children, chocolate apples are a great choice. I find forks make the decorating and eating of the apples a lot easier than the traditional lollipop sticks. Pop the apples into the fridge the night before decorating them, as the cooled apples allow the chocolate to stick to it with more ease.
4 apples, rinsed and dried
4 forks
200g good quality milk chocolate
50g white chocolate
Sugar sprinkles to top
1 Refrigerate the apples for several hours or overnight. 2 Dry any condensation from the apples with some kitchen paper. Insert a fork into each apple. Place some greaseproof paper on a baking tray.3 In a heat-proof bowl over some simmering water, melt the milk chocolate.
4 Let the chocolate cool slightly for two minutes. Dip each apple into the milk chocolate, covering each apple completely. Allow excess to drain. Place on the greaseproof paper and leave to set, which will only take a few minutes.5 In a clean bowl, over some simmering water, melt the white chocolate. Once the chocolate on the apples has set, drizzle over the white chocolate. Sprinkle with toppings of your choice. Place the apples back on the paper and leave in the fridge until the chocolate hardens. Read more
Nessa Robins's easy recipes for breastfeeding mothers
Nessa Robins' recipes to boost brain power for successful study
Halloween and healthy treats rarely fall under the one umbrella. If your house is like mine, the loot gathered from an evening trick-or-treating is generally enough to cater for a child’s birthday party. As it is only one night of the year, I try not to nag. I loved Halloween as a child and one of the main attractions was the opportunity to gorge on goodies I would only dream about at other times of the year. So, I understand the temptation.
The only trick I can offer to other parents is to provide some nutritious foods early in the evening, leaving less space in little tummies for sweets and chocolates. I was many years into adulthood before I realised that my own mother had this plan sussed at an early stage, as each Halloween evening an offering of colcannon and fried eggs was traditionally served. This plate of buttered spuds and eggs was warmly embraced as it became a tradition. As much as I tried to continue this with my own crew, it only worked on two of the four children, so a few other dishes have had to step up to the mark.
Naturally, these dishes must have some sort of spook appeal, while also resembling what a witch or a demon of the night might offer at their banquet. Steaming hot bowls of soup go hand in hand with autumnal weather and make for a nutritious filler. Pumpkin soup is rather delicious and it’s a marvellous way to put our jack o’ lantern filling to good use. If serving at a Halloween bash, a scooped out pumpkin makes for a perfect serving bowl, and it also looks pretty impressive as a centerpiece.
A few treats are a must, and when there are so many sweets making an appearance, it’s nice to make a few nutritious but equally tasty alternatives. Chocolate-covered fruit, such as the obligatory Halloween chocolate apples, are a good offering. Coating some fruit pieces with yoghurt and setting them in the freezer offers a nutritional snack that also tastes great. However, I always find anything goes as a Halloween treat, once there are raisins or chocolate chips for eyes and some edible drizzle resembling blood. Happy Halloween.
Spiced pumpkin muffins for Halloween. \ Nessa Robins
Spiced pumpkin muffins
These muffins are deliciously moist, due to the addition of the pumpkin puree. They are also incredibly effortless to make, simply adding the wet ingredients to the dry ingredients, making these muffins the perfect Halloween treat to make with young cooks.
125g plain flour
125g wholemeal flour
1 tsp baking powder
1 tsp mixed spice
1 tsp ground cinnamon
½ tsp ground cloves
½ tsp ground nutmeg
250g light muscovado sugar
4 free range eggs
200ml sunflower oil
250g pumpkin puree (see above)
1 tsp vanilla extract
For icing:
100g cream cheese
50g butter, softened
2 teaspoon vanilla extract
300g icing sugar, sieved
To decorate:
50g pecans
1 Preheat the oven to 190°C/fan 170°C/Gas five. 2 Sieve the flours, baking powder, spices and sugar into a large bowl. Tip into the bowl whatever remains in the sieve from the wholemeal flour.3 In another bowl, add the eggs and lightly beat with a hand whisk. Add the sunflower oil, pumpkin puree and vanilla extract, and combine.4 Pour the wet ingredients into the bowl with the dry ingredients. Stir well until all the ingredients are combined together.5 Divide the mixture between 16-18 muffin cases.6 Bake the muffins, in the preheated oven for 25 minutes until they are risen and golden. 7 Remove from the oven and leave to cool on a wire tray.
8 To prepare the pecans, add them to a baking tray and place them in the oven for five minutes. Transfer to a plate and once cooled, finely chop.9 While the muffins and pecans are cooling, make the creamy topping by combining the cream cheese, butter, vanilla extract and icing sugar in a bowl. Beat together until smooth and creamy. Scoop into a piping bag ready for decorating the muffins. 10 When the muffins have completely cooled, pipe some of the cream cheese topping on each and add a generous sprinkling of chopped pecans.
Banana mummies for Halloween. \ Nessa Robins
Banana mummies
These Halloween treats are so easy to make, as they are simply frozen yoghurt-covered banana pieces. They can be stored in the freezer for up to a week, but let them sit at room temperature for about 15 minutes before serving. Ensure the bananas are ripe, but not over-ripe as the ‘ghosties’ will only become mushy as they start to thaw.
2 bananas
150g Greek yoghurt
20g icing sugar, sieved
1 tsp vanilla extract
Handful of chocolate chips
8 lollipop/cake-pop sticks
1 Line a large baking tray, which will fit into your freezer, with a sheet of parchment paper. Peel each banana and cut in half across the middle and then slice in half along the length. Carefully skewer each banana piece with a lollipop stick and place them on the baking tray. Freeze for at least two hours, or overnight.2 In a bowl, combine the Greek yogurt, icing sugar and vanilla extract. Dip each of the frozen bananas into the yogurt mixture and place back on the baking tray. Add two chocolate chips to each one for the ghosties’ eyes. Return to the freezer for another two hours to allow the yoghurt to set. Place the remaining yoghurt mixture in a small sandwich bag and leave in the fridge until needed for decorating the ghosties.3 Once the ghosties are fully set, take from the freezer. Make a small snip at the corner of the yoghurt-filled sandwich bag and drizzle the yogurt over each pop. Place back in the freezer for about an hour to harden. 4 Take the pops from the freezer about 15 minutes before serving. Do not re-freeze once they have thawed. The banana ghosties can be made at least a week in advance and stored in the freezer. Just pop in a ziplock freezer bag once fully set.
Chocolate apples for Halloween. \ Nessa Robins
Chocolate apples
If you are in search of something easy to make with the children, chocolate apples are a great choice. I find forks make the decorating and eating of the apples a lot easier than the traditional lollipop sticks. Pop the apples into the fridge the night before decorating them, as the cooled apples allow the chocolate to stick to it with more ease.
4 apples, rinsed and dried
4 forks
200g good quality milk chocolate
50g white chocolate
Sugar sprinkles to top
1 Refrigerate the apples for several hours or overnight. 2 Dry any condensation from the apples with some kitchen paper. Insert a fork into each apple. Place some greaseproof paper on a baking tray.3 In a heat-proof bowl over some simmering water, melt the milk chocolate.
4 Let the chocolate cool slightly for two minutes. Dip each apple into the milk chocolate, covering each apple completely. Allow excess to drain. Place on the greaseproof paper and leave to set, which will only take a few minutes.5 In a clean bowl, over some simmering water, melt the white chocolate. Once the chocolate on the apples has set, drizzle over the white chocolate. Sprinkle with toppings of your choice. Place the apples back on the paper and leave in the fridge until the chocolate hardens. Read more
Nessa Robins's easy recipes for breastfeeding mothers
Nessa Robins' recipes to boost brain power for successful study


SHARING OPTIONS