

We saw last spring, when the cold weather hit, the real struggle that farmers had trying to get water to stock.
While everyone will hope that the spring of 2018 is not repeated for a long time, more extreme weather conditions are something that farmers have to be able to cope with.
In an ideal world, every farm would have a frost proof water source to ensure they are never left vulnerable to cold conditions, but this will not happen.
Farmers will be reluctant to bring a digger into an existing yard and start ripping up concrete to put in a frost-proof hydrant that may be used for a week in the year.
However, where the real possibility exists is to install one if you are putting up a new shed or parlour. There is a lot of work being done on farms currently in the lead up to Christmas and a last-minute addition can make life much easier during periods of hard frost where you can be guaranteed to have running water no matter what the conditions.
The Irish Farmers Journal spoke to Liam Glynn of Glynns Homevalue in Tuam, Co Galway who has installed the system on several farms, to see what is needed.
Installation
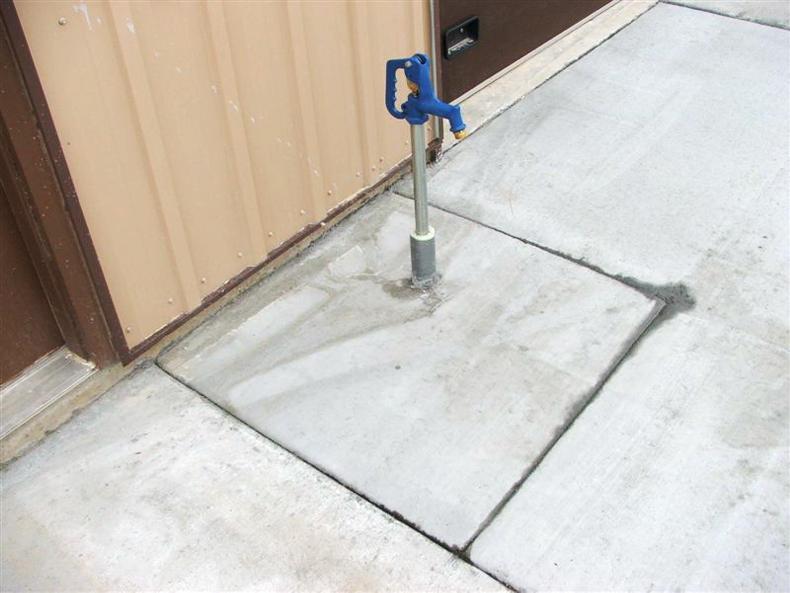
Ideally you want to locate the hydrant in a south facing side of the shed so that it will get some heat from the sun.
Locate it so that troughs can be conveniently filled also.
1 The first step is to expose the existing water pipe. Dig the hole at least 4ft deep and wide enough to work in. Ensure that the hole is about 12” below the frost line for your area. The frost line is described as the depth in the ground that reaches freezing temperatures during the winter months and at most is 2-3ft. Install a support post that is 7ft long, 5ft below ground level that the hydrant will be attached to.
2 Cut the pipe and attach the fitting for the hydrant to the pipe. Then fill the base of the hole with clean, coarse stone up to the level of the pipe. Ideally you want 12” of stone below the pipe to allow for sufficient drainage. Use no smaller than 0.75inch gravel to ensure sufficient drainage.
3 Now remove any plugs from the hydrant and attach to the support post and connect water mains to the hydrant.
Turn on the water and test the hydrant to ensure water is coming out through the valve and that the riser pipe of the hydrant is emptying completely through the drain port.
4 It is recommended to put a small bucket or container around the drain port to ensure it does not get blocked. Once this is done add another layer of stone to approximately three inches above the drain port.
5 Place a layer of geotextile material over the stone to prevent soil seeping down through the stone which could affect drainage. Finally fill the whole with clay and compact.
If you pour concrete around the base of the hydrant it can cause problems as the water will not be able to drain away and concrete also conducts frost. If the hydrant is installed through a concrete floor or slab then insulate the portion of the standpipe in contact with the concrete and also lay insulation beneath the concrete for a square metre around the hydrant. The hydrant costs just under €90.


SHARING OPTIONS