Serves eight
If you have a good carrot cake recipe in your back pocket you’re sorted for life. What makes this cake really stand out is the heirloom carrots, which are sliced thinly and scattered on top, so look out for different coloured carrots. Orange, purple, yellow, pink are all going to lift this cake to the next level.
460ml vegetable oil
200g natural yoghurt
8 large eggs
3 tsp vanilla extract
2 orange, zested
530g self-raising flour
670g light muscovado sugar
5 tsp ground cinnamon
½ fresh nutmeg, finely grated
530g carrots grated
200g raisins
200g walnuts
For the icing:
440g butter
500g icing sugar
400g soft cheese, eg mascarpone
400g cream cheese
To decorate:
2-3 heirloom carrots or sweet bog carrots. The more colours you can get hold of, the better

1 Preheat the oven to 160°C fan.2 Grease and line three nine-inch springform tins.3 Mix your oil, eggs, yoghurt, vanilla and orange zest together in a bowl.4 Separately, mix together your flour, sugar, cinnamon and nutmeg in a bowl.5 Fold your dry ingredients through your wet ingredients and then fold in the carrots, nuts and raisins.6 Pour your batter evenly into your three tins and bake for 30 to 35 mins until the cake is set and a skewer or knife comes out clean. 7 Leave to cool fully before icing.8 When you’re ready to ice the cake, beat together the butter and sugar in a stand mixer with the paddle attachment until it’s light and fluffy.9 Add in both your cheeses and then beat again until fully combined and there are no lumps.10 Place one cake layer on your cake plate and spread one third of the icing decadently with a hot knife. If you would like to achieve the look in the picture, get a piping bag and pipe little dollops of icing around the perimeter. Place the next layer on top and repeat, followed by the third layer.11 To decorate the top of the cake, peel the outer layer of the heirloom carrots. Then, using a peeler, peel thin slices of the carrots. Arrange on top. Ukrainian Easter Doughnuts
Serves 10-12

Ukrainian Easter Doughnuts. \ Claire Nash
We’re thinking of all the Ukrainian people who will be having a very different Easter this year. This is a recipe that is traditionally made in Ukraine and right across Eastern Europe at Easter time. It’s called Pampushky, which also means gorgeous plump woman, quite fitting given their beautiful appearance.
500g strong white bread flour
60g golden caster sugar
15g fresh yeast, crumbled
4 eggs
150g water
2 tsp fine sea salt
125g softened unsalted butter
For the filling:
4 tbsp blueberry jam
Edible flowers, to decorate

1 Put all of the ingredients apart from the butter into your stand mixer and mix for 8 minutes on medium until its sticky but smooth.2 Slowly add the butter little by little and once all is added beat for another 5 minutes until smooth.3 Grease a metal bowl and put your dough in, covered with cling film, to prove for two hours.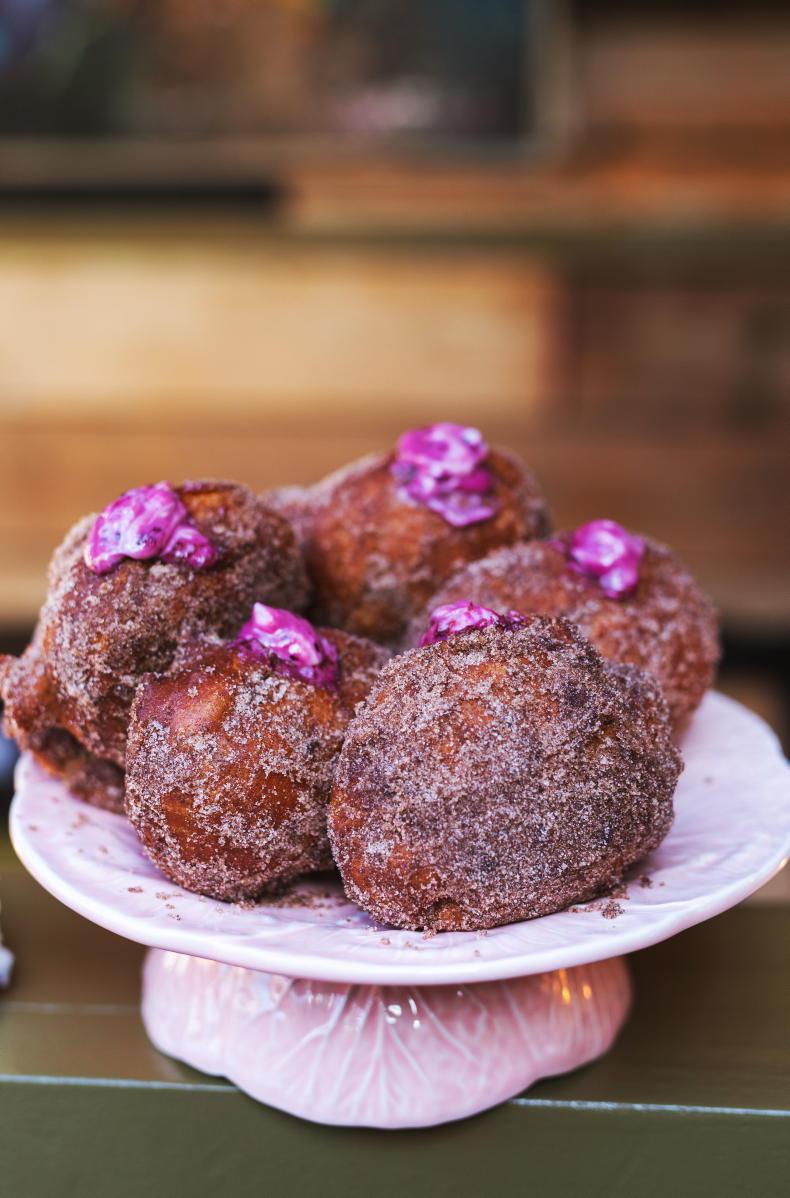 4 After proving, take your dough out and place onto a well-floured surface and knock all the air out. Divide your dough into 10-12 even pieces and shape into balls.5 Put each ball onto a floured tray and cover again to prove for another hour.6 Heat the oil in your deep fat fryer to 150°C and lower gently, for about five to six minutes until they are golden brown. Alternatively, but carefully, use a pan and very gently fry three to four doughnuts at a time giving them three to 4 minutes on each side. You’ll see that they’ll puff up when ready. 7 Once they’re cooked, gently take them out and let them drain on a wire rack for a minute before you toss them in caster sugar.8 If filling, let them cool completely first.9 Pierce a small incision and pipe in a dollop of blueberry jam. Decorate with edible flowers.
 Chocolate & Pear Frangipane Tart

Chocolate & Pear Frangipane Tart. \ Claire Nash
Serves eight
This is a really unique take on a chocolate tart for Easter. The pears add such a soft sweetness to the mix and I just love the crunch on top that comes from the almonds. It’s one of the most popular desserts on our cake buffet and the best thing is it doesn’t dry out for ages. So it will sit there happily for the Easter weekend. Reheat for a few minutes in the oven and enjoy with a steaming cuppa.
250g caster sugar
250g butter
250g ground almonds
2 tbsp cocoa powder
4 eggs
3-4 pears
1 portion of short crust pastry (I like to use Roll It Pastry made by Mairead Finnegan in Co Meath)
Handful of flaked almonds, to decorate
1 Preheat your oven to 150°C.2 Roll out your pastry into your greased tart tin and trim the edges to fit the tin. Put it in the fridge to set for 30 minutes.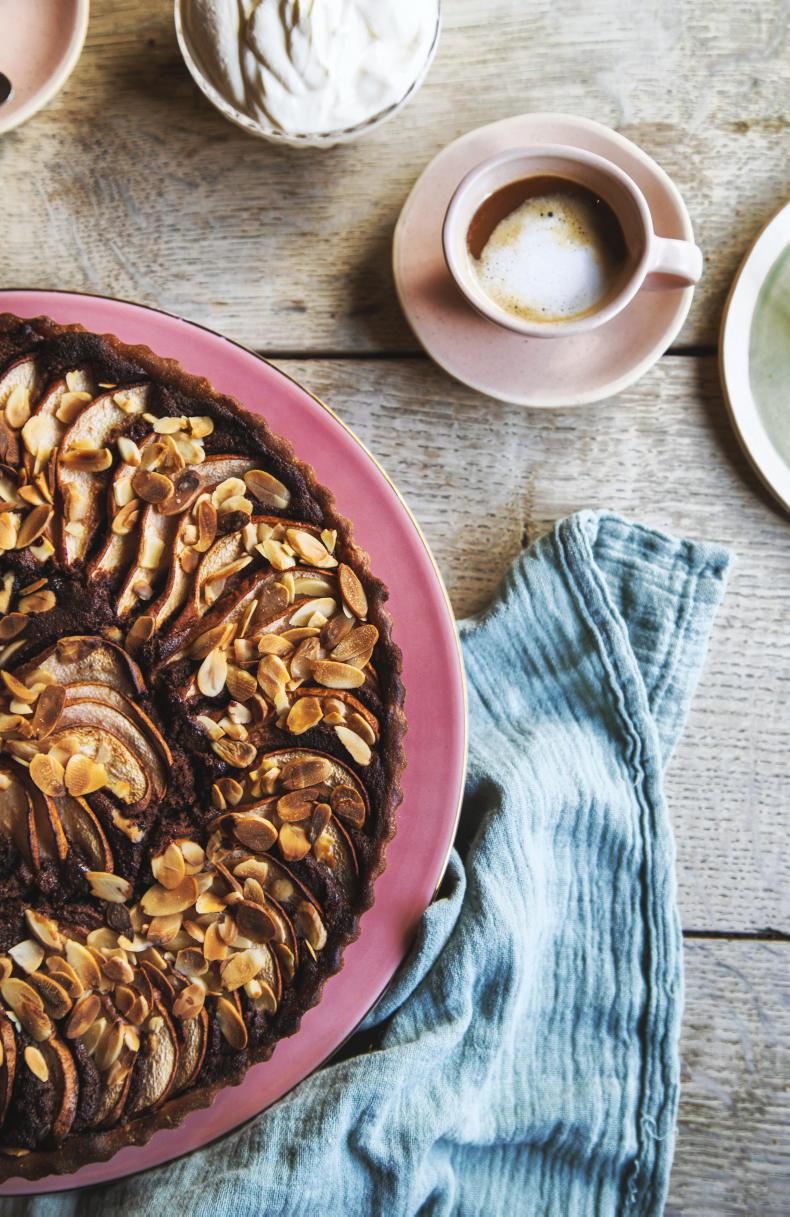 3 Put your butter and sugar into a stand mixer with the paddle attachment and beat until light and fluffy.4 Then add your eggs one by one with the mixer on medium low until they are all fully combined.5 Turn off your mixer and add in all your dry ingredients.6 Turn your mixer back on at the lowest setting until all the dry ingredients are well combined and then turn it up to medium high to fluff it up.7 Scoop your frangipane mix into your pastry and flatten out.8 Cut the pear in half and using the fat bottom, slice at an angle about 0.3cm. If you push it down it creates a fan effect. Arrange on top with a handful of flaked almonds. 9 Bake your tart for 50 to 60 minutes or until the centre is fully cooked through.10 Leave to cool a bit before cutting.
Tip: Although you can serve with
cream, this cake has enough
sweetness to carry something a little more savoury. My personal favourite
is a dollop of Glenisk Greek-style
yoghurt, plus the added bonus is there’s no whipping required.
Mum’s Big Campari Problem Pavlova
Makes 10-12
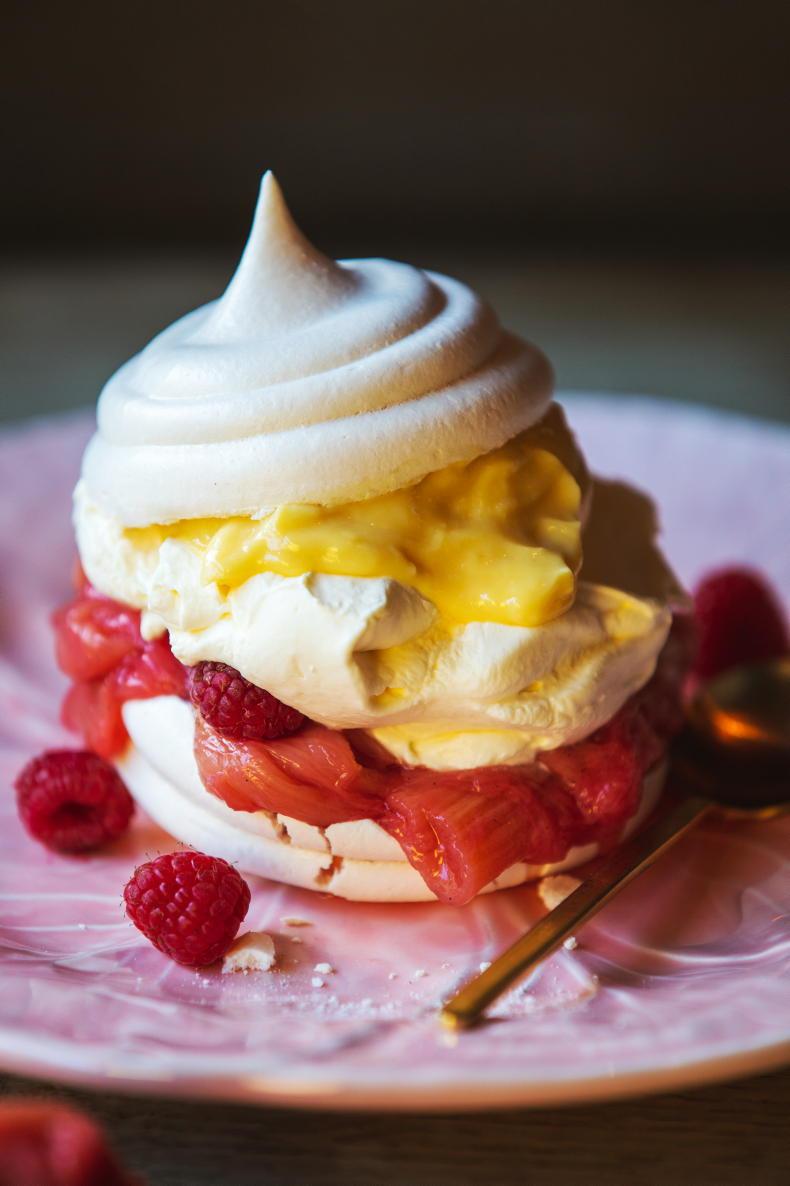
My Mum loves cooking with Campari. She’ll put a dash of it on lots of fruit but her favorite is rhubarb or strawberry. It cuts through the bitterness of the rhubarb and it’s just fab. You could just serve up the rhubarb mixture with some vanilla ice cream and its gorgeous but the pavlova brings it to another level.
For the pavlova:
5 egg whites
310g caster sugar
1 tbsp cornflour
1 tbsp apple cider vinegar
For the rhubarb:
230g rhubarb
250g sugar
50ml Campari
Squeeze of lemon
To serve:
Handful of raspberries
4 tbsp lemon curd
1 Preheat the oven to 180°C fan.2 Clean and trim the rhubarb, cutting into 1cm cubes. Arrange on a roasting tin and cover with the sugar, Campari and lemon. Bake for 20 minutes and leave to cool.  3 Lower the temperature of your oven to 110°C fan or 130°C no fan.4 Whisk up the egg whites in a stand mixer until stiff. 5 Slowly add in the caster sugar and cornflour and then mix for another minute until glossy and the sugar has started to dissolve.6 Add in the vinegar and let it mix again for another 30 seconds. It should be stiff and glossy.7 Once it’s ready, scoop your mix with a spatula out into a piping bag and pipe whatever shape pavlova you like, or you can use the spatula to scoop it straight onto a parchment-lined baking tray.8 Bake in preheated oven for 50 minutes and then turn off the oven, crack the door open to let them cool slowly and leave to cool completely before using.9 To assemble, place the pavlova in a bowl. To assemble, layer with the rhubarb, topped with the raspberries and lemon curd.
 Tip: Don’t overthink the decoration on this one. It’s supposed to look fun and chunky and messy. If it’s leaning over on one side, all the better. This is like a sweet hug in a bowl and it doesn’t need to look too pretty.


SHARING OPTIONS