

As we approach the end of the cropping season, now is the perfect time to take stock of the structural quality of your soil and develop a plan to remedy damage.
Compaction and soil structural damage are not limited to headlands and can occur anywhere in the field, especially where machinery has operated in wet conditions. Last autumn was a prime example of this, although arguably the drought in spring may have helped address some of these issues through cracking of the ground.
Good soil structure underpins crop production. The decline in structural quality can often lead to soil degradation and compaction. This results in a range of knock-on effects, such as reduced water infiltration and air permeability and increased runoff,
leading to poor root establishment and reduced fertiliser use efficiency.
However, soil structure is relatively easy to visually assess in the field. Every grower should at least aim to assess the known problem areas of fields after harvest, if ground conditions allow.
Teagasc, UCD and the Department of Agriculture have published a simple handbook to help growers assess soil structure. The process is simplified to A, B and C.
There are three parts to soil structure: form, stability and resilience. Structural form is perhaps the most important element when discussing structure. Form can be described as the architecture of the soil, because it refers to the physical arrangement of its building blocks. The building blocks or aggregates are naturally formed when clumps of sand, silt and clay particles stick together.
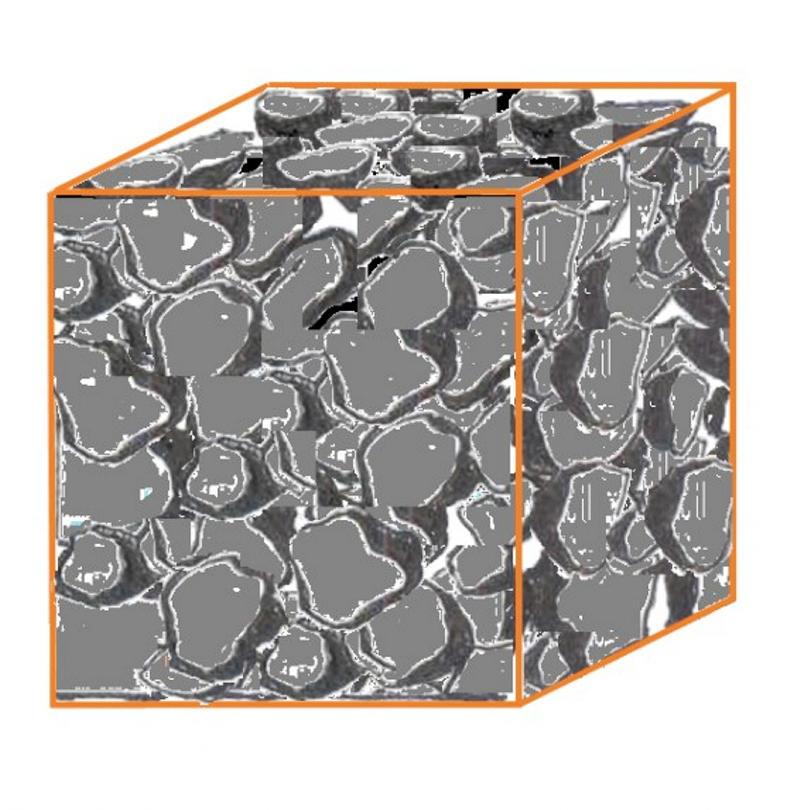
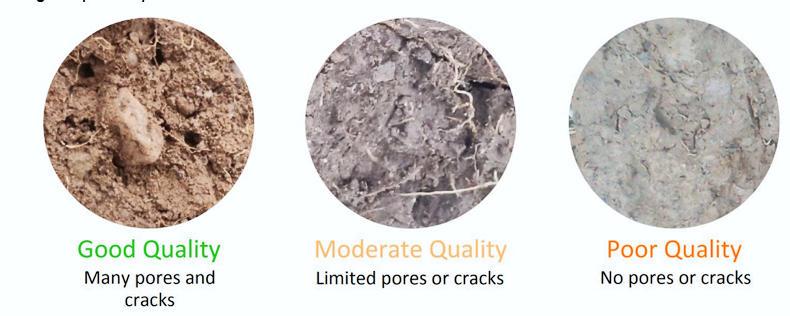
The micro- and macro-pores, cracks, gaps and spaces, both within and between the aggregates, are referred to as the soil porosity.
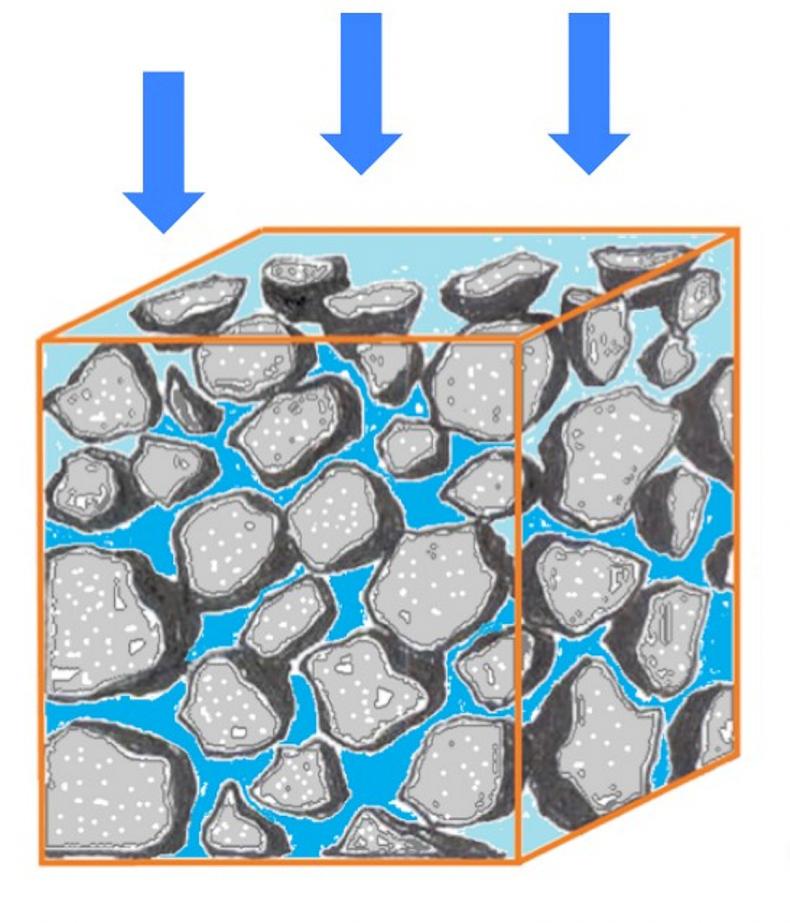
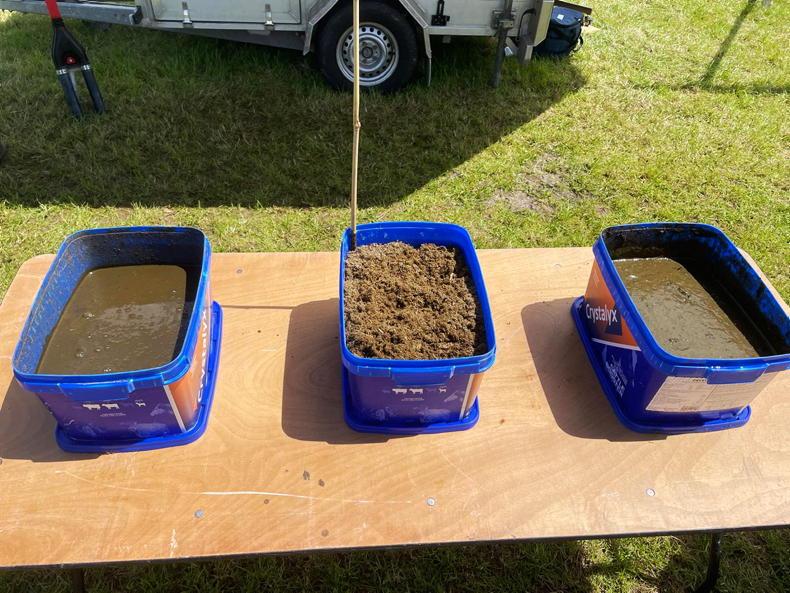
In structurally sound soils, water will start to drain down through the soil, soaking into aggregates and filling the micro-pores, draining down through the macro-pores. Macro-pores allow the rapid drainage of excess water, while micro-pores help to retain or store some water to sustain plant and soil life.
However, when the structure is damaged by compaction, the soil aggregates are squashed together, reducing the amount of macro-pores and in severe cases, reducing the amount of micro-pores. In this case, water will be restricted from draining through the soil.
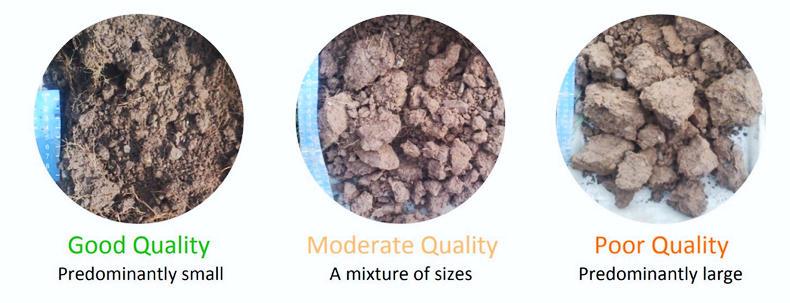
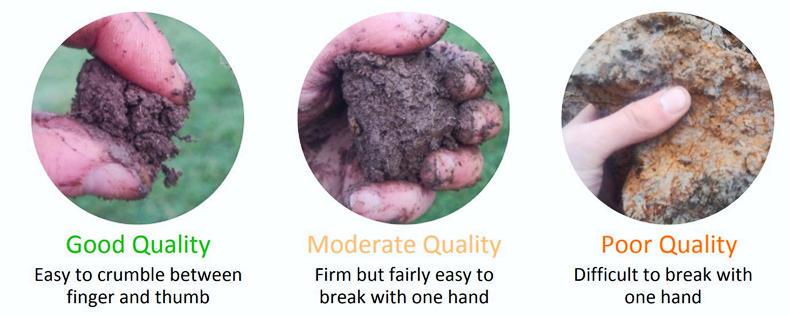
Soil structure can be visually assessed by breaking down a sample of soil by hand and looking at the different features.
The results from this visual inspection will not only indicate the soil structural quality, but also inform future management practices. There are two visual soil evaluation techniques which are commonly used on tillage lands. These are the visual evaluation of soil structure (VESS) method and the double spade method.
For assessing tillage topsoil structure, it is recommended to use the VESS method. This assesses the soil to 25cm depth. If you are worried about what is happening below the cultivation zone (eg plough pans), use the double spade method, which assesses to a depth of 40cm.
Both methods require a spade, a measuring tape, a plastic sheet or tray and a knife or trowel. VESS takes roughly 15 minutes and the double spade method takes 20 minutes per assessment. These assessments should be carried out when the soil is moist, but not waterlogged.
Preparing the soil for assessment
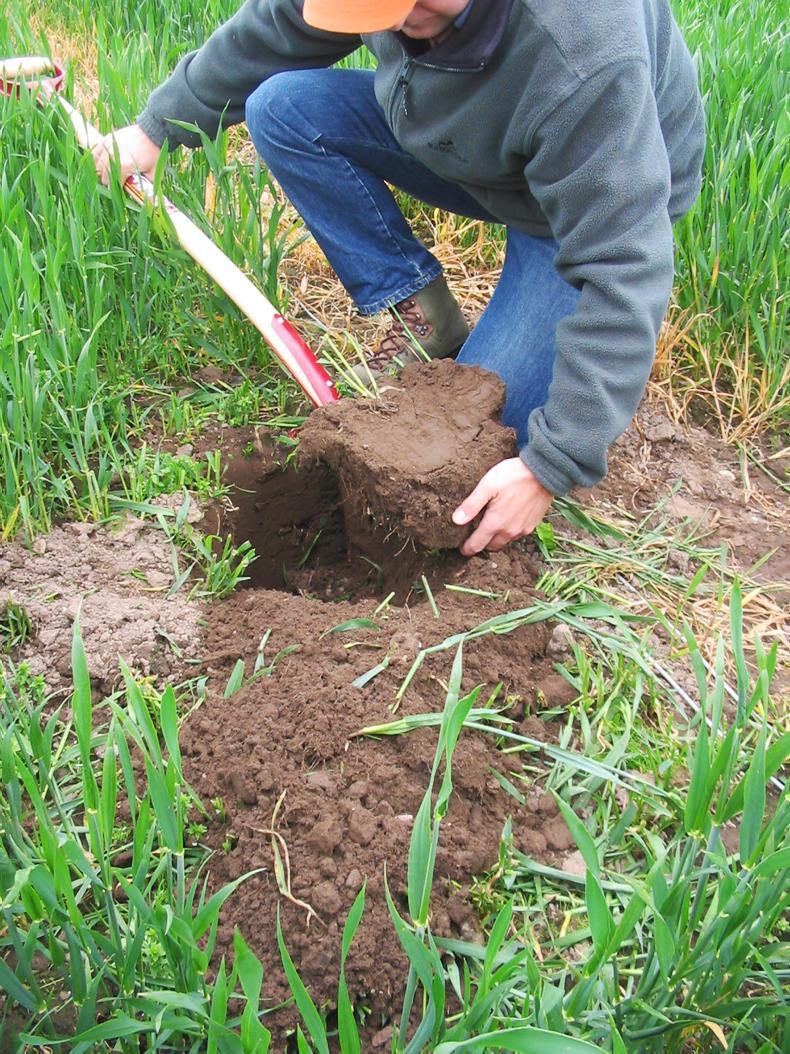
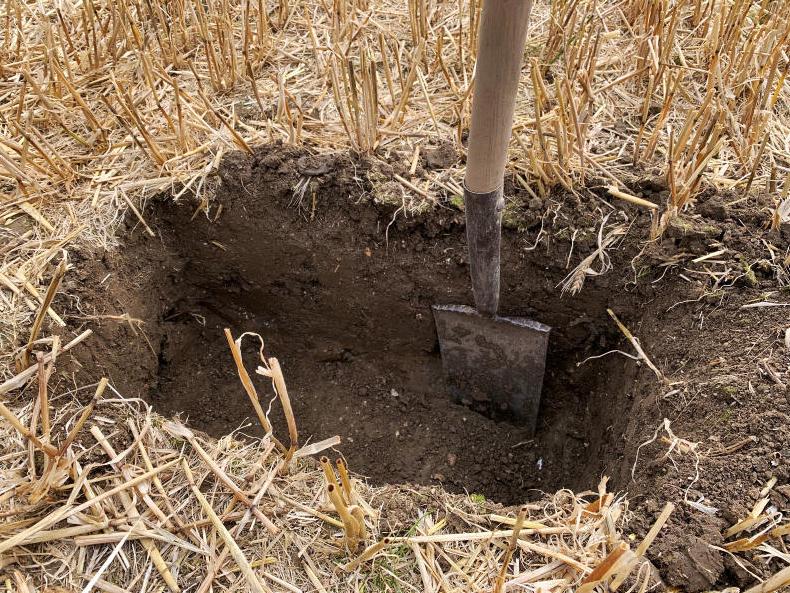
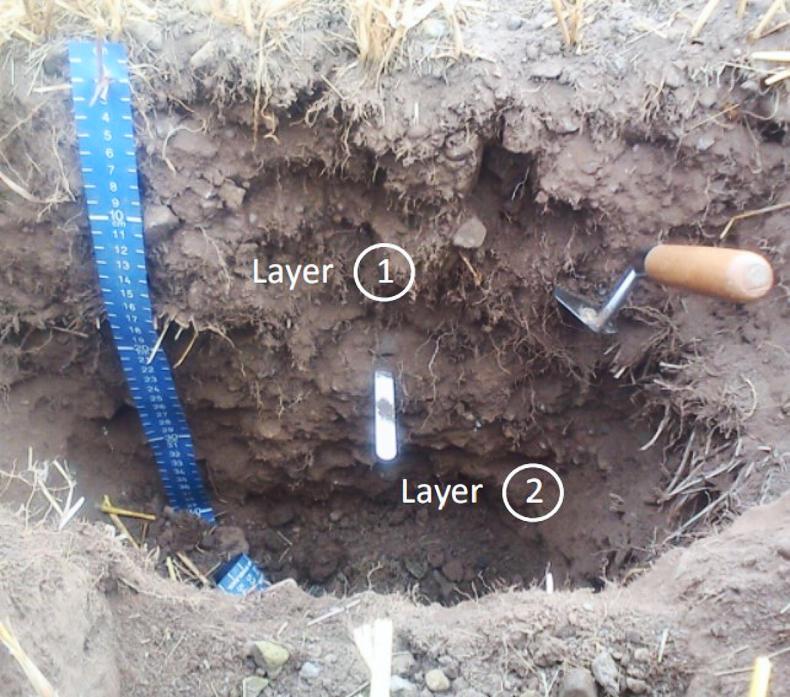
Choose a problem area in the field and prepare the soil for assessment. VESS involves extracting a sample block of topsoil out of the ground, while double spade involves assessing the wall of a soil pit.
VESS
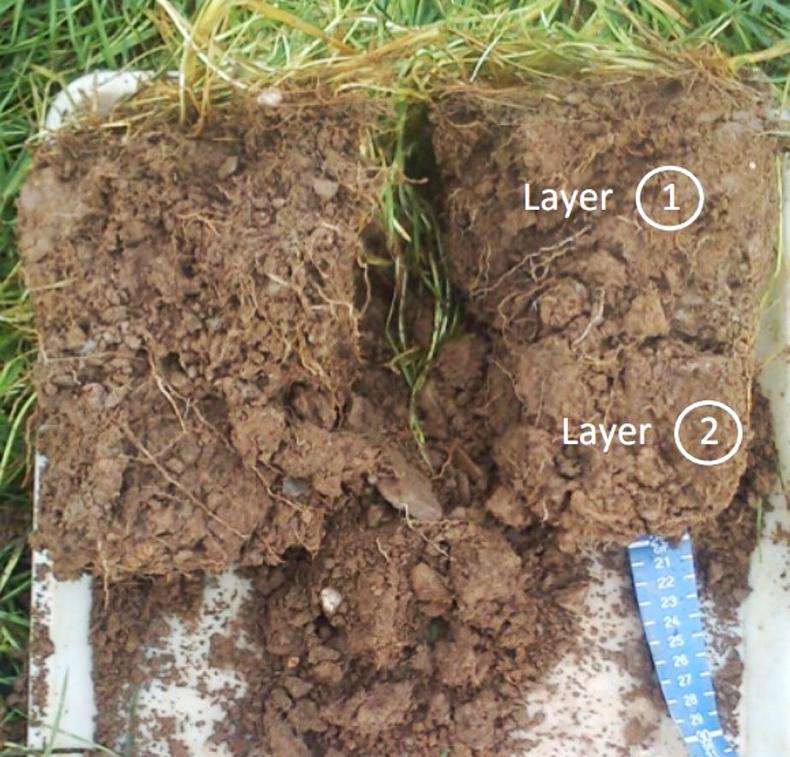
Double spade
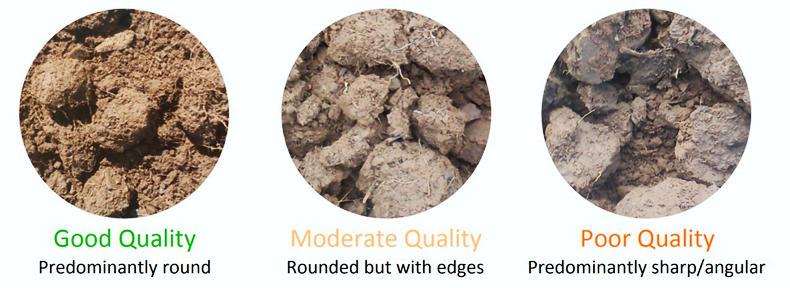
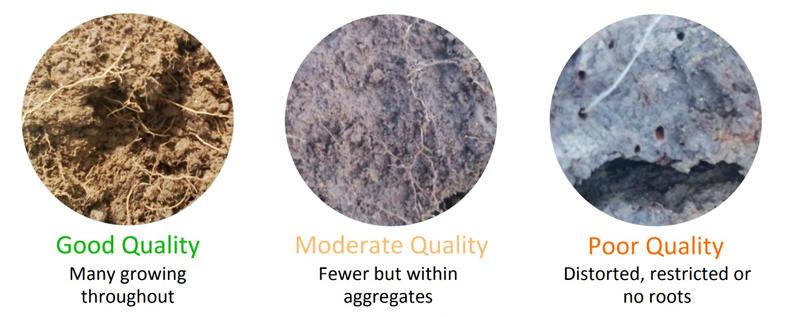
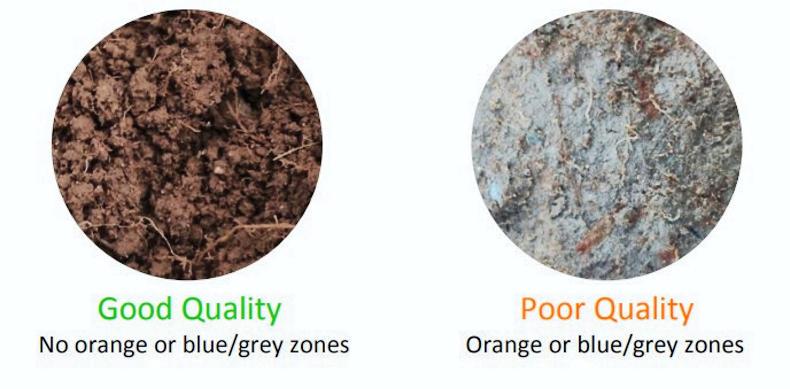
Soil features to examine
The soil features examined are the same for the three methods, however individual score sheets are available for each method.
This section gives a general overview of how the soil’s features relate to soil quality.
Damaged soil structure has a cost, in terms of production, economics and the environment.
From the information gained from section B, growers must then determine how to conserve, enhance and fix soil structure in order to maximise the production potential of their fields.
This section describes the key considerations to help achieve this.
Know your soil structure
Once you visually assess your soil structure, determine whether your management is having a negative impact and if there are problems which need to be addressed. Be mindful of the depth and position of the damage as this will help determine what is necessary to fix the problem.
For example, if the damage is near the surface (0cm to 15cm in depth), the soil may recover naturally by the action of the roots, adjusting establishment methods, earthworms and other soil organisms. If the damage is severe and occurs deeper (>15cm in depth), then mechanical intervention may be necessary.
Preventing soil structural damage is far better than having to fix it, especially subsoil compaction. Research suggests compaction below 40cm in depth may be semi-permanent. The following steps should be routinely used to prevent damage:
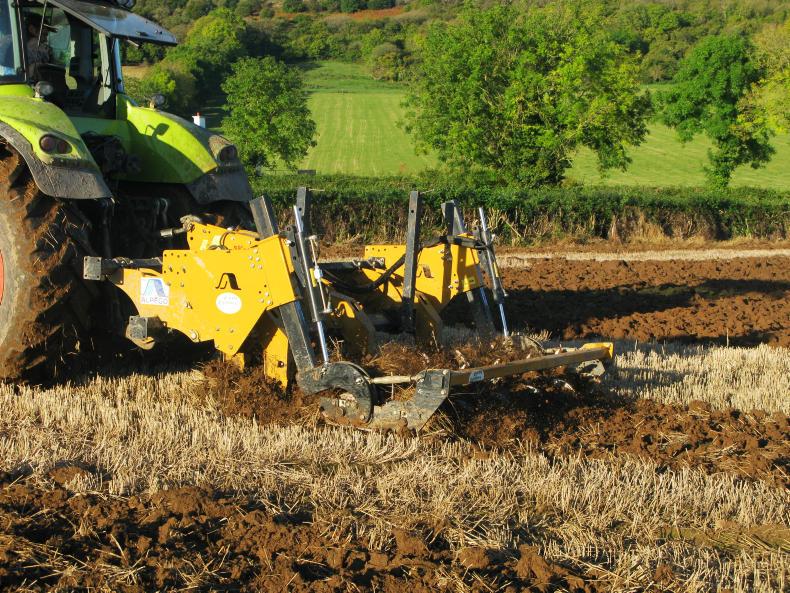
Worst case scenario: mechanical intervention
Where soil structure is very badly damaged and natural recovery is not possible, mechanical intervention may be necessary.

SHARING OPTIONS