While 70% of cows and 50% of heifers will calve by themselves, many will require assistance to avoid loss of the calf and potentially the cow themselves. It is important to understand the stages of calving, what the normal behavioural signs are for each stage, and when intervention or veterinary assistance are required. A cow gradually progresses through three stages of labour to deliver her calf.
Stage 1
Calf moves into position, cervix and birth canal begin to dilate.
Common signs: Relaxation of the sacrosciatic ligament (pin bones), restless behaviour, raised tail head, vocalisation, full udder (+/ – running milk) and mucus discharge (grinding of teeth at this stage may be a sign of milk fever or mastitis). Stage 2
Cervix fully dilated, calf moves through the birth canal and is eventually delivered. The calf is covered by two membranes. The outer membrane (water bag) often ruptures as it passes through the cervix, before it becomes visible. The membrane directly surrounding the calf is called the amnion and is a white-clear membrane when compared to the darker outer membrane.
Common signs: Appearance of the inner membrane covering the calf’s legs, straining. In normal deliveries, this stage lasts from 30 minutes to four hours, but may be longer in heifers. If a cow is moved during labour, the point at which she is moved can increase the length of labour.
A longer stage 2 labour is associated with increased stillbirths, dystocia and inflammation post-calving.
Stage 3
Passing of the placenta, which normally occurs within 30 minutes to eight hours post-calving.
It is important for each farm to establish their own standard operating procedure when assisting during calving, along with proper staff training. Guidelines for making the decision to intervene include:
If a cow is restless for more than four hours but does not start straining. If a cow is straining but no part of the calf is showing after two hours.If feet and/or nose are showing but the calf is not delivered after two hours.If the calf is not presenting normally, then intervention is required. A uterine examination will tell you a few things – if the cervix has dilated properly, if the calf is dead or alive, or if the calf is presenting normally.
A normal forward presentation (typical) is when the front legs and head come first and the calf is lying on its stomach (ie calf’s back next to cow’s back).
A normal backwards presentation is when the back legs are coming first, again with the calf lying on its stomach.
Never pull a calf presented in any other position, because you could kill both the cow and calf.
A calf that is coming backwards needs to be delivered more quickly as they can suffocate, but this may be more difficult, as the calf’s head will not have dilated the uterus.
If the calf is not presenting normally
Look for landmarks that will help you identify how the calf is presented e.g., a knee or hock joint, a tail, some part of the head (if the head is facing back it might be an ear). Many of these positions can be corrected if found early in the labour process.
If there is a leg down, cup the hoof in your hand when repositioning to prevent uterine damage. If you are inexperienced call for veterinary practitioner as this can be difficult. It may happen that you can’t feel any part of the calf, and if the labour has been progressing for some time this can mean that the uterus hasn’t dilated or there is a uterine torsion and veterinary assistance will be required.
Is the calf too big?
Determining the size of the calf relative to the birth canal is critical and requires some experience.
How easy is it to carry out a uterine exam on the cow? If this is difficult, then help should be sought from your veterinary practitioner. How much space is there between the calf’s head and the pelvic canal? You should be able to put your hand around the calf’s head comfortably. If the front legs are crossing, this means the space is restricted and it is unlikely there is room for the calf to be delivered. Size of the legs (back legs tend to be lighter). Sex of the calf (males are bigger).Sire used (some breeds have larger hips), size of previous calves from this sire (especially if stock bull).Due date and stage of season (calves tend to get bigger later in the calving season).The nutrition and body condition of the dam (fat deposits can restrict birth canal space, while a very thin cow may not have the energy to calve).Assistance required
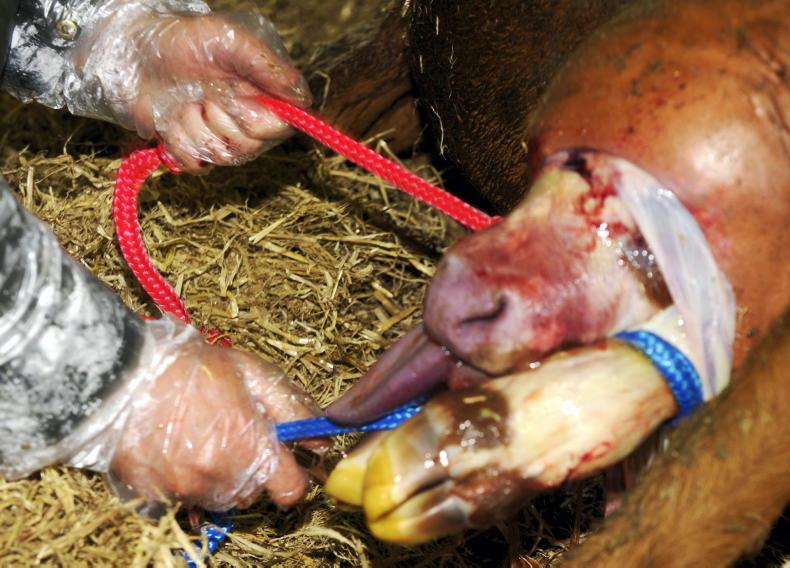
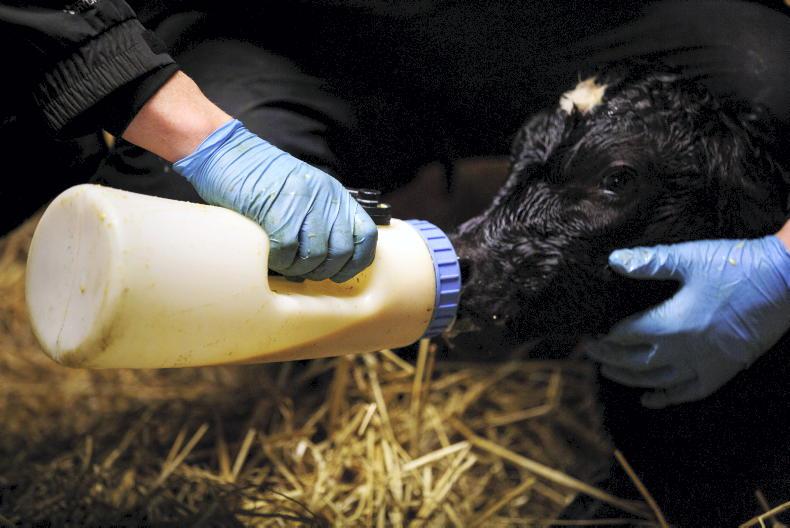
If they can stand, stall the cow before beginning. Ensure the gate is easy to open to prevent choking if they go down. If this happens, lie her out flat before continuing.Place a separate rope on each leg above the first joint. Before applying traction, gel should be applied. Pull both legs gently with even pressure and work with the cow’s contractions. Patience is needed, as the contractions help dilate the birth canal. If additional force is necessary, only use a calving jack, and carefully, as any other device will cause damage.Once the head is out, pull the calf out and down at a 45° angle to the cow’s spine – once the rib cage is out, the downward angle can be increased.One cause of calf death and damage to the dam is hip lock. If this happens, rotating the calf may create a new angle for the hips to pass through the cow’s pelvis. If the calf has trouble breathing, clear the mouth and nose of mucus and stimulate breathing by scratching the inside of the nose with straw, placing a drop of clean cold water in its ear, rubbing each side of chest with straw, swinging the calf by the back legs, or using the calving jack in an upright position or over a gate to allow the calf to clear its lungs.Proper facilities and hygiene are essential for a safe and successful calving. Good ropes, a calving jack, gel and clean water are other essentials, and record keeping will aid in calving management.
While 70% of cows and 50% of heifers will calve by themselves, many will require assistance to avoid loss of the calf and potentially the cow themselves. It is important to understand the stages of calving, what the normal behavioural signs are for each stage, and when intervention or veterinary assistance are required. A cow gradually progresses through three stages of labour to deliver her calf.
Stage 1
Calf moves into position, cervix and birth canal begin to dilate.
Common signs: Relaxation of the sacrosciatic ligament (pin bones), restless behaviour, raised tail head, vocalisation, full udder (+/ – running milk) and mucus discharge (grinding of teeth at this stage may be a sign of milk fever or mastitis). Stage 2
Cervix fully dilated, calf moves through the birth canal and is eventually delivered. The calf is covered by two membranes. The outer membrane (water bag) often ruptures as it passes through the cervix, before it becomes visible. The membrane directly surrounding the calf is called the amnion and is a white-clear membrane when compared to the darker outer membrane.
Common signs: Appearance of the inner membrane covering the calf’s legs, straining. In normal deliveries, this stage lasts from 30 minutes to four hours, but may be longer in heifers. If a cow is moved during labour, the point at which she is moved can increase the length of labour.
A longer stage 2 labour is associated with increased stillbirths, dystocia and inflammation post-calving.
Stage 3
Passing of the placenta, which normally occurs within 30 minutes to eight hours post-calving.
It is important for each farm to establish their own standard operating procedure when assisting during calving, along with proper staff training. Guidelines for making the decision to intervene include:
If a cow is restless for more than four hours but does not start straining. If a cow is straining but no part of the calf is showing after two hours.If feet and/or nose are showing but the calf is not delivered after two hours.If the calf is not presenting normally, then intervention is required. A uterine examination will tell you a few things – if the cervix has dilated properly, if the calf is dead or alive, or if the calf is presenting normally.
A normal forward presentation (typical) is when the front legs and head come first and the calf is lying on its stomach (ie calf’s back next to cow’s back).
A normal backwards presentation is when the back legs are coming first, again with the calf lying on its stomach.
Never pull a calf presented in any other position, because you could kill both the cow and calf.
A calf that is coming backwards needs to be delivered more quickly as they can suffocate, but this may be more difficult, as the calf’s head will not have dilated the uterus.
If the calf is not presenting normally
Look for landmarks that will help you identify how the calf is presented e.g., a knee or hock joint, a tail, some part of the head (if the head is facing back it might be an ear). Many of these positions can be corrected if found early in the labour process.
If there is a leg down, cup the hoof in your hand when repositioning to prevent uterine damage. If you are inexperienced call for veterinary practitioner as this can be difficult. It may happen that you can’t feel any part of the calf, and if the labour has been progressing for some time this can mean that the uterus hasn’t dilated or there is a uterine torsion and veterinary assistance will be required.
Is the calf too big?
Determining the size of the calf relative to the birth canal is critical and requires some experience.
How easy is it to carry out a uterine exam on the cow? If this is difficult, then help should be sought from your veterinary practitioner. How much space is there between the calf’s head and the pelvic canal? You should be able to put your hand around the calf’s head comfortably. If the front legs are crossing, this means the space is restricted and it is unlikely there is room for the calf to be delivered. Size of the legs (back legs tend to be lighter). Sex of the calf (males are bigger).Sire used (some breeds have larger hips), size of previous calves from this sire (especially if stock bull).Due date and stage of season (calves tend to get bigger later in the calving season).The nutrition and body condition of the dam (fat deposits can restrict birth canal space, while a very thin cow may not have the energy to calve).Assistance required
If they can stand, stall the cow before beginning. Ensure the gate is easy to open to prevent choking if they go down. If this happens, lie her out flat before continuing.Place a separate rope on each leg above the first joint. Before applying traction, gel should be applied. Pull both legs gently with even pressure and work with the cow’s contractions. Patience is needed, as the contractions help dilate the birth canal. If additional force is necessary, only use a calving jack, and carefully, as any other device will cause damage.Once the head is out, pull the calf out and down at a 45° angle to the cow’s spine – once the rib cage is out, the downward angle can be increased.One cause of calf death and damage to the dam is hip lock. If this happens, rotating the calf may create a new angle for the hips to pass through the cow’s pelvis. If the calf has trouble breathing, clear the mouth and nose of mucus and stimulate breathing by scratching the inside of the nose with straw, placing a drop of clean cold water in its ear, rubbing each side of chest with straw, swinging the calf by the back legs, or using the calving jack in an upright position or over a gate to allow the calf to clear its lungs.Proper facilities and hygiene are essential for a safe and successful calving. Good ropes, a calving jack, gel and clean water are other essentials, and record keeping will aid in calving management.


SHARING OPTIONS