Start by preparing the site and removing all top soil to a minimum depth of 150mm. Further excavate any soft spots down to solid ground.
Remove excavated material from site to a suitable area. Excavate deep enough at channels to allow for extra concrete depth under the channels. The overall site must be graded to suitable falls towards a collection point. A fall of 1 in 60 is required for base, apron and channels.
Place a layer of graded hardcore over the site and extend in each direction at least 300mm beyond the proposed edges of the slab.

Silage apron with appropiate channels to collect effluent.
Compact the hardcore with a vibrating roller to a finished depth of at least 150mm. Take special care to compact the edges of the slab and under proposed channels.
Hardcore placed in excavated soft areas or on made-up ground should be compacted in 150mm layers using a vibrating roller. Failure to compact the hardcore material adequately will lead to subsidence and cracking of the concrete.
Certified
Where hardcore fill material is purchased for use under concrete, check that it is certified to EN 13242:2013 and meets the requirements of Annex E of S.R. 21: 2015 in order to comply with S128.
Bind the compacted hardcore with sand or other fine binding material and run the vibrating roller over it one last time to bed it in. Lay a sheet of 1,000-gauge polythene on the finished foundation. Seal the overlaps with adhesive tape.
For grant aid, concrete must be purchased from an approved concrete manufacturer; it cannot be mixed on site.

Silage slab detailing expansion joints.
For walled silos, silage aprons, silo channels and purpose-built silage effluent tanks, concrete must be purchased on the basis of a characteristic 28-day cube crushing strength of 45N/mm2 (strength class C35/45). Minimum cement content must be 360kg/m3. The maximum water to cement ratio will be 0.5. The specified slump class needs to be S2 or S3. Maximum aggregate size must be 20mm.
Order the concrete either by requesting S.100 Mix A or by requesting 45N concrete with 360kg cement minimum, 0.50 water cement ratio maximum, and slump class S2 or S3, certified to IS EN 206, for use to Specification S.100.
A numbered certificate, signed and stamped, is required for all concrete delivered to site. This certificate, called the concrete manufacturers’ specification certificate, is produced in triplicate.
The top certificate, printed on light blue paper, must be retained by the applicant and given to and retained by the local AES office of the Department of Agriculture for inspection upon completion of the works
Place and compact the concrete to a finished depth of 125mm. The concrete must be thickened to 150mm under the base of the channels. The slab should be compacted using a vibrating screed and poker vibrator.

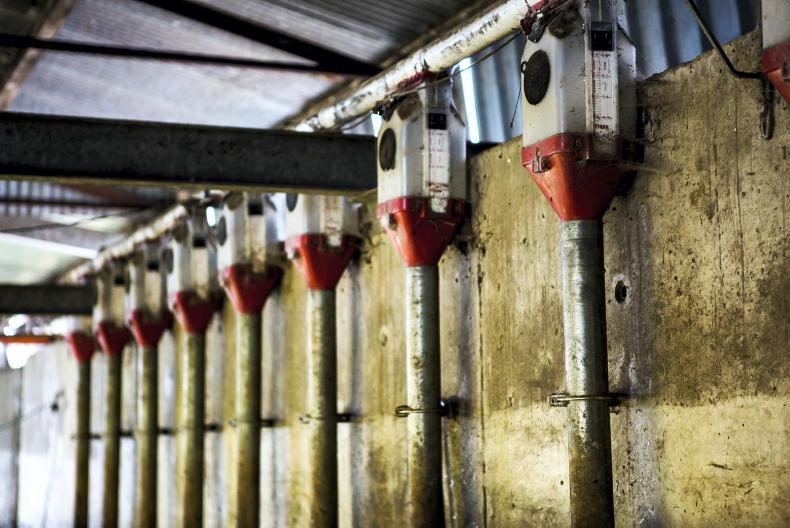
Effluent channels piped to a collection point for transferring to a storage tank.
Avoid hairline cracks (plastic shrinkage cracks) which occur due to rapid evaporation of water from the fresh concrete near the surface of the slab. These cracks will appear within one hour of placing the concrete in warm and windy weather. They tend to form diagonally and parallel to each other on the slab.
They can be avoided by spraying water from a power hose up in the air and letting it fall as a light mist on the surface of the fresh concrete. This counteracts evaporation from the surface. Prevention is better than cure for hairline cracks because they are very difficult to seal and, in most cases, the crack extends fully down to the hardcore.
Concrete must be at least 28 days old before being subjected to full load or to silage or silage effluent.
Curing freshly laid concrete is recognised as one of the most important factors affecting concrete durability. Yet it is one of the most-neglected areas of workmanship and is frequently omitted or carried out in an indifferent fashion on site. All concrete must be cured by keeping it thoroughly moist for at least seven days. The curing process retains water in the newly placed concrete. This water is necessary for complete setting and hardening of the concrete.
Curing should begin as soon as possible after placing the concrete. Slabs may be cured either by spraying on a proprietary curing compound or by covering with a new sheet of polythene, kept securely in place. Covering with polythene is probably the most practical method of curing concrete slabs. When frost is a danger, straw should be laid over the polythene.
Joints
Heat is produced when concrete is mixed due to the chemical reaction between water and cement. As the concrete hardens, it cools and starts to contract or shrink. Joints must be formed to control the degree of contraction and confine it to the joints. These are contraction joints, although most people incorrectly refer to them as expansion joints. Concrete does expand when heated by the sun, but expansion joints are only necessary in long stretches of concrete roads (more than 70m) and long yards.
Contraction joints are really controlled cracks. If no contraction joints are cut or formed, a crack or cracks will form in time, usually within the first year after construction. Cracks follow a zigzag pattern, making it very difficult to seal, whereas a joint which is formed or cut in a straight line is relatively easy to seal. They are different to the plastic shrinkage cracks mentioned above.
If the silage base is laid in alternate 4.5m or 6m bays, transverse joints should be cut with a disc cutter at intervals of 6m and 4.5m respectively across the bay (ie, perpendicular to the length) within 24 hours of pouring the concrete. The joint must be 30mm deep by 12mm wide. Shallow tracks are useless.
A natural contraction joint occurs when two bays are cast alongside each other. This joint can have a recess 25mm x 12mm preformed in the shuttering or be left alone until curing is complete to be cut out and sealed at this stage.
If the silage base is poured in one complete slab, the joints should be cut out within 24 hours to form 4.5m x 6m sections. All joints will have to be cut 30mm deep x 12mm wide in this case.
Sealing joints
The last job to be done is to seal the prepared joints with suitable sealant. Assemble all the necessary equipment and products. Wash or brush out all the joints thoroughly to remove all dust and other debris.
If the joints are wet, allow them to dry. Use a primer suitable for the sealant (usually supplied). Use it as directed to prime the sides of the joint and along the edges of the joint on the surface of the slab. Avoid getting primer on the base of the joint if possible. Do not omit the primer – the primer sticks to the sides of the joint and the sealant sticks to the primer.
Two broad types of sealant are commonly used, either hot-poured (for example hot-poured rubberised bitumen) or gun-applied (for example polyurethane, bitumen-based, etc). Hot-poured rubberised bitumen is only suitable for horizontal joints. Do not use non-flexible blown bitumen for sealing joints in silage slabs, because it has no flexibility and, with any small movement in the joint, it will shear and leak.
Gun-applied polyurethane or bitumen-based sealants can be used for wall joints and floor joints.
Channels
The need for effective drainage of silage effluent from pits cannot be overstated. A perimeter channel is an essential part of any silage base. The most important feature of any channel is that it has a vertical edge to intercept the effluent and a gradient and open space to carry it away.
Silage effluent should enter the channels under the cover of the silage polythene and the edge of the ensiled grass should not extend on to or over any channel.
A selection of some of the channel types outlined in the Department specifications S128 and S120 (walled silos) are shown in Figures 1, 2 and 3.
The open space is maintained by placing a suitable plastic drainage pipe in the channel or a cover over the channel, as shown in Figure 3.

Figure 1 Standard side edge or back edge channel for a silage base. Side and back channels must be set 400mm in from the edge of the concrete base, to allow for sealing of silage clamp with gravel bags or other suitable material.

Figure 2 Cross channel/alternative front channel.

Figure 3 Preferred front channel.
The effluent should be conveyed from the channels to the effluent tank in properly sealed uPVC sewer pipes.
Figure 4 shows how a drainage pipe elbow can be used to drain effluent from the channels and how it can be used to divert clean water when the pit is empty.

Figure 4 Channel drainage and clean water surface diversion system.
The beauty of this system is that any liquid flowing towards the clean water drainage system is flowing over the surface, making it easy to see.
In walled pits, as well as providing front and rear channels, it is necessary to use either drainage pipes at the walls or in channels parallel to the walls to allow effluent to drain away quickly and relieve effluent pressure on the floor and walls. If no drainage is used, there is a chance that the silage will split and shift under the pressure of trapped effluent.
Drainage pipes can either be placed at the butt of the wall or in channels in the floor parallel to the wall. There are pros and cons to both systems. The pipe at the base of the wall has to be replaced, usually every year. It can cause effluent damage at the base of the wall, but provides good drainage. The pipe in the channel will not be damaged by machinery crossing over it, but it is not as good for drainage.
These side channels are not mandatory for grant aid, but if provided must be 1.2m from the wall. The recommendation is to install them, as it allows a choice of using either drainage system or none at all if grass had been wilted. Polythene lining the wall and extended out under the pipe in the channel will protect the concrete and provide a better seal at the top of the wall.
It is vital that the ensiled grass is kept back behind the front channel when the pit is being finished off. The silage cover should extend out over the channel to let rainwater away.
In two-walled pits, the front and rear channels must extend fully from one wall to the other with no gaps for effluent to escape. If two pits are placed side by side, both the pits and the aprons of each should be drained separately to the storage tank.
Silage Aprons
A silage apron must be constructed at the front of a silage base or a walled silo as a condition of grant aid. The silage apron must extend across the full width of the silo. It will normally extend forward 8m from the front of the silo and may be up to 10m, but must not be less than 6m. The apron must be constructed to the same standard and at the same time as the silo base. Silage aprons must have channels at the front edge and the sides and ideally across the back. For more on aprons, see S128 and 120.
Start by preparing the site and removing all top soil to a minimum depth of 150mm. Further excavate any soft spots down to solid ground.
Remove excavated material from site to a suitable area. Excavate deep enough at channels to allow for extra concrete depth under the channels. The overall site must be graded to suitable falls towards a collection point. A fall of 1 in 60 is required for base, apron and channels.
Place a layer of graded hardcore over the site and extend in each direction at least 300mm beyond the proposed edges of the slab.
Silage apron with appropiate channels to collect effluent.
Compact the hardcore with a vibrating roller to a finished depth of at least 150mm. Take special care to compact the edges of the slab and under proposed channels.
Hardcore placed in excavated soft areas or on made-up ground should be compacted in 150mm layers using a vibrating roller. Failure to compact the hardcore material adequately will lead to subsidence and cracking of the concrete.
Certified
Where hardcore fill material is purchased for use under concrete, check that it is certified to EN 13242:2013 and meets the requirements of Annex E of S.R. 21: 2015 in order to comply with S128.
Bind the compacted hardcore with sand or other fine binding material and run the vibrating roller over it one last time to bed it in. Lay a sheet of 1,000-gauge polythene on the finished foundation. Seal the overlaps with adhesive tape.
For grant aid, concrete must be purchased from an approved concrete manufacturer; it cannot be mixed on site.
Silage slab detailing expansion joints.
For walled silos, silage aprons, silo channels and purpose-built silage effluent tanks, concrete must be purchased on the basis of a characteristic 28-day cube crushing strength of 45N/mm2 (strength class C35/45). Minimum cement content must be 360kg/m3. The maximum water to cement ratio will be 0.5. The specified slump class needs to be S2 or S3. Maximum aggregate size must be 20mm.
Order the concrete either by requesting S.100 Mix A or by requesting 45N concrete with 360kg cement minimum, 0.50 water cement ratio maximum, and slump class S2 or S3, certified to IS EN 206, for use to Specification S.100.
A numbered certificate, signed and stamped, is required for all concrete delivered to site. This certificate, called the concrete manufacturers’ specification certificate, is produced in triplicate.
The top certificate, printed on light blue paper, must be retained by the applicant and given to and retained by the local AES office of the Department of Agriculture for inspection upon completion of the works
Place and compact the concrete to a finished depth of 125mm. The concrete must be thickened to 150mm under the base of the channels. The slab should be compacted using a vibrating screed and poker vibrator.
Effluent channels piped to a collection point for transferring to a storage tank.
Avoid hairline cracks (plastic shrinkage cracks) which occur due to rapid evaporation of water from the fresh concrete near the surface of the slab. These cracks will appear within one hour of placing the concrete in warm and windy weather. They tend to form diagonally and parallel to each other on the slab.
They can be avoided by spraying water from a power hose up in the air and letting it fall as a light mist on the surface of the fresh concrete. This counteracts evaporation from the surface. Prevention is better than cure for hairline cracks because they are very difficult to seal and, in most cases, the crack extends fully down to the hardcore.
Concrete must be at least 28 days old before being subjected to full load or to silage or silage effluent.
Curing freshly laid concrete is recognised as one of the most important factors affecting concrete durability. Yet it is one of the most-neglected areas of workmanship and is frequently omitted or carried out in an indifferent fashion on site. All concrete must be cured by keeping it thoroughly moist for at least seven days. The curing process retains water in the newly placed concrete. This water is necessary for complete setting and hardening of the concrete.
Curing should begin as soon as possible after placing the concrete. Slabs may be cured either by spraying on a proprietary curing compound or by covering with a new sheet of polythene, kept securely in place. Covering with polythene is probably the most practical method of curing concrete slabs. When frost is a danger, straw should be laid over the polythene.
Joints
Heat is produced when concrete is mixed due to the chemical reaction between water and cement. As the concrete hardens, it cools and starts to contract or shrink. Joints must be formed to control the degree of contraction and confine it to the joints. These are contraction joints, although most people incorrectly refer to them as expansion joints. Concrete does expand when heated by the sun, but expansion joints are only necessary in long stretches of concrete roads (more than 70m) and long yards.
Contraction joints are really controlled cracks. If no contraction joints are cut or formed, a crack or cracks will form in time, usually within the first year after construction. Cracks follow a zigzag pattern, making it very difficult to seal, whereas a joint which is formed or cut in a straight line is relatively easy to seal. They are different to the plastic shrinkage cracks mentioned above.
If the silage base is laid in alternate 4.5m or 6m bays, transverse joints should be cut with a disc cutter at intervals of 6m and 4.5m respectively across the bay (ie, perpendicular to the length) within 24 hours of pouring the concrete. The joint must be 30mm deep by 12mm wide. Shallow tracks are useless.
A natural contraction joint occurs when two bays are cast alongside each other. This joint can have a recess 25mm x 12mm preformed in the shuttering or be left alone until curing is complete to be cut out and sealed at this stage.
If the silage base is poured in one complete slab, the joints should be cut out within 24 hours to form 4.5m x 6m sections. All joints will have to be cut 30mm deep x 12mm wide in this case.
Sealing joints
The last job to be done is to seal the prepared joints with suitable sealant. Assemble all the necessary equipment and products. Wash or brush out all the joints thoroughly to remove all dust and other debris.
If the joints are wet, allow them to dry. Use a primer suitable for the sealant (usually supplied). Use it as directed to prime the sides of the joint and along the edges of the joint on the surface of the slab. Avoid getting primer on the base of the joint if possible. Do not omit the primer – the primer sticks to the sides of the joint and the sealant sticks to the primer.
Two broad types of sealant are commonly used, either hot-poured (for example hot-poured rubberised bitumen) or gun-applied (for example polyurethane, bitumen-based, etc). Hot-poured rubberised bitumen is only suitable for horizontal joints. Do not use non-flexible blown bitumen for sealing joints in silage slabs, because it has no flexibility and, with any small movement in the joint, it will shear and leak.
Gun-applied polyurethane or bitumen-based sealants can be used for wall joints and floor joints.
Channels
The need for effective drainage of silage effluent from pits cannot be overstated. A perimeter channel is an essential part of any silage base. The most important feature of any channel is that it has a vertical edge to intercept the effluent and a gradient and open space to carry it away.
Silage effluent should enter the channels under the cover of the silage polythene and the edge of the ensiled grass should not extend on to or over any channel.
A selection of some of the channel types outlined in the Department specifications S128 and S120 (walled silos) are shown in Figures 1, 2 and 3.
The open space is maintained by placing a suitable plastic drainage pipe in the channel or a cover over the channel, as shown in Figure 3.
Figure 1 Standard side edge or back edge channel for a silage base. Side and back channels must be set 400mm in from the edge of the concrete base, to allow for sealing of silage clamp with gravel bags or other suitable material.
Figure 2 Cross channel/alternative front channel.
Figure 3 Preferred front channel.
The effluent should be conveyed from the channels to the effluent tank in properly sealed uPVC sewer pipes.
Figure 4 shows how a drainage pipe elbow can be used to drain effluent from the channels and how it can be used to divert clean water when the pit is empty.
Figure 4 Channel drainage and clean water surface diversion system.
The beauty of this system is that any liquid flowing towards the clean water drainage system is flowing over the surface, making it easy to see.
In walled pits, as well as providing front and rear channels, it is necessary to use either drainage pipes at the walls or in channels parallel to the walls to allow effluent to drain away quickly and relieve effluent pressure on the floor and walls. If no drainage is used, there is a chance that the silage will split and shift under the pressure of trapped effluent.
Drainage pipes can either be placed at the butt of the wall or in channels in the floor parallel to the wall. There are pros and cons to both systems. The pipe at the base of the wall has to be replaced, usually every year. It can cause effluent damage at the base of the wall, but provides good drainage. The pipe in the channel will not be damaged by machinery crossing over it, but it is not as good for drainage.
These side channels are not mandatory for grant aid, but if provided must be 1.2m from the wall. The recommendation is to install them, as it allows a choice of using either drainage system or none at all if grass had been wilted. Polythene lining the wall and extended out under the pipe in the channel will protect the concrete and provide a better seal at the top of the wall.
It is vital that the ensiled grass is kept back behind the front channel when the pit is being finished off. The silage cover should extend out over the channel to let rainwater away.
In two-walled pits, the front and rear channels must extend fully from one wall to the other with no gaps for effluent to escape. If two pits are placed side by side, both the pits and the aprons of each should be drained separately to the storage tank.
Silage Aprons
A silage apron must be constructed at the front of a silage base or a walled silo as a condition of grant aid. The silage apron must extend across the full width of the silo. It will normally extend forward 8m from the front of the silo and may be up to 10m, but must not be less than 6m. The apron must be constructed to the same standard and at the same time as the silo base. Silage aprons must have channels at the front edge and the sides and ideally across the back. For more on aprons, see S128 and 120.


SHARING OPTIONS