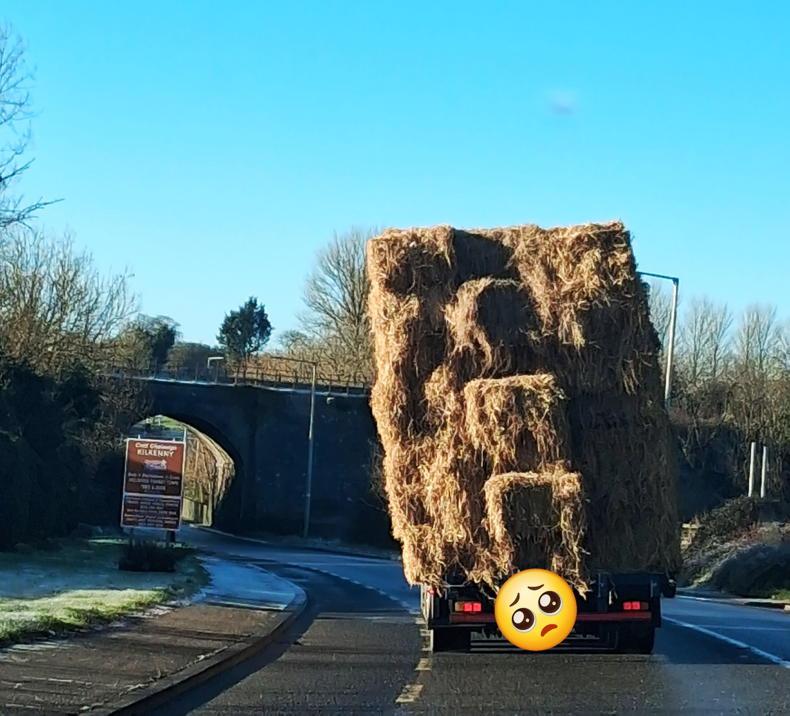
Poor weather in May has put extra pressure on farmers and contractors to get silage made. As we progress through June, that weather has remained a little unsettled, which only adds to the already high stress levels and silage workload.
Silage harvesting late into the night or even through the night is not uncommon.
While working extraordinary hours and in less than ideal conditions, it can be tough to keep machinery and equipment safe and road-legal.
Maintaining trailer lights properly and in working order is often one of the biggest challenges. Tractors are slow moving in comparison with other road traffic, which makes it so much more important that they work correctly.
Correctly functioning lights help minimise the risks to both the tractor driver and other road users.
On very busy roads, the conditions could often be described as “challenging”.
Defective lights are just too dangerous and not acceptable on public roads. Driving with defective lights could get the driver points on a licence and a fine. Not to mention being involved with or causing an accident.
Over the years, LED trailer lights have increased the reliability of trailer lights enormously.
Our wet environment and rough roads are very hard on even the best of bulb-type lights.
LED lamps are sealed, maintenance-free units with multiple light emitting diodes (LED).
Most new trailers and machines are fitted with LED lighting and most older trailers have been converted at this stage.
Inevitably, a trailer light plug may get damaged or pulled off its cable. The lights cable itself gets crushed and damaged against a drawbar, blowing a fuse (or several) in the process.
Replacing a seven-pin plug and finding a blown fuse can be a time-consuming job, right when you don’t need it.
A huge amount of trailers use a truck-style susi light cable between the tractor and trailer.
Keeping a spare susi solves damaged cable or plug problems very quickly. A set of magnetic lights is the ultimate fail-safe.
Lights first aid kit
A small first aid trailer lights kit is relatively inexpensive to put together.
All would fit in a nice plastic toolbox to keep it dry and safe. Storing it among the harvesting fleet on a tractor, harvester or service vehicle makes it easily and quickly accessible if and when it is needed.
Inevitably, there is always someone in a silage crew that is handy and more than capable of replacing a seven-pin trailer lights plug or tracking down a blown fuse.
Below is a guide to what could be in the kit and how to use it.
The tools required include a
spare susi cable, seven-pin trailer plug
screwdriver(s), snips, wire strippers
circuit tester, insulating tape and cable ties.

A set of magnetic lights are worth having as an ultimate failsafe.
Fuse guide

The fuse guide on the fuse box lid indicates what each fuse does.
A fuse guide on the tractor’s fuse box indicates what each fuse does. Sometimes this may not be that clear or can be very hard to follow. This is especially so while under pressure in the middle of the night.
Test light

A simple test light is a cheap and handy tool for fault finding.
A simple test light like this is available from many different suppliers from under €10.
With the tractor ignition on and providing the fuses have a probe point (most do), you can check each fuse without having to remove it.
Clamp the crocodile clip to a good earth point and with the pointed end check that the test lamp lights on each side of the fuse.
Be careful not to touch the brass body of the tester off any metal/earthling points while probing a fuse. This could cause a short and blow the fuse you’re testing or a main fuse.
Cut plug off

Often it is quicker to cut off the old seven-pin plug and fit a new one.
You can spend a lot of time chasing electrical ghosts trying to sort out trailer lights problems. I don’t, I just snip it off. A new 7-pin plug generally costs under €5, plastic or aluminium and provides a sound foundation to sort lighting problems. Often the plug is the root of the problem because it has been damaged or is corroded internally, particularly if it is attached to something parked outside and exposed to the elements.
Stripping cable

A wire stripping tool will leave the process of removing wire insulation much easier.
Stripping the cable of its outside insulation and each of the seven wires is possibly the fiddliest job to get right.
Carefully pare back the external insulation to approximately 50mm (2in) while not cutting into the wiring insulation (or your own hand).
I’ve been using this type of wire stripper pictured for about 30 years and find them very fast and efficient.
The version pictured is also equipped with a stop. Set this to approximately 6.5mm (1/4in). This exposes enough copper wire to twist tightly and fold over itself to provide enough “meat” for the plug screws to make a good connection.
Wiring guide

Seven-pin plug wiring guide.
Most 7-pin plug (and socket) packaging comes with a wiring guide indicating what colour wires goes where. Each pin in a plug or socket is numbered from 1 to 7 and would usually have the designated wiring code beside the pin number. For example Pin – 1 L accommodates the yellow wire and is the power for the left-hand indicator (L). Pin-4 R and green wire is the right-hand indicator.
Plug wiring

Twist the exposed wires and match them to the correct terminals.
Some years ago I wondered just how many combinations there were for seven wires in a seven pin plug.
When I worked it out, I couldn’t believe the final answer. There are actually 5,040 possible wiring combinations!
So two pieces of advice – always use the wiring guide and always start with the earth wire.
There is only one earth wire, it is white and is wired to pin-3 with a designation 31 after the three (31 is the standard wiring code designation for earth).
Check

Once wired, ensure each terminal is tight to avoid any loose connections.
With the plug wired, double-check that all wires are in their correct locations.
It is very easy to get wrong, particularly if the job is being done in poor light and under tiredness.
Also check each screw is tight. A standard phase tester I find is just the right size for the screws in most seven-pin plugs.
Some do use small Phillips screws, so it is worth have both types of screwdriver in the kit.
Poor weather in May has put extra pressure on farmers and contractors to get silage made. As we progress through June, that weather has remained a little unsettled, which only adds to the already high stress levels and silage workload.
Silage harvesting late into the night or even through the night is not uncommon.
While working extraordinary hours and in less than ideal conditions, it can be tough to keep machinery and equipment safe and road-legal.
Maintaining trailer lights properly and in working order is often one of the biggest challenges. Tractors are slow moving in comparison with other road traffic, which makes it so much more important that they work correctly.
Correctly functioning lights help minimise the risks to both the tractor driver and other road users.
On very busy roads, the conditions could often be described as “challenging”.
Defective lights are just too dangerous and not acceptable on public roads. Driving with defective lights could get the driver points on a licence and a fine. Not to mention being involved with or causing an accident.
Over the years, LED trailer lights have increased the reliability of trailer lights enormously.
Our wet environment and rough roads are very hard on even the best of bulb-type lights.
LED lamps are sealed, maintenance-free units with multiple light emitting diodes (LED).
Most new trailers and machines are fitted with LED lighting and most older trailers have been converted at this stage.
Inevitably, a trailer light plug may get damaged or pulled off its cable. The lights cable itself gets crushed and damaged against a drawbar, blowing a fuse (or several) in the process.
Replacing a seven-pin plug and finding a blown fuse can be a time-consuming job, right when you don’t need it.
A huge amount of trailers use a truck-style susi light cable between the tractor and trailer.
Keeping a spare susi solves damaged cable or plug problems very quickly. A set of magnetic lights is the ultimate fail-safe.
Lights first aid kit
A small first aid trailer lights kit is relatively inexpensive to put together.
All would fit in a nice plastic toolbox to keep it dry and safe. Storing it among the harvesting fleet on a tractor, harvester or service vehicle makes it easily and quickly accessible if and when it is needed.
Inevitably, there is always someone in a silage crew that is handy and more than capable of replacing a seven-pin trailer lights plug or tracking down a blown fuse.
Below is a guide to what could be in the kit and how to use it.
The tools required include a
spare susi cable, seven-pin trailer plug
screwdriver(s), snips, wire strippers
circuit tester, insulating tape and cable ties.
A set of magnetic lights are worth having as an ultimate failsafe.
Fuse guide
The fuse guide on the fuse box lid indicates what each fuse does.
A fuse guide on the tractor’s fuse box indicates what each fuse does. Sometimes this may not be that clear or can be very hard to follow. This is especially so while under pressure in the middle of the night.
Test light
A simple test light is a cheap and handy tool for fault finding.
A simple test light like this is available from many different suppliers from under €10.
With the tractor ignition on and providing the fuses have a probe point (most do), you can check each fuse without having to remove it.
Clamp the crocodile clip to a good earth point and with the pointed end check that the test lamp lights on each side of the fuse.
Be careful not to touch the brass body of the tester off any metal/earthling points while probing a fuse. This could cause a short and blow the fuse you’re testing or a main fuse.
Cut plug off
Often it is quicker to cut off the old seven-pin plug and fit a new one.
You can spend a lot of time chasing electrical ghosts trying to sort out trailer lights problems. I don’t, I just snip it off. A new 7-pin plug generally costs under €5, plastic or aluminium and provides a sound foundation to sort lighting problems. Often the plug is the root of the problem because it has been damaged or is corroded internally, particularly if it is attached to something parked outside and exposed to the elements.
Stripping cable
A wire stripping tool will leave the process of removing wire insulation much easier.
Stripping the cable of its outside insulation and each of the seven wires is possibly the fiddliest job to get right.
Carefully pare back the external insulation to approximately 50mm (2in) while not cutting into the wiring insulation (or your own hand).
I’ve been using this type of wire stripper pictured for about 30 years and find them very fast and efficient.
The version pictured is also equipped with a stop. Set this to approximately 6.5mm (1/4in). This exposes enough copper wire to twist tightly and fold over itself to provide enough “meat” for the plug screws to make a good connection.
Wiring guide
Seven-pin plug wiring guide.
Most 7-pin plug (and socket) packaging comes with a wiring guide indicating what colour wires goes where. Each pin in a plug or socket is numbered from 1 to 7 and would usually have the designated wiring code beside the pin number. For example Pin – 1 L accommodates the yellow wire and is the power for the left-hand indicator (L). Pin-4 R and green wire is the right-hand indicator.
Plug wiring
Twist the exposed wires and match them to the correct terminals.
Some years ago I wondered just how many combinations there were for seven wires in a seven pin plug.
When I worked it out, I couldn’t believe the final answer. There are actually 5,040 possible wiring combinations!
So two pieces of advice – always use the wiring guide and always start with the earth wire.
There is only one earth wire, it is white and is wired to pin-3 with a designation 31 after the three (31 is the standard wiring code designation for earth).
Check
Once wired, ensure each terminal is tight to avoid any loose connections.
With the plug wired, double-check that all wires are in their correct locations.
It is very easy to get wrong, particularly if the job is being done in poor light and under tiredness.
Also check each screw is tight. A standard phase tester I find is just the right size for the screws in most seven-pin plugs.
Some do use small Phillips screws, so it is worth have both types of screwdriver in the kit.


SHARING OPTIONS