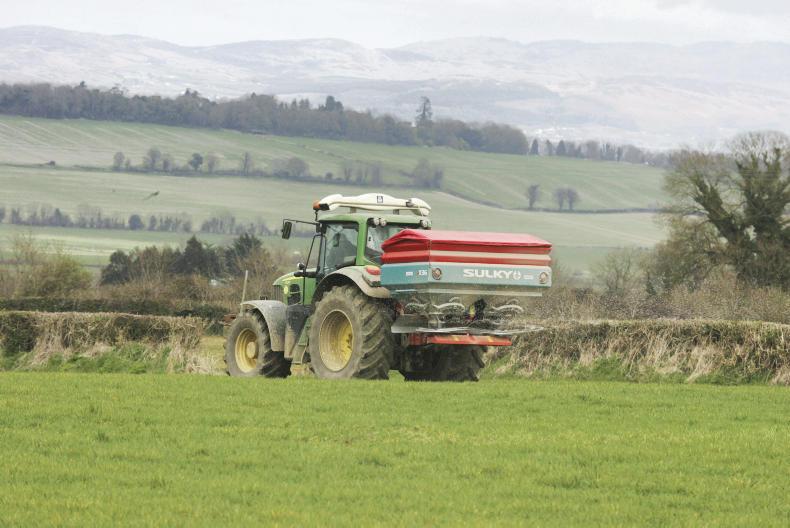
With fertiliser starting to move, now is the time to make sure that your fertiliser spreader is set up and ready for the season. Fertiliser is an expensive commodity and can be up to 30% of the total production cost of a cereal or silage crop, so getting it right is very important.
The spreader is expected to put fertiliser precisely where it needs to be but it will only do this if it is set up and working correctly.
Inspect the machine
The first step is to ensure that the spreader is mechanically sound. Look for any signs of wear or fatigue, such as cracks in the frame, bent or damaged components or linkages. Worn linkages on the regulator mechanism will alter the output of the spreader, and may cause uneven application on one side.
Check that all the spreader parts, which should move, are moving freely. Lubricate the machine following the instructions in the operator’s manual.
Inspect the spreader vanes as they are critical to getting an even spread pattern. Look for signs of wear such as ripples or, if excessively worn, there could be holes in the vane. Any wear here will affect the way the fertiliser is thrown from the machine.
Shake the discs to ensure there is no bearing wobble – if found, tighten or replace the bearings or shafts.
Check to ensure that the agitator in the bottom of the hopper is functioning and not damaged. It is vital to ensure an even flow of fertiliser out to the disc. Operate the headland control unit, make sure that it is engaging and disengaging fully and that is not bent or damaged.
Fitting the spreader
Before fitting the spreader, ensure that the tractors lower link arms are set level, and that the tyre pressures are equal. Once mounted on the tractor, lift the machine to the correct working height; this will be given in the instruction manual.
Once set at the working height check that the machine is level, when viewed from the rear. In most cases, it should be level when viewed from the side.
If unsure of the height setting, then 75cm to 85cm measured from the top of the crop to the disc or spout is a good guide of height. Ensure that the tractor will be able for the weight of the filled spreader; front weights may be required.
Critical to getting accurate results is the tractor’s forward speed and the PTO speed. Forward speed can only be altered by changing gears as the PTO speed needs to be maintained at 540rpm. This is to ensure that the discs speed is maintained on the spreader.
Fertiliser types
Remember that all fertilisers are not the same. The physical characteristics of the fertiliser such as density, size and shape of the granules, as well as the strength of the granule, will alter how the product will be thrown from the machine.
Urea is lighter than other fertilisers.
The physical characteristics of the fertiliser such as density, size and shape of the granules, as well as the strength of the granule, will alter how the product will be thrown from the machine.
This makes it more difficult to spread, and it usually will not spread as wide as denser material. Ensure that you use the correct setting for the fertiliser type.
Setting the machine
There are two main areas that require adjustment on the spreader. The first is the flow rate of fertiliser from the machine, or the regulator. The second relates to disc and vane settings.
The flow rate is adjusted by moving the regulator.
This is vital to get the correct application rate (kg/ha). Each fertiliser type will flow differently so the same regulator setting for one fertiliser will not ensure the same application rate for a different fertiliser. Even the same fertiliser may flow differently if it has been in storage for a prolonged period or has become slightly damp.
Setting the regulator only ensures that the correct amount is coming out of the machine. Further adjustments are needed to ensure the fertiliser is being spread evenly. These adjustments will vary for each machine, so it is vital to refer to the calibration’s settings for your machine.
Adjustments include setting the angle or length of the vanes, changing the fertiliser drop point on to the disc, changing the disc to a larger or smaller diameter disc, or possibly adjusting the top-link length to change the angle of the spreader. These settings will vary not only for different working widths and speeds but also for each fertiliser type. A settings book is always provided with the spreader, although they tend to be difficult to use.
Phone apps
Most manufacturers have produced a phone app for their machine.
This has made the task of getting the correct settings for each fertiliser much more user friendly. The app will allow the operator to input the following:
Model of spreader and disc.Fertiliser type.Application rate. Bout width. Forward speed. It will then produce a list of adjustments that need to be made to the spreader including regulator setting, vane setting, drop point, height, etc.
Fertiliser test kits are available which assess the size, density and strength of granules. Many of the manufacturer provide these with the machine and they will allow the use of these results in their apps to provide more accurate settings for the fertiliser being used.
Calibration
It is still important to carry out a calibration of the spreader to check the correct output is being achieved. The settings given by the manual or phone app are based on a sample of fertiliser which has been tested by the spreader manufacture in their test hall.
However, fertiliser will vary over time and calibrating the flow rate is the only way to make sure that the output setting is fully correct.
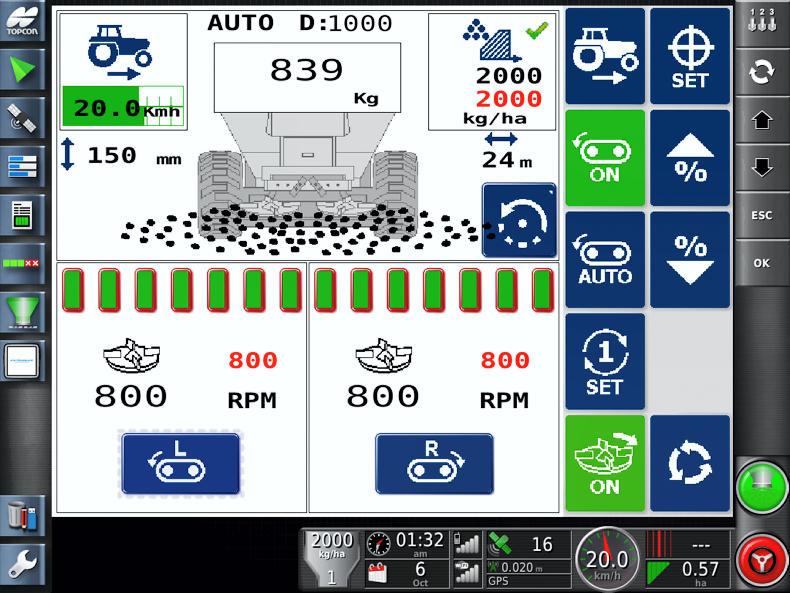
Higher-end spreaders have taken a lot of the work out of setting the machine from the operator. These machines will calibrate the application rate several times a minute.
On most twin-disc spreaders, calibration is done by removing one or more discs then running the machine for one minute and collecting the fertiliser in a bucket.
It is important that the PTO is running during this exercise as the agitator at the bottom of the hopper needs to be moving to ensure an even and steady flow of fertiliser.
The weight of fertiliser in the bucket should be equal to the desired flow rate. This will be given in the app or can be calculated as shown below.
In order to work out the flow rate, we need to know the following information:
Forward speed (km/hr).Bout width (m).Application rate (kg/ha).To calculate the flow rate, the formula below can be used, (or the QR link above is to an online calculator)
Flow rate (kg/min) = forward speed (km/hr) x bout width (m) x application rate (kg/ha) divided by 600.Tray test
In order to check the spread pattern of the fertiliser across the bout width, a tray test should be carried out on the machine.
This should be done for each fertiliser type and at least once a season.
It involves laying out trays evenly across the working width and then making a pass spreading fertiliser over the trays.
The material in each tray is poured into small cylinders so that the balance of spread can be assessed. It is important that the trays are level and that there is no wind which will affect the results.
Field procedure
Once all of the settings have been made, it is up to the operator to make sure they drive accurately in the field. This means ensuring the PTO and forward speed is correct and that the correct bout width is being maintained.
When using a wagtail (Vicon-type) spreader, where the working width is 10m to 12m, it is reasonably easy to maintain an accurate bout width by eye.

When using a wagtail (Vicon-type) spreader, where the working width is 10m to 12m, it is reasonably easy to maintain an accurate bout width by eye.
This is not possible with wider working widths or in a cut swath.
It is therefore necessary to mark out the bouts with some form of markings at the ditch or more desirable would be to use a GPS guidance system.
The price of simple GPS guidance has come down in recent years.
Headland management
Most spreaders will have some a headland management system. These are important to ensure that the environment is protected. They will also ensure accurate application up to the hedge. Each manufacturer has achieved headland control in different ways. Some may require adjustments to the vanes on one side of the machine, others involve changing the direction of the discs.
Care needs to be taken when fitting the machine to the tractor and when filling the spreader. The tractor should be parked on level ground – ensure that the handbrake is working. If using a second tractor to load big bags, ensure that any crush points are avoided. This is key when opening the bag. The use of a knife on a long bar will allow the operator to reach in to cut the bag without getting themselves into a dangerous position. Take care in the field, especially if it is hilly or rough ground. Choose a speed which is suitable for the conditions and make adjustments to the spreader to suit.
With fertiliser starting to move, now is the time to make sure that your fertiliser spreader is set up and ready for the season. Fertiliser is an expensive commodity and can be up to 30% of the total production cost of a cereal or silage crop, so getting it right is very important.
The spreader is expected to put fertiliser precisely where it needs to be but it will only do this if it is set up and working correctly.
Inspect the machine
The first step is to ensure that the spreader is mechanically sound. Look for any signs of wear or fatigue, such as cracks in the frame, bent or damaged components or linkages. Worn linkages on the regulator mechanism will alter the output of the spreader, and may cause uneven application on one side.
Check that all the spreader parts, which should move, are moving freely. Lubricate the machine following the instructions in the operator’s manual.
Inspect the spreader vanes as they are critical to getting an even spread pattern. Look for signs of wear such as ripples or, if excessively worn, there could be holes in the vane. Any wear here will affect the way the fertiliser is thrown from the machine.
Shake the discs to ensure there is no bearing wobble – if found, tighten or replace the bearings or shafts.
Check to ensure that the agitator in the bottom of the hopper is functioning and not damaged. It is vital to ensure an even flow of fertiliser out to the disc. Operate the headland control unit, make sure that it is engaging and disengaging fully and that is not bent or damaged.
Fitting the spreader
Before fitting the spreader, ensure that the tractors lower link arms are set level, and that the tyre pressures are equal. Once mounted on the tractor, lift the machine to the correct working height; this will be given in the instruction manual.
Once set at the working height check that the machine is level, when viewed from the rear. In most cases, it should be level when viewed from the side.
If unsure of the height setting, then 75cm to 85cm measured from the top of the crop to the disc or spout is a good guide of height. Ensure that the tractor will be able for the weight of the filled spreader; front weights may be required.
Critical to getting accurate results is the tractor’s forward speed and the PTO speed. Forward speed can only be altered by changing gears as the PTO speed needs to be maintained at 540rpm. This is to ensure that the discs speed is maintained on the spreader.
Fertiliser types
Remember that all fertilisers are not the same. The physical characteristics of the fertiliser such as density, size and shape of the granules, as well as the strength of the granule, will alter how the product will be thrown from the machine.
Urea is lighter than other fertilisers.
The physical characteristics of the fertiliser such as density, size and shape of the granules, as well as the strength of the granule, will alter how the product will be thrown from the machine.
This makes it more difficult to spread, and it usually will not spread as wide as denser material. Ensure that you use the correct setting for the fertiliser type.
Setting the machine
There are two main areas that require adjustment on the spreader. The first is the flow rate of fertiliser from the machine, or the regulator. The second relates to disc and vane settings.
The flow rate is adjusted by moving the regulator.
This is vital to get the correct application rate (kg/ha). Each fertiliser type will flow differently so the same regulator setting for one fertiliser will not ensure the same application rate for a different fertiliser. Even the same fertiliser may flow differently if it has been in storage for a prolonged period or has become slightly damp.
Setting the regulator only ensures that the correct amount is coming out of the machine. Further adjustments are needed to ensure the fertiliser is being spread evenly. These adjustments will vary for each machine, so it is vital to refer to the calibration’s settings for your machine.
Adjustments include setting the angle or length of the vanes, changing the fertiliser drop point on to the disc, changing the disc to a larger or smaller diameter disc, or possibly adjusting the top-link length to change the angle of the spreader. These settings will vary not only for different working widths and speeds but also for each fertiliser type. A settings book is always provided with the spreader, although they tend to be difficult to use.
Phone apps
Most manufacturers have produced a phone app for their machine.
This has made the task of getting the correct settings for each fertiliser much more user friendly. The app will allow the operator to input the following:
Model of spreader and disc.Fertiliser type.Application rate. Bout width. Forward speed. It will then produce a list of adjustments that need to be made to the spreader including regulator setting, vane setting, drop point, height, etc.
Fertiliser test kits are available which assess the size, density and strength of granules. Many of the manufacturer provide these with the machine and they will allow the use of these results in their apps to provide more accurate settings for the fertiliser being used.
Calibration
It is still important to carry out a calibration of the spreader to check the correct output is being achieved. The settings given by the manual or phone app are based on a sample of fertiliser which has been tested by the spreader manufacture in their test hall.
However, fertiliser will vary over time and calibrating the flow rate is the only way to make sure that the output setting is fully correct.
Higher-end spreaders have taken a lot of the work out of setting the machine from the operator. These machines will calibrate the application rate several times a minute.
On most twin-disc spreaders, calibration is done by removing one or more discs then running the machine for one minute and collecting the fertiliser in a bucket.
It is important that the PTO is running during this exercise as the agitator at the bottom of the hopper needs to be moving to ensure an even and steady flow of fertiliser.
The weight of fertiliser in the bucket should be equal to the desired flow rate. This will be given in the app or can be calculated as shown below.
In order to work out the flow rate, we need to know the following information:
Forward speed (km/hr).Bout width (m).Application rate (kg/ha).To calculate the flow rate, the formula below can be used, (or the QR link above is to an online calculator)
Flow rate (kg/min) = forward speed (km/hr) x bout width (m) x application rate (kg/ha) divided by 600.Tray test
In order to check the spread pattern of the fertiliser across the bout width, a tray test should be carried out on the machine.
This should be done for each fertiliser type and at least once a season.
It involves laying out trays evenly across the working width and then making a pass spreading fertiliser over the trays.
The material in each tray is poured into small cylinders so that the balance of spread can be assessed. It is important that the trays are level and that there is no wind which will affect the results.
Field procedure
Once all of the settings have been made, it is up to the operator to make sure they drive accurately in the field. This means ensuring the PTO and forward speed is correct and that the correct bout width is being maintained.
When using a wagtail (Vicon-type) spreader, where the working width is 10m to 12m, it is reasonably easy to maintain an accurate bout width by eye.
When using a wagtail (Vicon-type) spreader, where the working width is 10m to 12m, it is reasonably easy to maintain an accurate bout width by eye.
This is not possible with wider working widths or in a cut swath.
It is therefore necessary to mark out the bouts with some form of markings at the ditch or more desirable would be to use a GPS guidance system.
The price of simple GPS guidance has come down in recent years.
Headland management
Most spreaders will have some a headland management system. These are important to ensure that the environment is protected. They will also ensure accurate application up to the hedge. Each manufacturer has achieved headland control in different ways. Some may require adjustments to the vanes on one side of the machine, others involve changing the direction of the discs.
Care needs to be taken when fitting the machine to the tractor and when filling the spreader. The tractor should be parked on level ground – ensure that the handbrake is working. If using a second tractor to load big bags, ensure that any crush points are avoided. This is key when opening the bag. The use of a knife on a long bar will allow the operator to reach in to cut the bag without getting themselves into a dangerous position. Take care in the field, especially if it is hilly or rough ground. Choose a speed which is suitable for the conditions and make adjustments to the spreader to suit. 


SHARING OPTIONS